
Today’s pattern is a bear – no, really!
The bear’s paw pattern is an adorable addition to a rustic quilt. Although it involves a lot of cutting, the technique itself is surprisingly easy. It is based on simple squares and triangles (which will also be based on squares), so, unlike a real bear’s paw, you don’t have to worry about any curves or bumps!
This tutorial will show you how to make a full set of four bear paws, but it will be up to you to decide how to place them on your quilt!
Advertisement
Watch the bear’s paw pattern video tutorial by the Missouri Star Quilt Company:
Materials
2 different color fabrics (one color for the bear paw and one color for the background)
Thread
Pencil
Sewing machine/sewing needle
2 different color fabrics (one color for the bear paw and one color for the background)
Thread
Pencil
Sewing machine/sewing needle
Pro tip: The following written instructions will describe how to make a block using just two different colored fabrics, but if you would like, you could make each bear’s paw a different color, as seen on DelawareQuilts.com.
Written Instructions
1. From your bear’s paw color fabric, cut one four-inch square and two 2 5/8 inch squares for each of the four bear paws.
1. From your bear’s paw color fabric, cut one four-inch square and two 2 5/8 inch squares for each of the four bear paws.
2. From the background color fabric, cut two 2 5/8 inch squares and one 2 ¼ inch square per bear paw.
3. Take all of your 2 5/8 inch squares and pair them up, matching each background color square with a bear paw color square. Then, take one of these pairs and put them face to face. Draw a diagonal line across the back, dividing the square into two triangles.

4. Sew two ¼ inch seams, one on each side of the line you drew, then cut along the line to create two triangles. Open up the triangles, and you have a square with both colors. Press flat. Repeat with your other pairs of squares.

5. Next, take one of your 2 ¼ inch background color squares and two of the bi-colored squares you just created. You will sew them together to make one row, as shown.

6. Put that row aside for the moment, and grab one of your large, 4-inch bear paw color squares, and two more of your bi-colored squares. Sew the bi-colored squares together, and turn them on their side, so that it looks like the bear’s “claws” are pointing to the right. Sew this new rectangle to the right side of the large square.
7. Pick up the first row you created, and put it on the top of the piece you just made. Make sure that the claws on that piece are pointing upwards, then sew it in place.
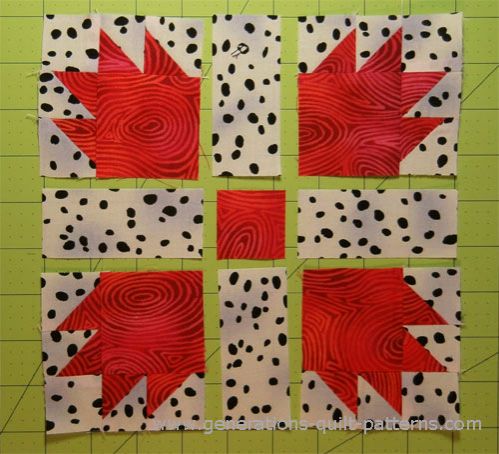
Now, your first bear paw is complete! Repeat this process for the other three bear paws, and then you can put them together in any design you choose. Below is an example from Generations Quilt Patterns to give you some ideas.
That’s all there is to it. When you finish your quilt, be sure to tell everyone that you “bear-ly” worked up a sweat while making it!
Advertisement
