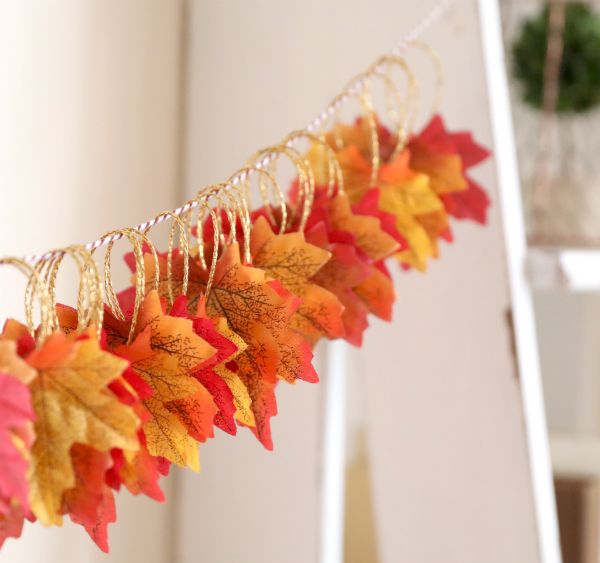
Gather the kids to create this fall craft project. Designate an older child to use the hot-glue gun, and keep little ones engaged with metallic gold twine and safety scissors. Teachers can even personalize leaves with names or photos of kids in the classroom.
The vibrant colors of the maples leaves brighten up any home or classroom. Drape the fall garland across windows or walls, or even hang it across the center of a room. There is nothing difficult about this project. Prepare to have a lot of festive fun while following these instructions.
Advertisement
Materials
- Small glass bowl
- Artificial maple leaves
- Metallic gold twine
- Scissors
- Hot-glue gun
- Glue stick
- Bakers twine
- Tack or adhesive strip
- Small glass bowl
- Artificial maple leaves
- Metallic gold twine
- Scissors
- Hot-glue gun
- Glue stick
- Bakers twine
- Tack or adhesive strip

DIY Everywhere
Instructions
1. Place artificial maple leaves in a small glass bowl.
1. Place artificial maple leaves in a small glass bowl.
2. Unravel a length of gold twine from the roll.
3. Use a scissor to snip approximately 3 inches of twine off the roll.
4. Squeeze a small amount of glue on the bottom of a maple leaf.
5. Secure two ends of the gold twine cut in step 3 to the glue. The leaf should now feature a gold twine loop.
6. Repeat steps 1 through 5 until all the leaves in the bowl feature a loop of twine.
7. Unroll some bakers twine from the roll, then slip the bakers twine through all the loops on the leaves. The leaves should now dangle upside-down.
8. Cut the twine from the roll.
9. Choose a location for the garland. Secure each end of the fall garland to tacks or adhesive strips.
Advertisement
