
This is a project that is every gardener's and landscaper's dream. According to The Garden Glove, this entire project — building your own garden pond — only costs $30. The end result is a sight you must see (Scroll down for final pictures).
While traditional garden ponds require fancy pond liners and more extensive planning, this garden pond DIY keeps things simple and easy.
Advertisement
Here's the supplies required for this project:
— Rubbermaid storage container that keeps water in
— Fountain pump (or a solar-powered pump)
— A couple of concrete pavers (varies based on container size)
— Rocks and stones of varying sizes (based on your design preference)
— Plant tolerant of water (e.g. water grass)
— Fountain pump (or a solar-powered pump)
— A couple of concrete pavers (varies based on container size)
— Rocks and stones of varying sizes (based on your design preference)
— Plant tolerant of water (e.g. water grass)
1. Secure the best location for your garden pond

Shutterstock
Consider a spot that has good sunlight and enough space for your storage container. Garden Glove recommends, "Decide where to place your water feature. If you don’t have power nearby, consider a solar powered fountain pump." This Old House warns to mark electric and gas lines and make sure to steer clear of them.
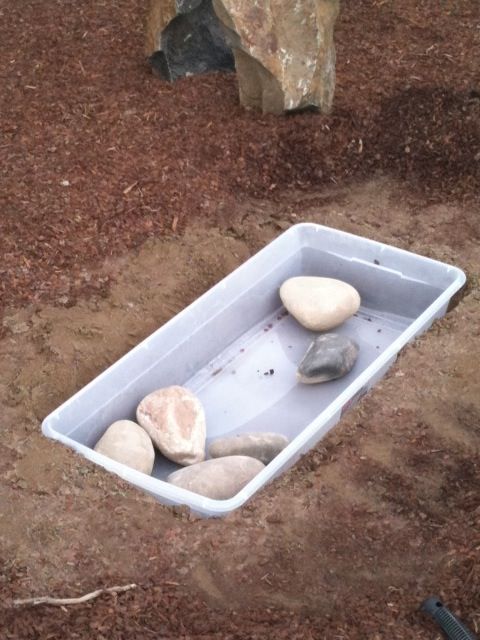
2. Add rocks
The rocks anchor the pump in place.
3. Place the pavers down
Place the flat pavers along the edge of the container to cover it. The pavers, along with the stones/rocks, can be used to cover any power cords or unwanted sights.

4. Lay down stones for design and looks
5. Secure the water plant
Use the rocks to cover the plant container and hold the plant in desired location.
6. Final step
Fill up your pond with water and adjust pump settings to your preference.
The final result should look something like this:

Advertisement
Lastly, in terms of maintenance, Garden Glove suggests, "Clean your water feature on a regular basis, and use an algae inhibitor available at your home improvement store where they sell pond supplies."