
It's February and no matter the temperature where you live, the seed is planted in our brains: Spring is not that far away. So let's talk DIY planters, and since so many seem to require lifting, bending, cutting, etc., maybe we can skirt high-impact activities.
What things do we all have? In the kitchen, if you need to drain pasta there must be a colander, or two. Here, creative soul Tina at Mommy's Kitchen goes all out, buying a new one and painting it a hot pink — we like it.
Advertisement

Even simpler, skip the paint and go with a lived-in look: Get some fabric (burlap, anyone?) to line the colander, add soil and plants of choice. Now maybe use twine, old chains or bungee cords and hook it up somewhere reachable. If you're being no-frills, just sit it on a table or crates — that's rustic.
The folks at Decoist came up with a great set of planter projects, but the ladder one seems very adaptable. You can add planks for shelves, paint and even stencil. But if you have a ladder with big enough steps, just move some plants and other items over. Of course, please test the sturdiness beforehand.

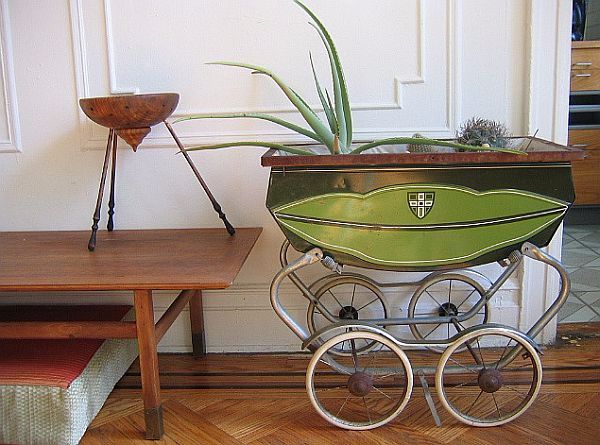
This, by the way, wins the most adorable award: the Pram Planter spotted by Homedit. This features a retro-cool pram and with the wheels, well access is easy and you can move it where you need it. If you don't have one of these, an old stroller, grocery cart or even a child's doll stroller could work.
A great source for DIY stuff is picking up what other people discard, like this project below.

The tabletop and frame were left out for someone to take, so smart blogger Kelli bought a bucket and found a way to create an easy-access planter.
Options we like? Take an unused metal tub, some leftover wood (think old closet doors), old refrigerator shelving or adapt a large metal or wood picture frame as your top. You can sand the edges or leave them to hang little plants or your gardening tools. To really make it sparkle, add some solar lighting.
To make this project, the bottom of the bucket is used as a guide so a hole can be measured and cut in the table, allowing the bucket to be centered and fit in snug.


The great thing about this project is that you can add other plants to the top or use the table to repot and do other projects. It also means if you have trouble bending, lifting or just don't want to do either, this is a great height for most people and easy on the back.
Advertisement
For the full tutorial, check out Kelli's instructions and make sure to head over to her website for kitchen and canning tricks.
Make sure to share if you liked this gardening DIY!