
Crocheting is a captivating and versatile craft that empowers you to fashion exquisite and practical items. Among the array of creative projects, there is one that stands out for its uniqueness and visual appeal – the lighted LED rug. This enchanting endeavor seamlessly blends the comforting warmth of a rug with the soft, mesmerizing glow of LED lights, resulting in a truly stunning masterpiece that effortlessly infuses any room with a touch of magic.
Throughout this article, we will provide you with a comprehensive step-by-step guide on how to create your very own lighted LED rug. From selecting the perfect materials to mastering the crochet techniques, you'll embark on a fulfilling journey of artistic expression and practical craftsmanship. Let's dive in and bring a radiant and captivating ambiance to your living spaces!
Advertisement
Materials Needed:
A strand of LED lights (preferably 20 feet long)
Crochet hook (appropriate size for your yarn)
Bulky or super bulky weight yarn (choose a color that complements your LED lights)
Scissors
Measuring tape
Safety pins or stitch markers (optional)
Crochet hook (appropriate size for your yarn)
Bulky or super bulky weight yarn (choose a color that complements your LED lights)
Scissors
Measuring tape
Safety pins or stitch markers (optional)

Step 1: Choose the Right LED Lights
To ensure the safety and efficiency of your lighted LED rug, it's important to use LED lights specifically. LED lights generate less heat than regular lights, reducing the risk of fire hazards. Additionally, they are energy-efficient, allowing your rug to shine brightly without consuming excessive power. Select a strand of LED lights that suits your desired rug size; a 20-foot-long strand is commonly used for this project.
Step 2: Create a Crochet Foundation
Start by creating a foundation chain that is slightly longer than your desired rug length. To determine the number of chains needed, measure the length of the LED light strand and add a few extra chains to accommodate any additional length you may want. Keep in mind that the rug will stretch slightly during the crocheting process.
Step 3: Crochet the First Row
After creating your foundation chain, crochet the first row using a stitch of your choice. Single crochet or half-double crochet stitches are commonly used for rugs as they provide a dense and sturdy texture. Choose a stitch that you are comfortable with and begin crocheting along the foundation chain, ensuring each stitch is tightly worked.
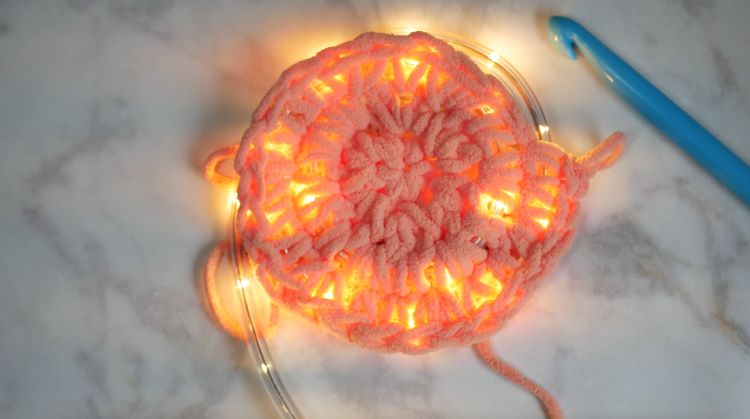
Step 4: Incorporate the LED Lights
As you crochet, carefully insert the LED lights into the stitches to create the illuminated effect. To do this, work your stitches around the light strand, securing it within the stitches as you go. Ensure that the lights are evenly distributed throughout the row. You can use safety pins or stitch markers to help keep the lights in place if needed.
Step 5: Continue Crocheting Rows
Continue crocheting rows using your chosen stitch, making sure to enclose the LED lights within the stitches as you progress. Take care to avoid damaging the lights or tangling the wires. Work each row tightly to maintain a consistent density and ensure that the lights remain securely in place.
Step 6: Finish the Rug
Continue crocheting rows until your rug reaches the desired width. Once you're satisfied with the size, finish off your work and weave in any loose ends to give your rug a polished look. Trim any excess yarn or wires carefully.
Step 7: Connect the Lights
Plug in the LED lights and marvel at your beautiful lighted rug. Adjust the lights to evenly distribute the glow throughout the rug, creating an enchanting atmosphere in your space.
Safety Precautions:
- When working with the LED lights, be gentle to avoid damaging them or causing any electrical issues.
- Always unplug the lights when you're not actively working on the rug to prevent overheating or accidental power consumption.
Ashleigh Kiser / DIY Everywhere
If you are feeling inspired by the above quick tutorial, check out these super neat elaborations of this technique:

Advertisement
Here's another variation:
