
Poor soil? No soil? Do you have a hard time bending down or over to garden? If any of these affect you, then straw bale gardening is a fantastic gardening alternative! Straw bale gardening uses decomposing straw bales instead of soil to grow vegetables. It's similar in concept to raised bed gardening, but with a much cheaper price tag.
These tips will help you set up and garden successfully using straw bales!
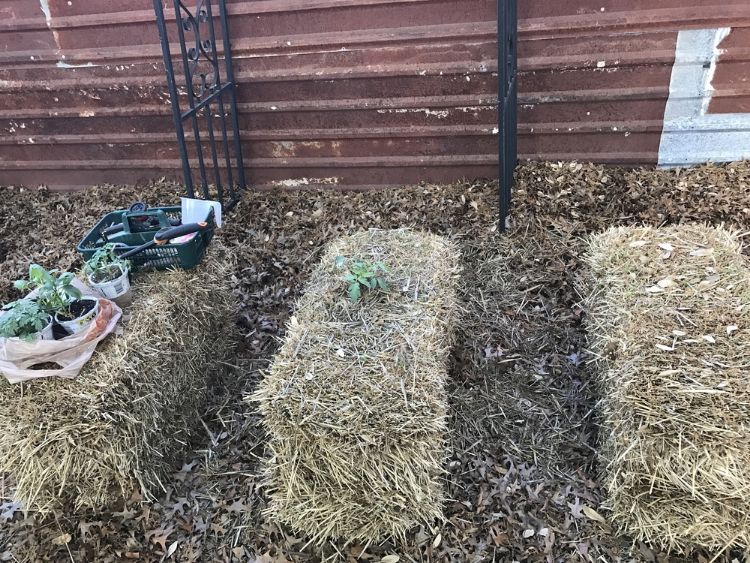
1. Use straw bales
Bales come in two varieties: straw and hay. Straw is the byproduct of the grain industry and contains only the hollowed out stem of plants such as wheat, barley and oats. Hay bales often contain a variety of dried grasses and many seeds; they are usually cheaper but will become weedy and break down too quickly. Bales can be purchased at some garden centers or sourced directly from farmers. They are more available for purchase in the fall after grain harvest.
Advertisement
Shutterstock
2. Position bales
Lay a couple layers of newspaper or weed block fabric under the area you plan on putting your bales to prevent weeds from coming up from the ground. Bales can be placed on your concrete driveway, on top of your existing garden soil or anywhere else you'd like to garden. Keep in mind the wetness of the bale can damage wooden decks and the bales become quite heavy, a concerning aspect of rooftop gardening.

Shutterstock
3. Twine
Bales are held together with 2 or 3 strands of baling twine, keeping the bale in its telltale rectangular shape. Make sure this twine is not severed, as it will allow the bale to fall apart. Bales should be laid on their sides with the narrow side up so the twine is parallel to the ground.
4. Condition bales for growing
One of the most important steps is prepping, or conditioning, the bales for growing. You need approximately two weeks for this. Conditioning jump-starts the breakdown process; microbes in the straw generate heat as they work. The key to conditioning is to watch and wait until the temperature of the bales stabilizes.
Day 1 to 3: Water the bales heavily, until water runs out the bottom.
Day 4 to 6: Sprinkle 1 cup of high nitrogen fertilizer (urea, ammonium sulfate, blood meal, lawn fertilizer) across the top of each bale and water well.
Day 7 to 9: Sprinkle 1/2 cup of high nitrogen fertilizer across the top of each bale and water well.
Day 10 until completion: Stop fertilizing but continue watering.
Bales are ready to be planted when they are no longer hot to the touch. They should be about as warm as your body temperature.
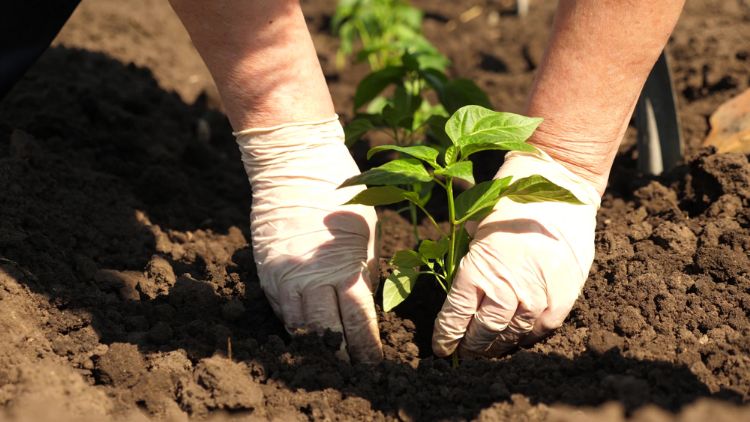
5. Planting
If you are using seedlings, use a garden trowel to create a hole in the top of the straw bale, between the pieces of straw, slightly larger than the seedling. Then plant seedlings, one per hole, per recommended spacing. If you are planting seeds, spread a 2-inch layer of peat based potting soil across the top of the bale. Sow seeds into the potting soil. Root systems will grow downward, making their way into the bale over time.
Shutterstock
6. Vegetables to avoid
Shutterstock
Top heavy plants like corn are best to leave for in-ground gardens. As plants grow taller they can topple over, especially as the bales weaken as they break down. Plants with perennial roots, such as rhubarb or raspberries, should be avoided as well. They dislike needing to be transplanted every year into new bales.
7. Keep well watered

Shutterstock
Straw bales dry out quickly, so make sure to water regularly. A soaker hose or drip irrigation draped across the top of the bales saves you a great deal of time spent on watering as well as providing adequate moisture for plants.
8. Mushrooms

Shutterstock
Mushrooms are a sign that your straw bale garden is growing well and the bales are decomposing slowly, as they should. Pick them off and discard them if desired, but refrain from eating them as they can potentially be dangerous.
9. Fertilizer
Straw bales contain no nutrients of their own, so it is important to fertilize them regularly. Add a water soluble fertilizer source every two weeks after planting and then weekly once plants begin to bear fruit.
10. Compost
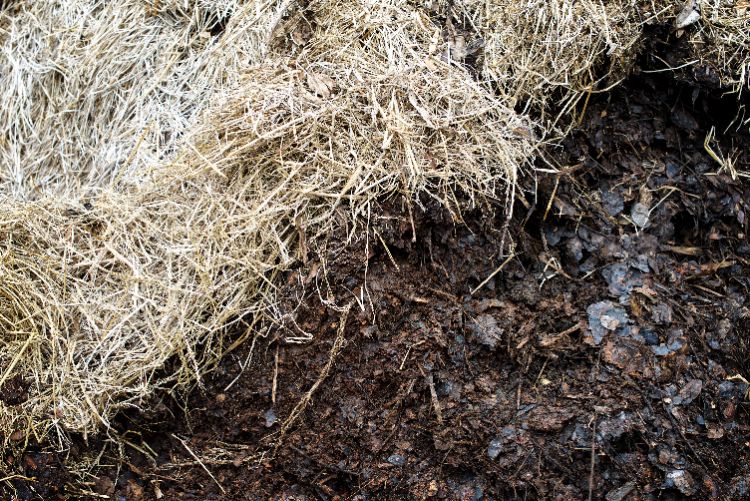
Shutterstock
By the end of the growing season, the bales should have broken down into a rich mound of compost. Scatter this compost around your flowerbeds and other garden areas, or leave it to break down further over the winter before spreading it.
Advertisement
Who would have thought you could successfully plant and grow a vegetable garden using straw bales instead of soil? These tips will help you get started and reap a bountiful harvest at the end of the growing season.
Share these great tips on Facebook!