
Photo transfer DIYs are a popular choice for those new and advanced into DIY. They serve as an inexpensive alternative to buying expensive store-bought picture frames or mementos. Plus, they can be customized to all sorts of mediums from wood to fabric to even mugs.
In the following project, we cover how to transfer photos onto wood. In the demonstration below, we use a generic stock photo, but most people use this technique to save precious family and friend moments. By the end, once you see the final result, it really feels like magic!
Advertisement
Materials
- Printed color photo from laser jet printer
- Milk paint (acrylic gel medium)
- Milk paint (acrylic gel medium)

DIY Everywhere
- Wood (cut to the same size as photo)
- Wax paper as your work surface
- Mod Podge
- 1 Brush
- 1 Foam brush
- Brayer
- Damp cloth
- Wax paper as your work surface
- Mod Podge
- 1 Brush
- 1 Foam brush
- Brayer
- Damp cloth
Pro Tip: Make sure to print your photo backwards (especially if there are words). This way they will read the correct way upon transfer.
Instructions
1. Apply a single layer of milk paint onto wood with a brush. Be sure not to go to thin or too thick. If you don't have enough, your transfer may fail later as parts of the photo may not stick. Milk paint is quick to dry, so it's a great option for this step.

DIY Everywhere
2. In a separate surface, lay down wax paper. Place photo on top.

DIY Everywhere
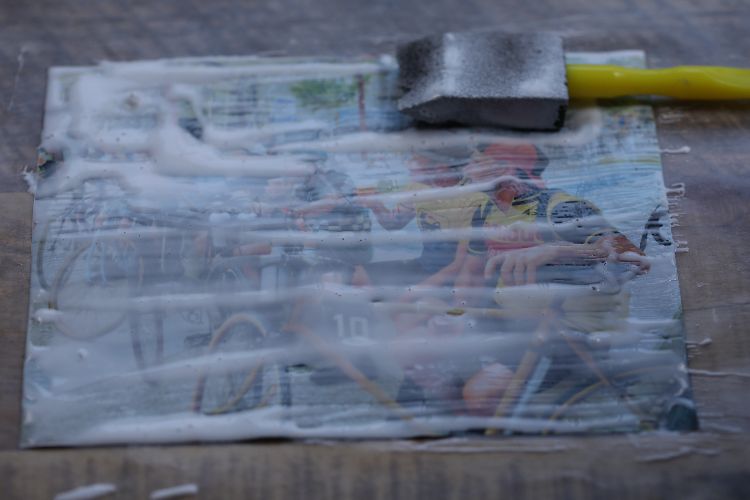
3. Using a foam brush, cover the photo with Mod Podge.
DIY Everywhere
4. Flip the wax paper onto the wood surface (image side down), and remove the wax paper.

DIY Everywhere
5. Use a brayer to roll out any air bubbles.

DIY Everywhere
Set dry for 24 hrs, or apply heat for faster drying.
6. Use a damp cloth to reveal picture below.

DIY Everywhere
Here's the final revealed photo:

DIY Everywhere
8. Decorate and hang based on your preferred design style.

DIY Everywhere
Advertisement

DIY Everywhere