
Wreath making is an art. Many people love creating these beautiful arrangements adorn their front doors all year round as well as holiday or season-specific representations. However, people who have been making wreaths for a long time have often had to master difficult techniques.
This is why it can be a great option to start with this easy and functional burlap wreath, which will allow you to determine if this type of project is suitable for you. Once you've mastered this wreath, you may feel you are ready to move on to more complicated pieces. This option is also much less expensive and requires fewer materials than a more complex wreath.
Advertisement
With just a few, easy steps, you can create this handsome wreath and hang it on your front door all year. You may want to gift it to a friend who is moving into a new home. You can also hang the wreath in your kitchen, living room or anywhere else that requires a bit of Southern charm and beauty.
Materials
- Styrofoam wreath form
- Roll of burlap
- Hot glue gun
- Hot glue sticks
- Pair of scissors
- Roll of colorful twine
- Small bouquet of silk flowers
- Styrofoam wreath form
- Roll of burlap
- Hot glue gun
- Hot glue sticks
- Pair of scissors
- Roll of colorful twine
- Small bouquet of silk flowers
Instructions
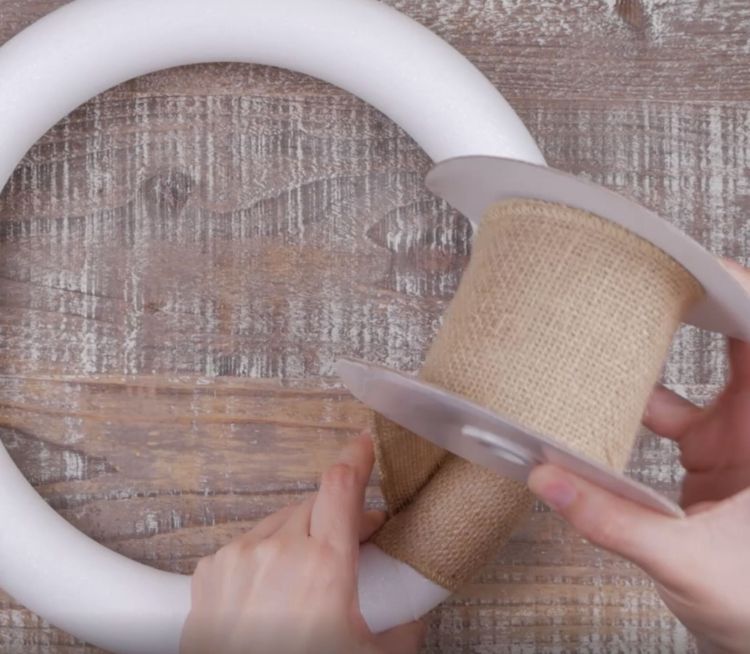
1. Lay your styrofoam wreath form on a flat surface like a table or a countertop.
1. Lay your styrofoam wreath form on a flat surface like a table or a countertop.

DIY Everywhere
Unroll a bit of burlap, and wind it one time around the base of the wreath.
DIY Everywhere
Use your hot glue gun to glue the burlap to the wreath form.
2. Next, slowly wind the burlap all the way around your wreath form, making sure to keep it tightly wound. You don't need to glue it every time as long as you wrap it tight enough.

DIY Everywhere
3. Once you have it wrapped all the way around with no styrofoam showing through, cut the piece of burlap with the scissors. Use the hot glue gun to glue the last flap to the wreath, preferably in the back so people won't be able to see where it ends.

DIY Everywhere
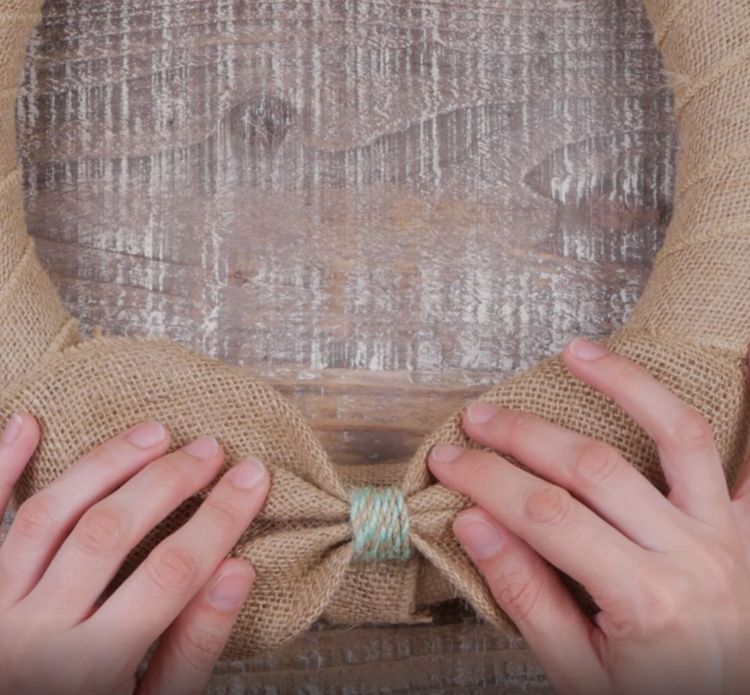
4. Set the wreath aside for now. Cut a square shape from the burlap, and lay it flat with the corners at the tops and sides like a diamond.

DIY Everywhere
Fold the top and bottom corners inward, and use the glue gun to glue the points down to the burlap.
Roll the bottom and the top inward slightly, then pinch them down to create a bow effect.

DIY Everywhere
5. Use your twine to wrap around the middle of the burlap bow several times. Cut the twine after doing so, and hot glue the ends to the bow, making sure they will not unravel.

DIY Everywhere
6. Hot glue the bow to the bottom of the burlap wreath.
DIY Everywhere
Then hot glue a small arrangement of silk flowers behind the bow to hide the stems.

DIY Everywhere
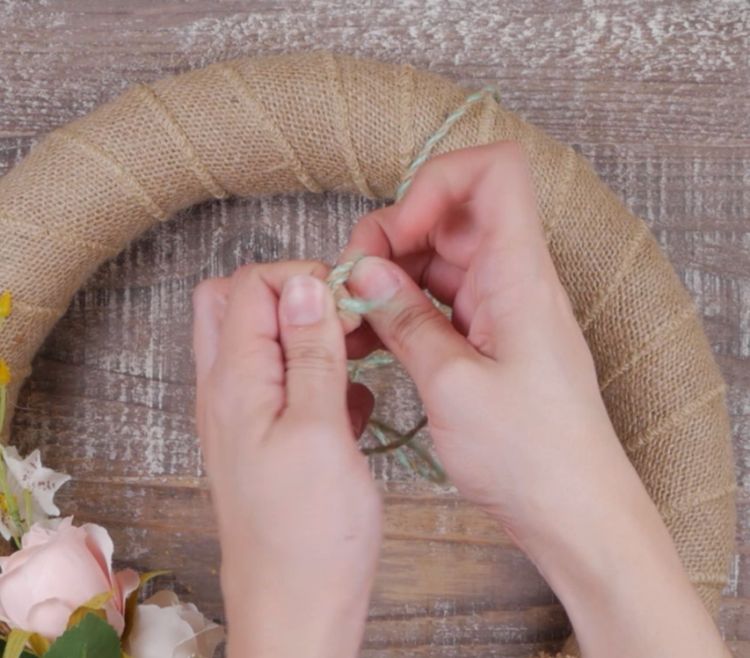
7. Finally, unroll the twine, and use a long piece to thread around the top of the wreath. Tie it off at the length you would like the wreath to hang, and cut the twine.
DIY Everywhere
You now have a simple wreath that was easy to make and is beautiful to behold!

DIY Everywhere
Advertisement
If you enjoyed creating this item, you can start making more difficult wreaths that require the weaving of florals on metal wreath forms.