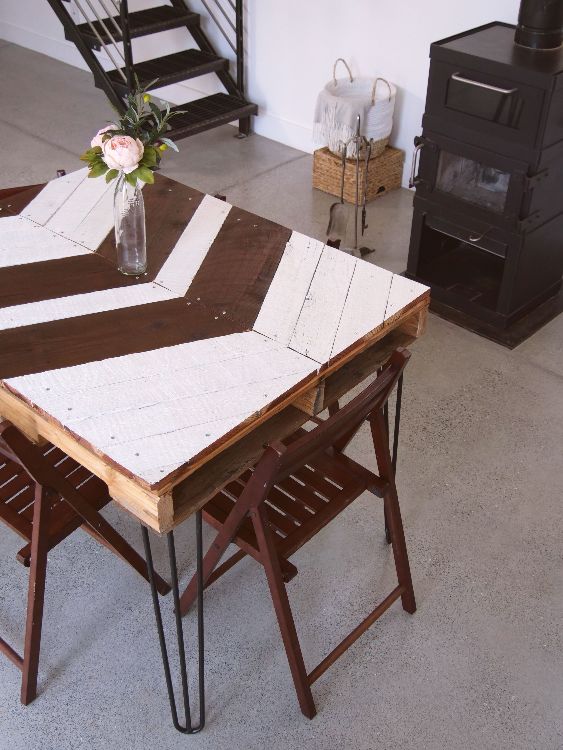
Who doesn't love projects that use reclaimed wood? They're inexpensive, easy to make and the results are usually incredible. That's definitely true of this pallet table. It's simply stunning, and it's easy enough to make even if you aren't an experienced woodworker.
In short, this isn't your typical table. In fact, it's actually better. If you want to try this project, read the instructions below and check out the video tutorial to see how it's done. You can customize it to fit your decor thanks to the two colors of paint used.
Advertisement
Materials
- Sawhorses
- Pallet
- Four 3-rod hairpin table legs
- Pencil
- Electric drill
- Screws
- Plywood boards painted in two colors
- Trigger clamp
- Circular saw
- Aluminum straight edge
- Wood glue
- Shellac
- Paintbrush
- Sawhorses
- Pallet
- Four 3-rod hairpin table legs
- Pencil
- Electric drill
- Screws
- Plywood boards painted in two colors
- Trigger clamp
- Circular saw
- Aluminum straight edge
- Wood glue
- Shellac
- Paintbrush
Instructions
1. Rest the pallet on the sawhorses. Place the first table leg on one corner of the pallet and use a pencil to make marks where you'll need to screw it on. Do this for the three remaining legs as well.
1. Rest the pallet on the sawhorses. Place the first table leg on one corner of the pallet and use a pencil to make marks where you'll need to screw it on. Do this for the three remaining legs as well.
2. Drill holes on each mark, and screw the legs onto the table. Flip the table over so it's standing on its legs.
3. One by one, clamp the boards you'll be using onto the pallet and cut them at a 45-degree angle.
4. Line up an aluminum straight edge with the middle of the table and clamp it on. Arrange the pieces of wood along one side of the table with the 45-degree-angle side along the straight edge.
5. Aattach the pieces of wood to the pallet with glue, and use the electric drill to securely screw each one down.
6. Remove the aluminum straight edge, and repeat step 5 for the other side of the table.
7. Clamp the straight edge along the long edge of the table and use it as a guide to cut off all the excess wood with the circular saw. Repeat for the other side of the table.
8. If needed, use wood glue and screws to attach one more piece of wood to each corner of the table. Cut off all the excess wood on both short ends of the table.
9. Coat the entire table top in shellac and let it dry.

DIY Everywhere
Advertisement
