Jewelry is a wonderful way to brighten up any outfit, but storing it isn't always easy. Keeping those well-loved chains and clasps from becoming a single, tangled mess doesn’t have to be complicated, though. Transforming a few standard clothespins into a creative organizing system is a sure way to keep accessories in order and easy to find.
A shabby-chic wooden plank and some elegant lace create a stylish backboard for a one-of-a-kind jewelry organizer. Those clothespins that securely grasp fabric are just as effective with jewelry. Simple and quick to make, this clothespin jewelry organizer also brings a touch of rustic glamour to any wall in the home.
Advertisement
Materials
-Three wooden clothespins
-Pink pearl acrylic paint
-Plastic paint palette
-Paintbrush
-Distressed wood plank, 14 inches by 4 inches
-Lace
-Scissors
-Hot-glue gun
-Twine
-Pink pearl acrylic paint
-Plastic paint palette
-Paintbrush
-Distressed wood plank, 14 inches by 4 inches
-Lace
-Scissors
-Hot-glue gun
-Twine
Instructions
1. Fill a plastic paint palette with pink pearl acrylic paint.
1. Fill a plastic paint palette with pink pearl acrylic paint.

DIY Everywhere
2. Cover one side of a wooden clothespin with the pink paint using a small paintbrush. Repeat with two more wooden clothespins and allow to dry completely.

DIY Everywhere
3. Place the distressed wooden plank lengthwise on a flat surface.

DIY Everywhere
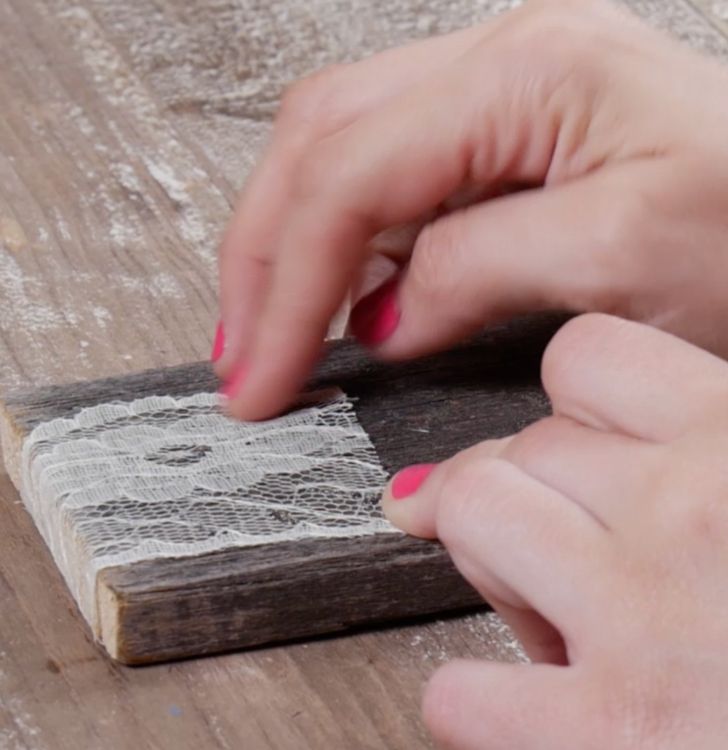
4. Place lace along the center of the wooden plank, allowing 3 inches of lace to extend past the board on both ends. Cut the lace from the roll.

DIY Everywhere
5. Wrap the ends of the lace around the back of the wooden plank and attach with hot glue.
DIY Everywhere
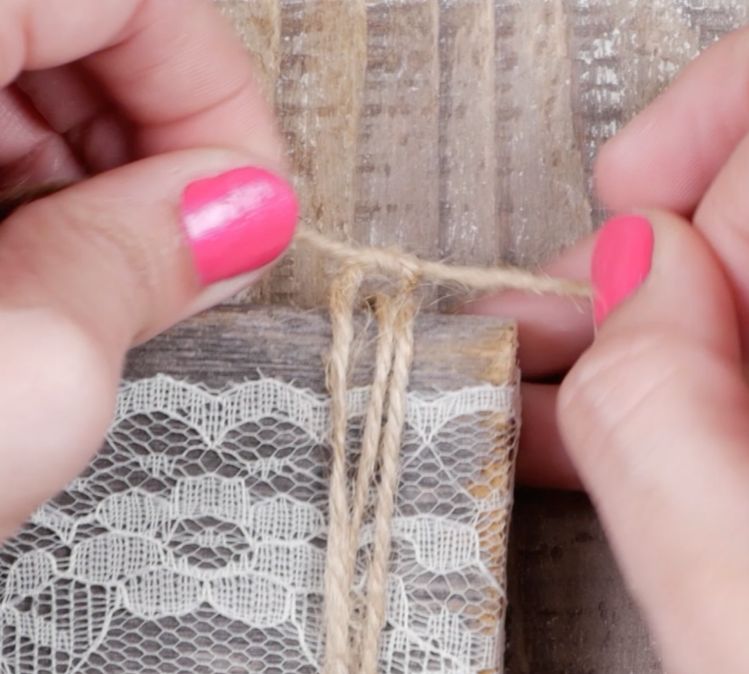
6. Flip the wooden board face up and wrap a length of twine three times around the right end of the plank. Tie a knot at the top to secure.

DIY Everywhere
7. Pull the twine towards the left side of the wooden plank and wrap three times around the opposite end. Tie a secure knot at the top edge. Cut away excess twine.
DIY Everywhere
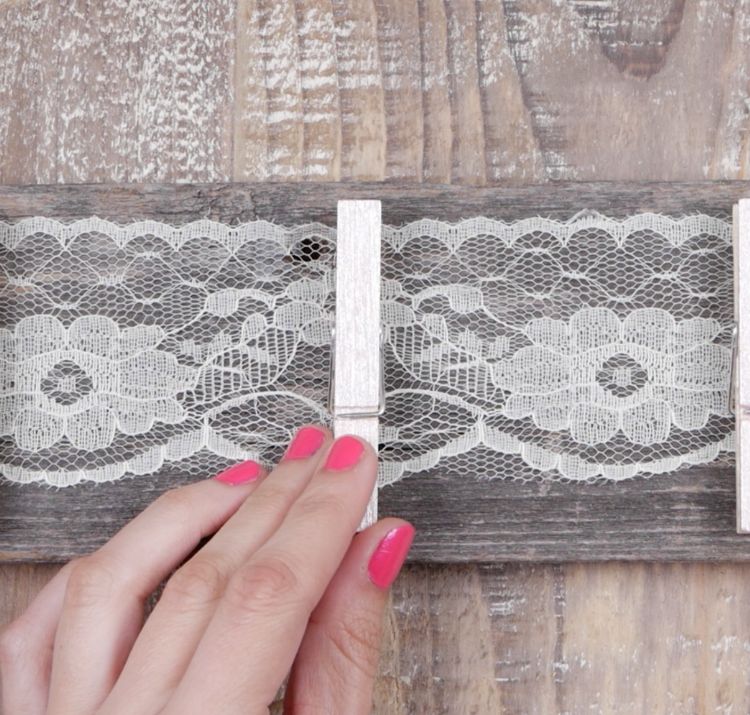
8. Line the back of one of the painted clothespins with hot glue and press firmly to the wooden plank approximately 3 inches in from the left edge. Make sure the painted surface is facing up, and the portion of the clothespin that clasps is pointing down.

DIY Everywhere
9. Evenly space the remaining two clothespins along the plank and affix with hot glue.
DIY Everywhere
10. Hang the plank by the twine and use the clothespins to hold jewelry in place.

DIY Everywhere
Advertisement