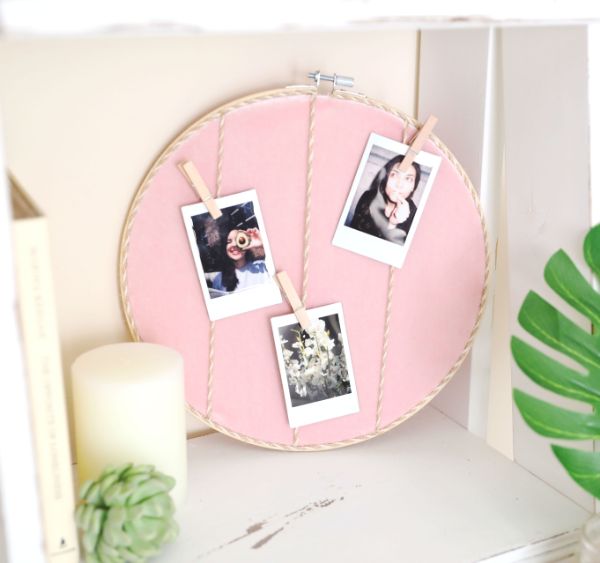
Displaying photos at home just got more creative! Craft an incredible display with some strategically placed fabric and string on an embroidery hoop. Instead of hosting needlework, the hoop can hold pictures. Feel free to craft independently or make this a group exercise for the family as you quickly and easily add photos to this creative frame.
Pick a fabric background that best suits the photos you plan to display. For example, a pastel pink can deliver up a soft, delicate foundation for favorite memories, or you can choose a bolder pattern that speaks to your different personal taste and style. Similarly, small wooden clothes pins work well to hold pictures in place, but can just as easily be swapped out for a brighter or patterned version. Whatever color scheme you select, an embroidery hoop picture holder is a fun way to display those memories that mean the most.
Advertisement
Materials
-1 12” embroidery hoop
-14” x 14” swatch of pink fabric
-3 pieces of brown string cut to 16” in length
-Hot-glue gun
-Scissors
-1 pack of small clothes pins
-Hand-held pliers
-1 12” embroidery hoop
-14” x 14” swatch of pink fabric
-3 pieces of brown string cut to 16” in length
-Hot-glue gun
-Scissors
-1 pack of small clothes pins
-Hand-held pliers
DIY Everywhere
Instructions
1. Separate the interior and outer bands of a 12” embroidery hoop by loosening the tightening apparatus at the top.
2. Center a 14” x 14” square of pink fabric over the top of the interior hoop band on a flat surface.
3. Cut three pieces of brown string to a length of 16” each.
4. Lay one string from top to bottom down the center of the pink fabric. Lie the remaining two strings the same direction approximately 3-inches away on either side of the center string so all three strings are evenly spaced across the width of the hoop.
5. Replace the outer band of the embroidery hoop back on top of the interior band capturing the edges of the fabric and string between the two pieces.
6. Tighten the top apparatus using hand pliers to secure the hoop.
7. Turn the hoop over and line the perimeter of the back of the hoop with hot glue.
8. Gently press the pink fabric edges down into the glue and towards the back interior of the hoop. Press to secure.
9. Cut excess fabric away for even edges.
10. Cut excess string ends away at the back of the hoop.
11.Turn the hoop over and use a spot of hot glue to attach a piece of brown string at the top near the left side of the tightening apparatus. Continue gluing the string around the perimeter to act as a decorative frame, and cut away excess string when it reaches the right side of the tightening apparatus.
12. Attach photos to the three strings on the front of hoop with small clothes pins as desired.
13. Display on a shelf or hang on the wall for viewing.
Advertisement