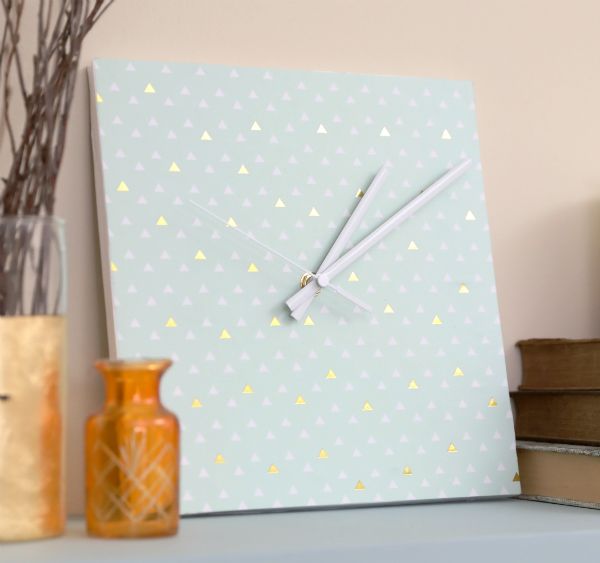
Telling time is essential to keeping life on track, but that doesn’t mean time can't look elegant. You can easily combine a simple piece of foam core and a moving mechanism to create a one-of-a-kind wall clock that comes with a sparkling touch. This clock can also incorporate your preferences, with options to mix and match clock hands according to shape, length and color.
A foam core clock is lightweight, making it easy to move from room to room. It doesn’t take much time to craft this unique timepiece. Some well-placed foam cutouts and a single sheet of decorative paper will give clock hands the beautiful base they need to become an authentic wall clock. Create a single clock with foam core, or mix and match paper or foam core dimensions for an eclectic collection.
Advertisement
Materials
- Decorative crafting paper, 12 by 12 inches
- Transparent measuring mat
- Scissors
- Foam core square, 9-½ by 9-½ inches
- Elmer’s washable clear glue
- Ruler
- Precision knife
- Pencil
- Clock mechanism with three hands and mounting hardware
- Decorative crafting paper, 12 by 12 inches
- Transparent measuring mat
- Scissors
- Foam core square, 9-½ by 9-½ inches
- Elmer’s washable clear glue
- Ruler
- Precision knife
- Pencil
- Clock mechanism with three hands and mounting hardware
DIY Everywhere
Instructions
1. Place a 12-by-12-inch sheet of decorative paper on a flat surface. Place a transparent measuring mat on top, lining up the bottom left corners evenly.
1. Place a 12-by-12-inch sheet of decorative paper on a flat surface. Place a transparent measuring mat on top, lining up the bottom left corners evenly.
2. Trace the edges of the measuring mat with a pencil, creating a square that measures 9-1/2 by 9-½ inches.
3. Remove the measuring mat. Cut the square from the paper following the traced pencil lines.
4. Apply Elmer's washable clear glue to one face of the 9 ½-inch-by-9 ½-inch foam core square, making sure the entire surface is covered.
5. Line up the edges of the decorative paper with the foam core square. Gently press the paper to the glue. Run your hand over the entire surface of the foam several times to secure and smooth the paper.
6. Measure 4-¾ inches from the top and side of the foam core square to indicate a center point. Mark the point with a pencil.
7. Cut a small circle around the center point using a precision knife.
8. Lift the foam core square. Push the spoke of a clock-moving mechanism through the back of the board, entering through the central hole so the spoke protrudes out the side with the decorative face.
9. Place a washer and hex nut on top of the spoke. Twist to secure.
10. Press three clock hands onto the central spoke to firmly attach them.
Advertisement
11. Turn the mechanism to the "on" position, and find a place to display the clock.