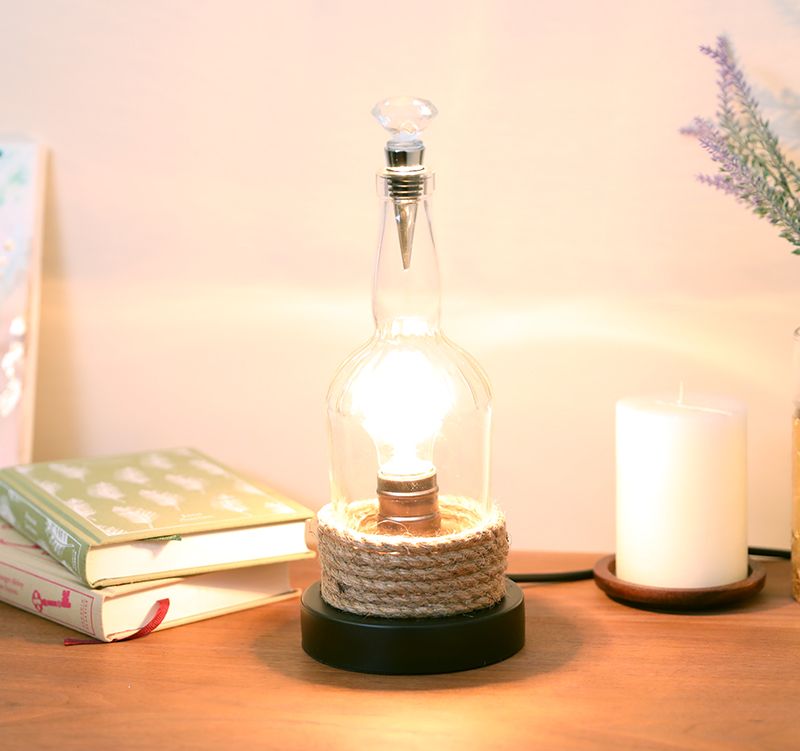
Whether your preference is fine Kentucky bourbon, a crisp vodka or a refreshing pinot grigio, keep the empty bottle and craft a striking table lamp for your space. This DIY project is easy, but the result will add rustic character to your home and is sure to be a confirmed conversation piece.
A glass cutter kit is easily available at a craft store, and once you separate the bottom of the bottle from its body, you can embellish the upper piece with naturalistic rope twine, as the tutorial does, or with colored ribbon or yarn. Install a standard bulb, or go for an antique vibe with an Edison bulb or a candle flame bulb. However you choose to detail this DIY lamp, it will be an eye-catching highlight to your bedroom, living room or entryway.
Advertisement
Materials
- Liquor bottle
- Glass cutter kit
- Electric teapot
- Two large Pyrex or metal bowls
- Large bowl filled with ice cubes
- Heavy duty work gloves
- Sanding sponge
- Spool of heavy twine
- Hot glue gun
- Glue sticks
- Scissors
- Decorative bottle stopper
- Lamp base hardware kit
- Light bulb
- Liquor bottle
- Glass cutter kit
- Electric teapot
- Two large Pyrex or metal bowls
- Large bowl filled with ice cubes
- Heavy duty work gloves
- Sanding sponge
- Spool of heavy twine
- Hot glue gun
- Glue sticks
- Scissors
- Decorative bottle stopper
- Lamp base hardware kit
- Light bulb

DIY Everywhere
Instructions
1. Place the bottle in the glass cutting tool.
1. Place the bottle in the glass cutting tool.
2. Turn the bottle so the sharp cutting tool edge cuts a mark around the bottle base about 3 inches from the bottom of the bottle. This action won't separate the two pieces of the bottle, but it starts the process.
3. Heat a full pot of water in the electric teapot.
4. While the water is coming to a boil, fill one of the large bowls with cold water and ice.
5. Put on your heavy duty work gloves.
6. Place the bottle in the other large empty bowl, and hold it by the neck while you pour boiling water over the cut mark.
7. Immediately place the bottle in the ice water.
8. Repeat steps 7 and 8 until the two pieces of the bottle separate. As you repeatedly dip the cut section of the bottle into boiling and then cold water, the cut section will weaken and break off.
9. Sand the sharp bottom edge of the top portion of the bottle with the sanding sponge until it’s smooth.
10. Apply a line of hot glue around the bottle, about 1 inch up from the sanded bottom edge.
11. Unwrap some of the twine from the spool and affix it to the portion of the bottle you coated with glue.
12. Continue gluing the twine in concentric circles around the bottle until you reach the cut edge. You will have about five or six layers of twine.
13. Cut the twine from the spool with scissors.
14. Place the decorative bottle stopper in the opening of the bottle.
15. Install the bulb into the lamp base hardware.
16. Place the cut bottle over the bulb on the base.
Advertisement
