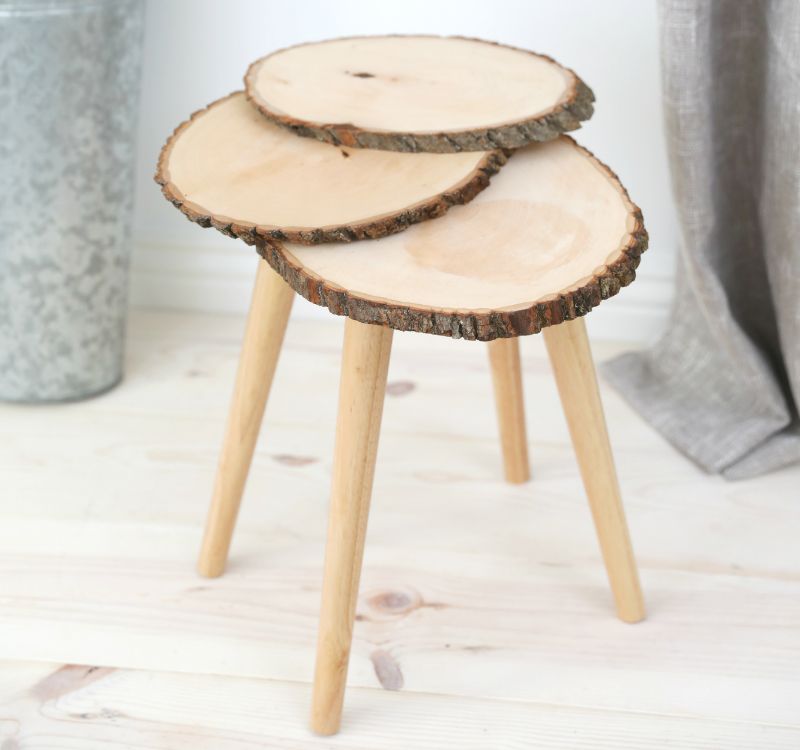
Wood bark and wood grain differ from tree to tree and can be a work of art themselves. Take advantage of this natural beauty by making a small end table out of log slices. This end table is ideal for a home with rustic decor, but it also would look nice in a home featuring natural wood furniture or cabinets.
If your decor has darker wood, stain the log slices to match. Just make sure you stain and let it dry before applying the wax finish per the instructions. When rubbing in the wax, do so in a circular motion until the wax is hard and shiny, and does not come off when you swipe a finger across it.
Advertisement
Materials
- 2 wood rounds, 12-16 inches in diameter
- 1 wood round, 10 inches in diameter
- Liquid wax
- 2-inch round bristle brush
- Clean rag
- Gorilla Wood Glue
- 4 angled wood table legs with mounting plates
- Pencil
- Drill with drill bit and screwdriver bit
- 2 wood rounds, 12-16 inches in diameter
- 1 wood round, 10 inches in diameter
- Liquid wax
- 2-inch round bristle brush
- Clean rag
- Gorilla Wood Glue
- 4 angled wood table legs with mounting plates
- Pencil
- Drill with drill bit and screwdriver bit
DIY Everywhere
Instructions
1. Apply the liquid wax with the brush in a circular motion to 1/4 of the face of one of the larger wood slices. Rub it in with the clean rag. Repeat this step for each quarter of the rest of the slice.
2. Repeat step 1 for the two remaining wood slices.
3. Place one large slice on top of the other large slice. Slightly fan out the two slices as if you were holding two playing cards in your hand. Place the smaller slice across the bottom of the larger ones.
4. Apply several squiggles of wood glue where the two large rounds meet and press down. Hold firmly in place for 30 seconds.
5. Apply several squiggles of wood glue where the smaller round touches the top larger slice. Hold firmly in place for 30 seconds. Let the glue dry according to directions on the glue bottle.
6. Turn over the glued pieces. Place the mounting plates on the back of the exposed large slice. Place them 1 inch in from the top and bottom edges, and equidistant from one another. Mark the outer holes with the pencil.
7. Drill pilot holes at the marks. Attach the mounting plates and screw in the legs.
8. Display your new end table where desired.
Advertisement