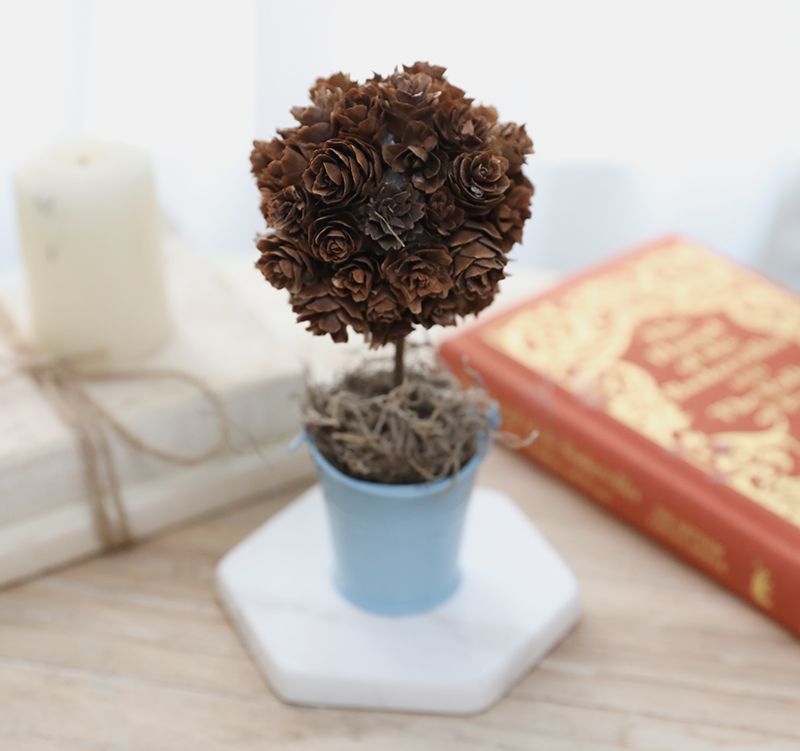
You can make so many different types of simple, unique designs with a couple of pine cones and a few items from the floral section of the craft store. If you're looking for something that you can display in your home year round, that won't wilt and is easy to make, we've got the perfect craft for you in the form of this pine cone topiary.
Pine cones are pretty and won't wither over time like regular flowers, but because you can collect real ones from the outdoors, they'll give your arrangement a hint of nature. Plus, you can display these topiaries from winter to fall — and all the seasons between. Place one on your bookshelf or in the middle of a side table as an adorable little centerpiece that will make people smile.
Advertisement
Materials
- A dozen or more small pine cones (You can either gather them outside or buy them from a craft store.)
- Small Styrofoam ball
- Hot glue gun
- Small twig
- Scissors
- Small decorative bucket
- Small floral foam brick
- Decorative moss from the craft store
- A dozen or more small pine cones (You can either gather them outside or buy them from a craft store.)
- Small Styrofoam ball
- Hot glue gun
- Small twig
- Scissors
- Small decorative bucket
- Small floral foam brick
- Decorative moss from the craft store
DIY Everywhere
Instructions
1. Start by making sure you have enough pine cones to fully cover the Styrofoam ball. Pine cones should be about the size of your fingertip, and the Styrofoam ball should be about palm-sized.
1. Start by making sure you have enough pine cones to fully cover the Styrofoam ball. Pine cones should be about the size of your fingertip, and the Styrofoam ball should be about palm-sized.
2. Place a small dollop of glue on the Styrofoam using the glue gun. Glue down the bottom side of one of the pine cones, so the pointed ends stick out. Let the glue dry, and hold the pine cone in place until it does.
3. Glue more pine cones to the styrofoam ball. Group the pine cones close together. They should look like leaves sticking out of a topiary tree that has been pruned into a ball shape. Leave a small area of the topiary ball uncovered, about the size of one of the pine cones.
4. Use a small twig as the tree trunk for the topiary. You may want to cut the twig, so it's the perfect length to complement the top of the tree, about 6 inches or so. Also, cutting the twig makes it easier to insert into the Styrofoam. When you have the twig at the length you want, insert the top end into the area of the topiary ball where you left a hole in the pine cone design.
5. Place the foam brick inside the bucket, and insert the bottom of the stick into the brick.
6. Place decorative moss from the craft store inside the bucket. It hides the foam brick and completes the look of the piece.
Tip: Never use real moss from the outdoors, as it could potentially be infested with small insects.
Advertisement