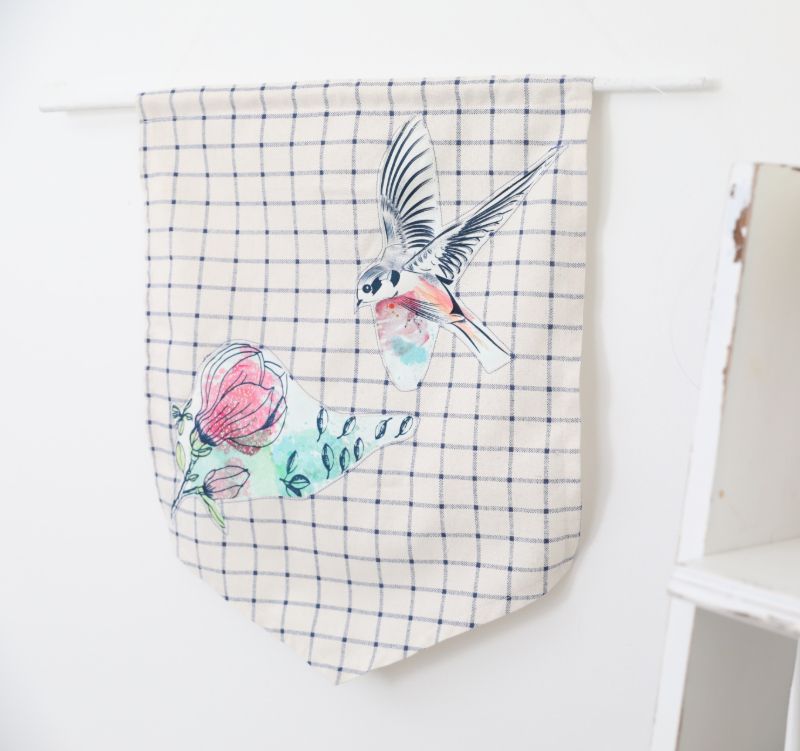
Nothing brightens a room faster than some well-placed wall art. An easy way to customize your walls is with an easy-to-make banner. Throughout history, banners were used to announce who was arriving and who lived where. With our tutorial, you can create your own custom banner for your home.
When picking out the cloth napkins for this project, keep in mind how you plan to use the motif. You may want to start by picking out the napkins and then choose a base fabric that complements them. Try different shapes of banner or follow our measurements for a fun afternoon project.
Advertisement
Materials
- Cutting mat
- Rotary cutter
- Ruler
- Fabric for the banner
- Sewing machine
- Serger (optional)
- Straight pins
- Cloth napkin with a motif
- Fabric scissors
- Wooden dowel
- Cutting mat
- Rotary cutter
- Ruler
- Fabric for the banner
- Sewing machine
- Serger (optional)
- Straight pins
- Cloth napkin with a motif
- Fabric scissors
- Wooden dowel

DIY Everywhere
Instructions
1. First, use your rotary cutter to trim the selvage sides off of your banner fabric. Cut your fabric to the desired banner size. For our project, we cut a 15” x 19” square.
1. First, use your rotary cutter to trim the selvage sides off of your banner fabric. Cut your fabric to the desired banner size. For our project, we cut a 15” x 19” square.
2. Fold your fabric in half lengthwise and cut at an angle from the corner of the fold out to the edge to create a pointed bottom edge.
3. Serge the edges of your banner fabric. If you don’t have a serger available to you, sew around the edge using a zig-zag stitch.
4. Turn your edges under and pin. On the side you wish to use for the top of your banner, make sure to fold enough that a dowel will be able to be fed through it, maybe 1 inch.
5. Sew around your turned edges. Set your banner piece aside.
6. Pick a couple of design motifs from your cloth napkin. Leave plenty of room around each design piece.
7. Turn your banner fabric over so the wrong side is facing up. Plan out how you would like to arrange your design pieces.
8. Pin the right side of pieces of the napkin motif to the wrong side of the fabric.
9. Sew around the edges of the design pieces you pinned from the wrong side, staying about 1/16-inch away from the actual motif.
10. Continuing on the wrong side, trim around the motif pieces to remove excess fabric.
11. Carefully cut a small opening on the right side of the banner fabric over the motif design. Be sure to not cut the napkin fabric you sewed underneath. Cut along the inside of the sewed outline to expose the motif design beneath the fabric.
Advertisement
12. Insert your dowel and hang your banner.
