
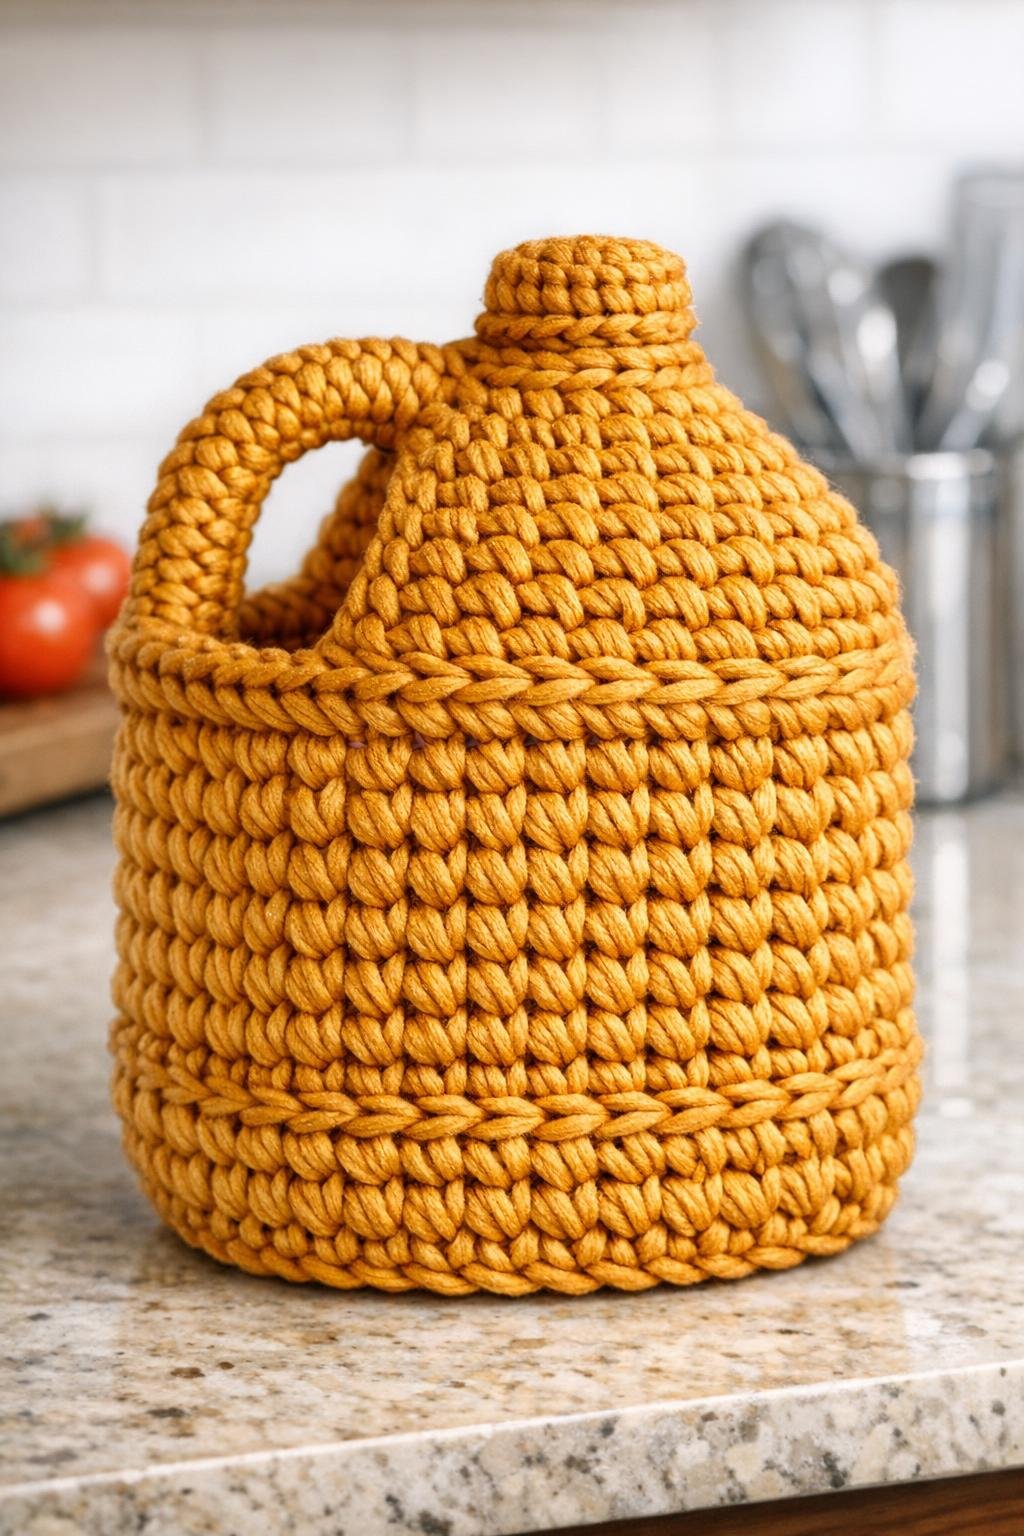
I love a project that turns something headed for the recycling bin into something that looks boutique-shop pricey, and this crochet basket does exactly that. For this one, I use a saved plastic milk jug as the hidden structure, cut the sides into vertical strips, and then crochet chunky amber yarn right around it to create a sturdy little decorative basket with amazing texture.
This is a great project if you want the look of handwoven home décor without spending much money or needing advanced crochet skills. I’m always looking for quick creative projects I can squeeze in after work while dinner is simmering, and this one checks all my boxes: fast, practical, and surprisingly polished when it’s done.
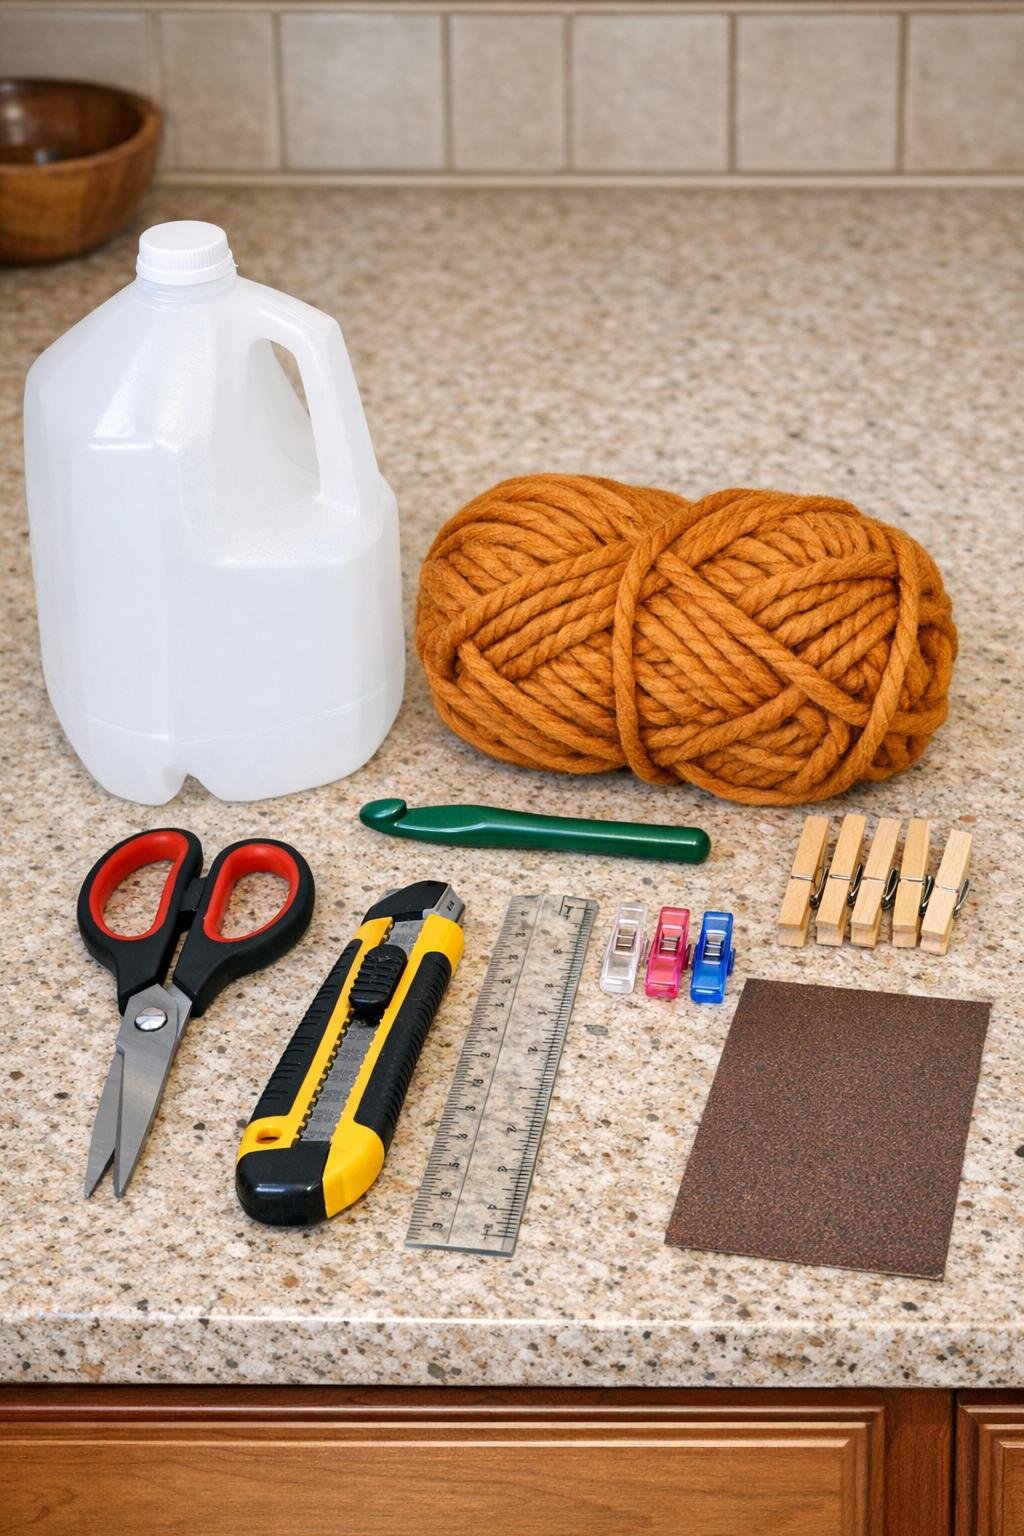
Materials
1 clean white plastic 1-gallon milk jug, dry, with cap removed
Instructions
1. Wash the milk jug thoroughly, remove any remaining residue, and let it dry completely. Peel off the label so the surface is smooth and easy to work with.
2. Use scissors or a utility knife to cut off the top of the jug just below the shoulder, leaving the bottom portion as an open container about 6 to 7 inches tall.
3. Lightly sand the cut rim until it feels smooth to the touch, because this edge will sit near your hands and yarn as you work.
4. Measure and mark vertical cutting lines around the sides of the jug, spacing them about 3/4 inch apart from the top edge down to about 1 inch above the bottom.
5. Cut along each marked line to create flexible vertical plastic strips, keeping the bottom intact so the jug still holds its basket shape.
6. Bend each strip outward gently with your fingers to loosen the plastic and make it easier to crochet around. Clip a few strips outward temporarily if that helps keep them separated while you start.
7. Make a slip knot with the chunky amber yarn and crochet a foundation chain long enough to wrap once around the outside base of the jug. Join it into a ring with a slip stitch, checking that it fits snugly.
8. Work 1 round of single crochet into the ring, then slide that crocheted band over the bottom of the jug so it hugs the base and anchors your work.
9. Begin the first wall round by crocheting around each plastic strip: insert the hook behind one strip, pull up a loop with the amber yarn, and make 2 single crochet stitches around that strip.
10. Repeat 2 single crochet stitches around each strip all the way around the jug, keeping the yarn tension firm enough to cover the plastic but not so tight that the strips buckle inward.
11. Join the round with a slip stitch, then continue building upward with the same pattern or with 1 single crochet around each stitch from the previous round, depending on how dense you want the texture.
12. Keep crocheting round by round until the yarn reaches just below the top cut edge of the jug, covering nearly all of the strips and creating an even basket wall.
13. For a clean finish, fold any exposed plastic strip tips inward slightly if needed and work 1 final round of tight single crochet along the top to visually cap the edge.
14. Cut the yarn leaving a 6-inch tail, pull it through the final loop, and weave the tail down into nearby stitches so it disappears into the chunky texture.
15. Shape the basket with your hands by gently pressing the sides into an even cylinder, then set it on the counter and check that the base sits flat.
Variations & Tips
Softer texture: If you want a slightly more flexible basket, use a category 5 bulky yarn instead of a super chunky one. It takes a little longer, but the stitch definition is really pretty.
Shorter catchall basket: Cut the jug down to about 4 1/2 to 5 inches tall for a lower basket that works well for napkins, tea bags, or garlic on the counter.
More polished top edge: If the cut rim feels uneven, trim tiny amounts before crocheting the final rounds. I’ve learned the hard way that taking one extra minute here makes the finished piece look much more intentional.
Color change option: Work the base and first few rounds in one color, then switch to a second yarn shade near the top for a color-blocked basket. Warm neutrals, rust, or cream all pair nicely with amber.
Storage use: This basket is best for lightweight decorative storage like dishcloths, wrapped snacks, mail, or sachets. Because the core is repurposed plastic, I treat it as décor storage rather than something for high heat or heavy loads.
Busy-day tip: I like to cut and prep the jug one night, then do the crochet portion the next evening while I’m unwinding in the kitchen. Breaking it into two short sessions makes it feel very doable on a packed weekday.