
This ornament wreath is one of those wonderfully high-impact projects that looks far pricier than it is. You start with a plain wire coat hanger and a pile of shatterproof dollar store ornaments, then build up layer after layer until the whole thing feels lush and boutique. In my experience, this is the kind of holiday craft that rewards a little restraint in the beginning and a lot of abundance at the end.
It’s a good project for anyone who wants a dramatic seasonal decoration without spending boutique prices or committing an entire afternoon. Plan on about an hour of hands-on time and roughly $15 in supplies, depending on your ornament packs. One important note before you begin: this works best with shatterproof ornament balls only, and it’s meant for indoor use or a covered door so the finish stays looking fresh.
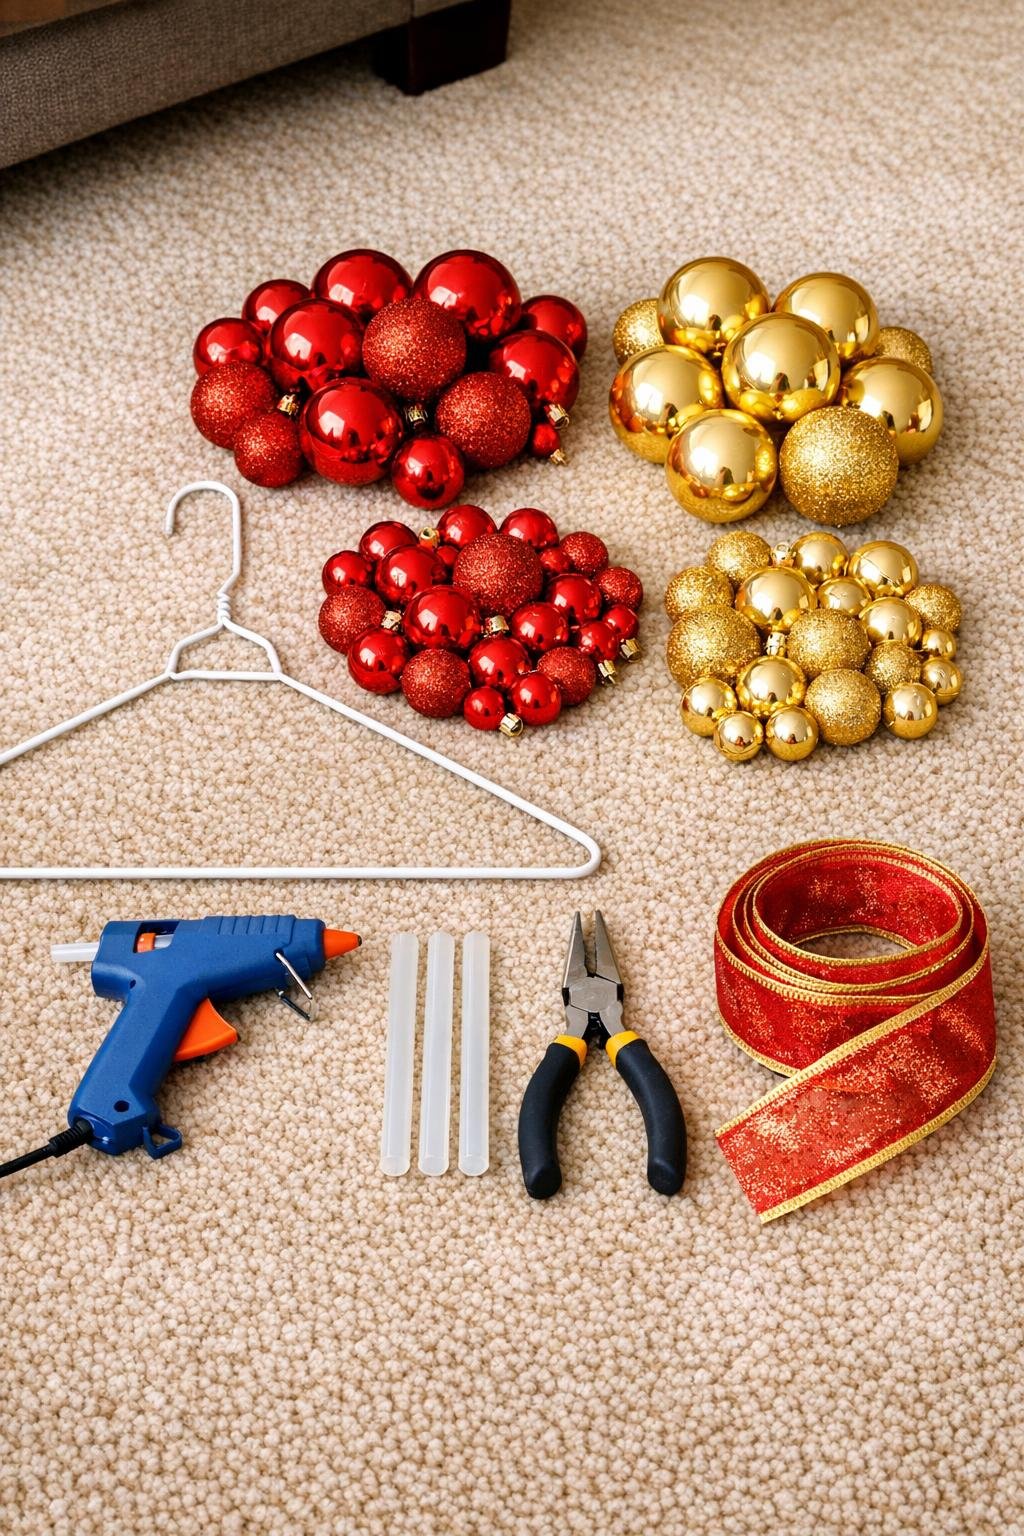
Materials
Instructions
1. Sort the ornaments by size and color, and set aside any with loose caps. Before you thread a single ball, hot glue every ornament cap to its ball and let them cool completely; skipped caps are the classic reason this wreath falls apart mid-project.
2. Use the pliers to untwist the top of the wire hanger and open it fully. Bend the hanger into a rough circle, keeping the hook at the top so it can still be used for hanging later.
3. Start threading ornaments onto one open end of the hanger, alternating colors and mixing sizes as you go. Turn the balls in different directions so the shine and caps don’t all face the same way.
4. Keep packing the ornaments on more tightly than seems reasonable. That crowded fullness is exactly what makes the wreath look polished instead of sparse and homemade.
5. Pause every so often to lift the hanger and check for thin spots. Add small ornaments between larger ones and reposition a few balls if needed to fill visible gaps.
6. Continue until the circle looks overfilled and the ornaments nearly meet all the way around. Leave just enough space at the ends to twist the wire closed securely.
7. Re-twist the hanger ends together with the pliers, pulling the circle into a neater wreath shape as you close it. Tuck any sharp wire end inward so it won’t snag the ribbon or scratch the door.
8. Tie the ribbon into a full bow and place it over the twisted wire join at the top. Secure it with floral wire, a twist tie, or a small dab of hot glue if needed.
9. Fluff the bow, rotate a few ornaments for the best face-out arrangement, and check that the hook sits centered. Hang the wreath indoors or on a covered door where it won’t be exposed to harsh weather.

Variations & Tips
Color palette: Red and gold is classic, but I also like using silver and white for a frosty look or emerald and champagne for something a little more formal. Stick to two or three colors so the wreath looks intentional.
Budget tip: Buy mixed-size ornament tubs when possible, since this project depends on size variation to fill gaps well. Even with ribbon and glue, you can usually finish this for about $15, which is a fraction of many store versions.
Cap security: If there is one thing I would insist on after years of kitchen and craft shortcuts gone wrong, it is this: glue every cap before threading. It takes a few extra minutes and saves the whole wreath from unraveling when a cap pops off the wire.
Fullness matters: Don’t stop when it first looks “done.” The extra-packed look is what gives this wreath that expensive, designer feel.
Placement: Because ornament finishes can scratch or fade, this wreath is best indoors or on a covered front door. Avoid direct rain, strong wind, or full outdoor exposure.
Shape control: If the wreath looks slightly uneven after closing, gently press and rotate the ornaments before hanging. Once it is up, small adjustments make a surprisingly big difference.