
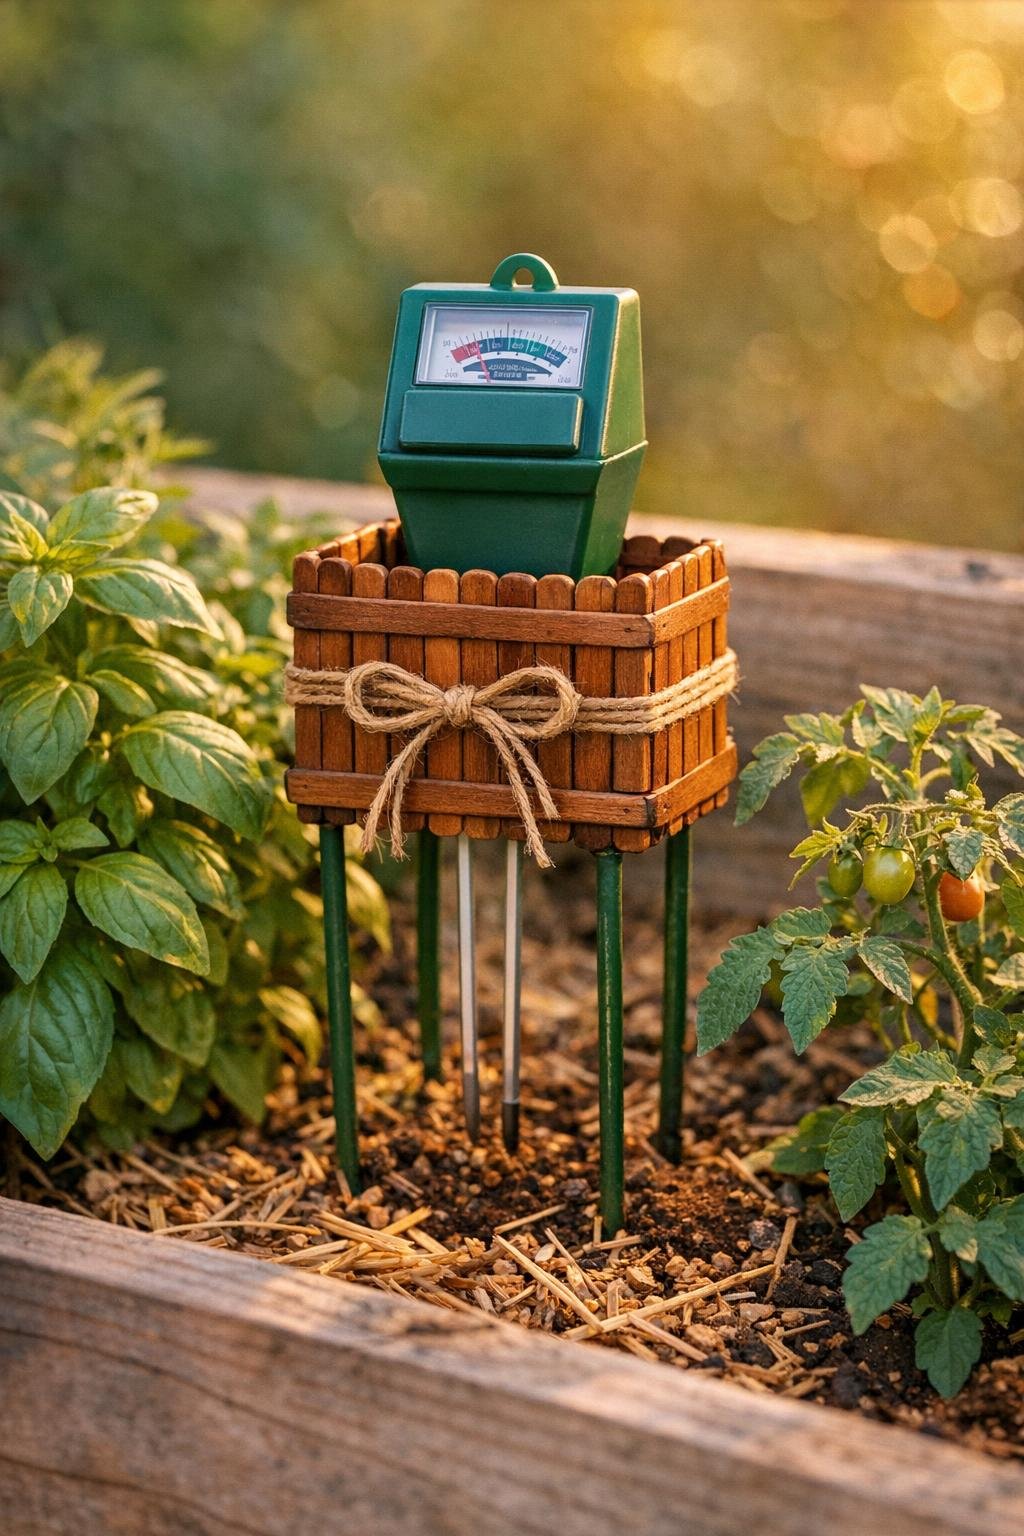
This little project turns baked wooden popsicle sticks and one everyday yard item into a tidy raised-bed moisture meter holder that looks charming instead of purely practical. I love projects like this because they solve a real problem—keeping a moisture meter upright, easy to spot, and not lost in the mulch—while still adding a handmade touch that makes the garden feel cared for.
If you like easy weekend projects and want something that looks sweet enough for neighbors to ask about, this is a good one. The baking step gives the sticks a warmer, aged color, and the finished holder is simple to build but looks polished tucked into a raised bed beside herbs, tomatoes, or flowers.
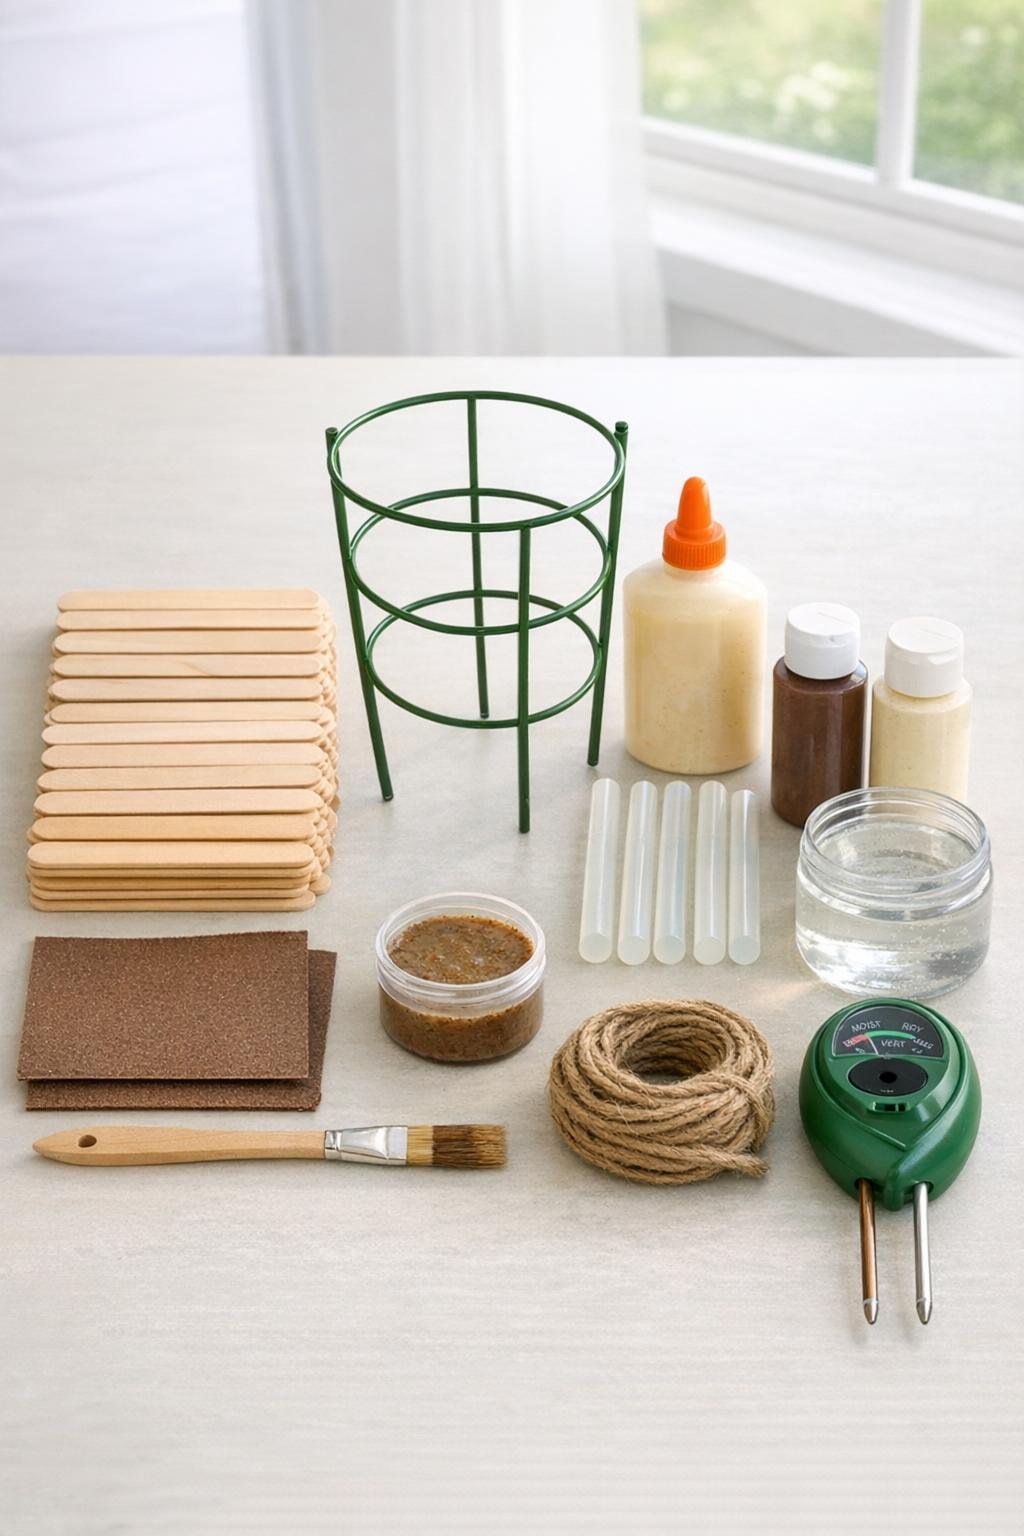
Materials
Instructions
1. Line a baking sheet with foil, spread out the popsicle sticks in a single layer, and bake them at 300°F for 12 to 18 minutes until they turn a warm honey-brown. Let them cool fully before handling so they stay flat and don’t smudge if any edges get slightly toasted.
2. Lightly sand both sides and the edges of the sticks to remove rough spots, then dry-brush a tiny bit of cream paint over a few areas if you want a soft weathered finish. Keep it subtle so the baked wood tone still shows through.
3. Cut one ring from the tomato cage along with its three attached legs, making a hoop with three stakes about 8 inches long. Trim the legs evenly so the holder will sit level when pushed into the raised bed.
4. Lay 12 sticks side by side with the long edges touching, then glue two horizontal sticks across the back to make one panel. Repeat to make a second matching panel, and let both panels set for 10 minutes.
5. Make the front and back of the holder by standing those two panels upright, then glue 5 sticks per side between them to create a box shape with an open top and open bottom. Leave the inner space just wide enough for the moisture meter to slide in without wobbling too much.
6. Test-fit the moisture meter inside the box and add one more stick as an interior stop near the lower back if needed to keep the meter standing at a nice visible height. This is the little step that makes it feel custom instead of floppy.
7. Glue the tomato cage ring to the lower outside of the holder so the three metal legs extend straight down as stakes, then reinforce each contact point with extra hot glue. Hold it still until the glue grips, and make sure the ring sits centered so the holder won’t lean.
8. Cover the tomato cage ring with a border of popsicle sticks glued vertically around the lower outside edge, using 8 to 10 sticks to hide most of the metal while still leaving the legs exposed below. This gives the piece a fuller, store-bought look while keeping the yard item recognizable and sturdy.
9. Wrap jute twine around the top edge and tie a simple bow or knot in front, then add the optional ribbon for a softer finished touch. Brush or spray on clear outdoor sealer and let it dry completely so the holder stands up better to watering and weather.
10. Push the three stake legs into the corner or side of your raised bed, slide the moisture meter into the holder, and adjust the depth until the face sits easy to read above the plants. If your soil is loose, press a little gravel around the stakes for extra stability.
Variations & Tips
For picky plant zones: If you grow a mix of thirsty and drier plants like I do, make two holders in slightly different finishes so you can tell at a glance which bed gets checked first. A darker dry-brushed finish looks especially nice in vegetable beds.
Best yard-item swap: If you do not have a tomato cage, you can use a similar ring-and-stake section from an old wire plant support, but keep the shape close to the same so the finished holder still looks balanced and sturdy.
Weather tip: Two thin coats of sealer last better than one heavy coat. I like to let the first coat dry fully before adding the second, especially if the holder will live in a bed that gets watered often.
Kid-helpful step: Children can help sand the baked sticks or hand you pieces for gluing, but I handle the cutting, baking, and hot glue myself. It keeps the project fun and moving along without stress.
Decorative finish: For a cottage-garden look, dab a little more cream paint on the edges after assembly and wipe most of it back off with a paper towel. It settles into the seams and makes the holder look nicely aged.
Fit tip: Always test the moisture meter before the glue fully sets on the box. Meters vary a bit, and a snug custom fit is what makes this simple project look surprisingly polished.