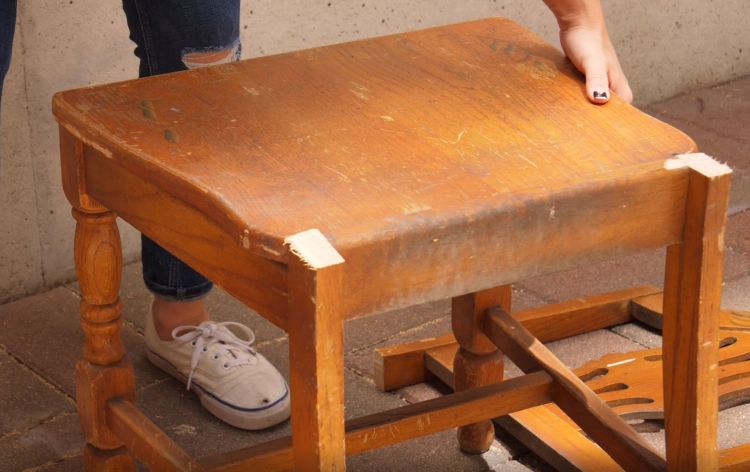
Drawn to nautical design aesthetics and beach house chic? This faux antique end table is a stylish addition to any sea lover’s living room or bedroom. It’s made out of an old chair and comes together in six simple steps, so anyone with a modest budget and an afternoon to spare can whip one up. Dig an old chair out of the attic, or keep your eyes peeled for a curbside find — the more beaten down, the better.
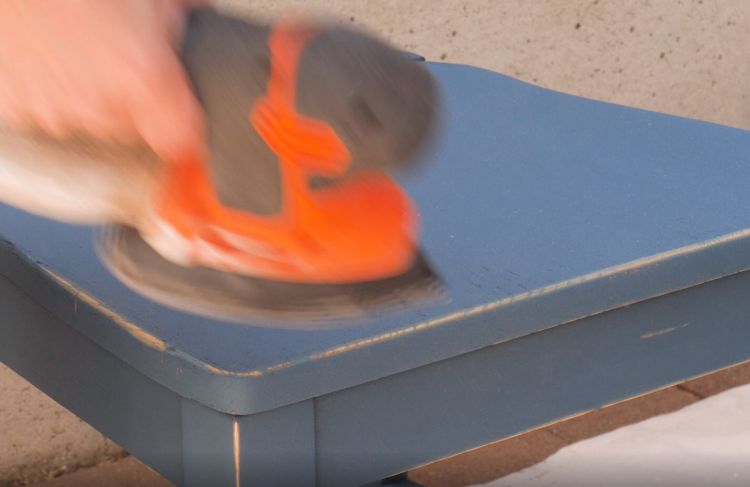
Every element of this end table lends itself to seaside style. Chalk paint in a dark blue-gray mirrors the moody coastline of New England, while the wax finish gives the table the look and feel of a weathered antique. Using an orbital finishing sander after painting and before waxing imparts a slightly distressed style that brings the whole table together. Top with a retro gas lantern and a few clothbound books for a look that befits a lighthouse cottage.
Materials
- An old chair
- Electric jigsaw
- Random orbit sander
- Medium-grit sanding block
- Hand towel
- Chalk paint, blue-gray
- Round paintbrush
- Orbital finishing sander
- FolkArt Home Decor Wax in Antiquing Wax
Instructions
Find an appropriate workplace and rest the chair on its side.

1. Use the electric jigsaw to remove the back from an old chair.

Discard the back, and keep the seat and legs of the chair.
2. Sand off the finish from the seat and legs. Use a random orbit sander for large surfaces, such as the seat.

Use a medium-grit sanding block for parts that have more nooks and crannies, such as the legs.

3. Wipe the chair down with a hand towel to remove the dust from sanding.

4. Paint the chair with the chalk paint.

Let it dry.

5. To give the end table a distressed look, pass the orbital finishing sander over the edges and corners of the chair. Distress as little or as much as desired.
6. Paint a section of the chair with the antiquing wax.

Wipe with the hand towel to remove excess product and leave a thin finish.

Repeat until the entire chair has been covered. Let it dry.
