Retired your elbow pads but not quite ready to say goodbye to your trusted boards? Turn your old skateboards into a modern coffee table that will be sure to keep your memories alive as you reminisce about your old ollies.
Not only is this project fairly easy to complete, but you'll also be able to show off your newfound carpenter skills the next time you invite your skater friends over; proving that not only did you once master the Caballeria, but you've mastered the art of DIY as well.
Materials
- Three standard size skateboards
- Electric drill
- Impact driver
- Two pieces of wood measuring 20 inches (50.8 cm) in length, and 2 inches (5 cm) wide
- Six metal screws
- Chalk marker
- Four wood round taper legs with hanger bolts
Instructions
1. Move one skateboard onto its side on your workspace, and remove the screws from the first wheel using your electric drill. Use the impact driver to remove the nuts underneath. Set all screws, nuts, and wheels aside. Repeat for the other wheel.
2. Put the four screws back into the holes you just removed them from on the underside of the skateboard. Add the nuts onto each screw, and secure the drills into place with the electric drill, and secure down the nuts with the impact driver. Repeat for the other side.
3. Repeat steps 1 and 2 for your other two skateboards.
4. Once you've completed steps 1 and 2 for all three skateboards, align the skateboards face-up on your workspace so the edge of the bottom of one skateboard touches the top of the next skateboard, and so on.
5. Take both wooden pieces and measure them so they fit evenly half way between the top of the first board and bottom of the third board, about 1/4 of the way in from each side.
6. With your drill, attach one long screw into the wooden piece and skateboard, making sure to attach three on the left side (one screw into each board), and three on the right.
7. Attach one hanger bolt that came with your wooden legs between the spaces on the top side of the skateboard where the wheels were once secured. You'll do this first by setting one hanger bolt into a wheel space and marking where the holes will be with your chalk marker.
8. Drill in the long screws into the hanger bolt (four screws per bolt). Repeat for the three other hanger bolts — and in doing so, the only skateboard that won't have a hanger bolt drilled in will be the middle skateboard.
9. Manually screw each wooden table leg into the hanger bolt clockwise until it is tight and secure.
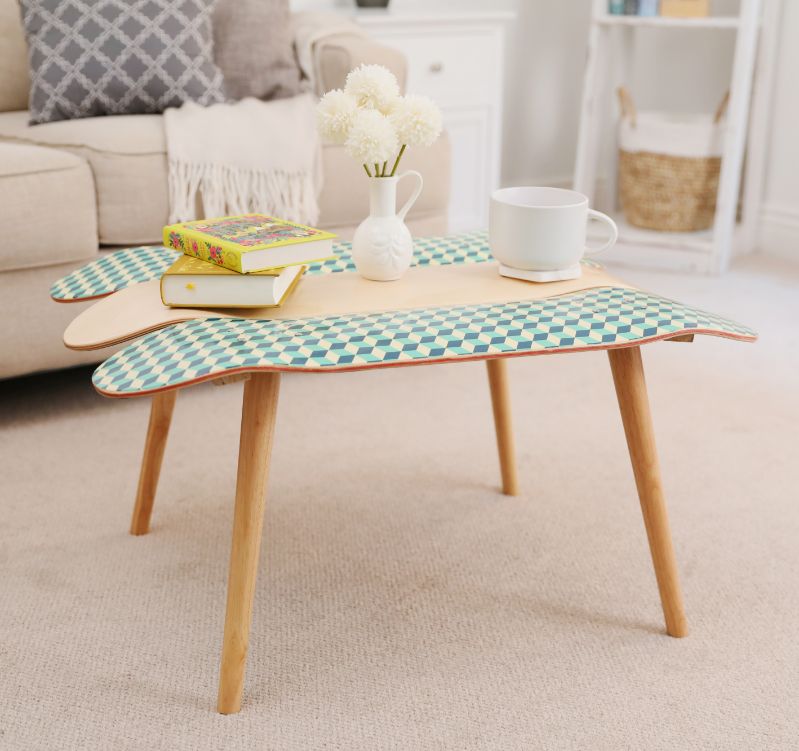
10. Flip your table over, and it's now ready to stack your favorite centerpiece and old skateboarding magazines on.