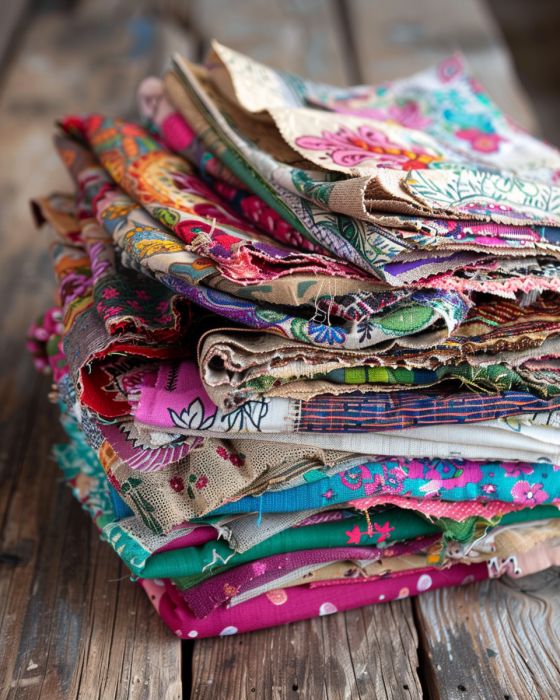
In a world where sustainability and personal touch in home decor have become increasingly valued, crafting a vibrant, patchwork DIY decor using fabric scraps is not only an eco-friendly project but also a delightful way to add a splash of color and uniqueness to any room. This type of project allows for personal expression and the reuse of materials that might otherwise go to waste, making it a purposeful endeavor for those looking to make their home feel more connected to their own stories and the broader narrative of sustainability.
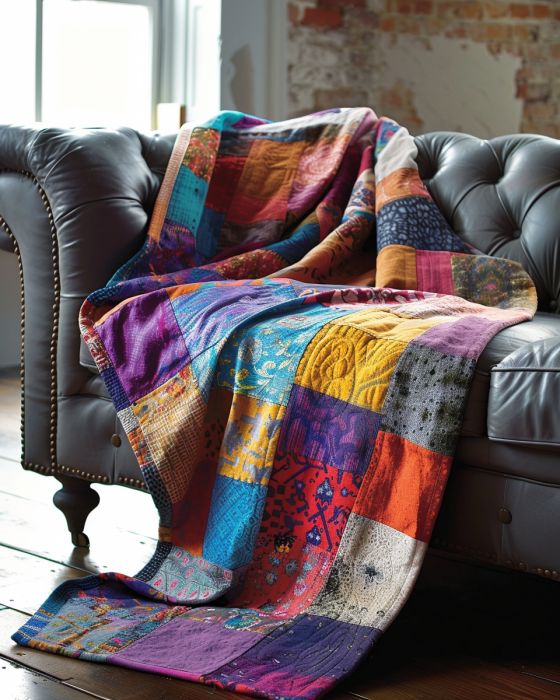
Given its eclectic and personalized nature, this patchwork DIY decor harmonizes well with a variety of interior design styles, from bohemian and rustic to modern minimalist, depending on the fabrics chosen. For a bohemian vibe, mix and match textures and colors. In a rustic setting, focus on muted tones and natural fabrics. For a modern, minimalist home, select a restrained color palette with geometric patterns. This decor piece can serve as a statement wall hanging, a cozy throw, or an eye-catching table runner, lending warmth and vibrancy to any space.
Vibrant Patchwork Decor
Materials
Fabric scraps in various colors and patterns
Sewing machine or needle and thread
Scissors
Straight pins
Iron and ironing board
Measuring tape or ruler
Fabric glue (optional for no-sew edges)
Backing fabric (size depends on the desired final product)
Batting material (optional, for quilted projects)
Directions
1. Gather your fabric scraps and sort them by color, pattern, or fabric type, depending on the desired final look.
2. Measure and cut your fabric scraps into desired shapes (squares, rectangles, triangles). Aim for uniform sizes to simplify the sewing process.
3. Lay out your cut pieces on a flat surface, creating the design or pattern you wish your patchwork to have.
4. Once satisfied with the layout, start pinning the pieces right sides together in small sections and sew using a ¼ inch seam allowance. Press the seams flat with an iron as you go.
5. Gradually sew all the sections together, pressing seams flat and checking the overall pattern to ensure it's coming together as planned.
6. If a quilt is being made, prepare your backing fabric and batting material by cutting them to the size of your completed patchwork top.
7. Lay the backing fabric face down, place the batting on top (if using), and then add your patchwork top face up. Pin all layers together, ensuring there are no wrinkles.
8. Sew all layers together, either by hand or using a machine, close to the edge of the patchwork. For additional durability and style, quilt through all layers in your preferred pattern.
9. Trim any excess from the edges and finish by sewing a binding around the entire edge or use fabric glue for a no-sew finish on non-quilted projects.
Variations & Tips
This DIY project is wonderfully adaptable. For a quicker, simpler version, use larger fabric pieces or opt for a no-sew approach by using fabric glue for the edges and skip the quilting steps. Experiment with different shapes such as hexagons or circles for a unique touch. Additionally, consider incorporating embellishments like buttons, beads, or embroidery to your patchwork for an even more personalized piece. These variations not only add to the visual appeal but also allow for further customization to match any home decor style.