Creating a whimsical and enchanting front yard has never been easier with this DIY glowing mushroom garden light project. Inspired by the charming world of fairy tales, this project transforms ordinary stainless steel bowls into captivating mushroom lights that add a magical glow to any garden space. The use of affordable materials and simple techniques makes it accessible for anyone looking to enhance their outdoor ambiance.
These glowing mushroom garden lights can be styled in various ways to complement different garden aesthetics. For a rustic look, place them among natural foliage or along a winding garden path. The warm LED lights will create a cozy atmosphere perfect for evening gatherings. Alternatively, use them as focal points in a minimalist garden, where their vibrant red caps and glowing presence will stand out beautifully against a backdrop of green grass or gravel.
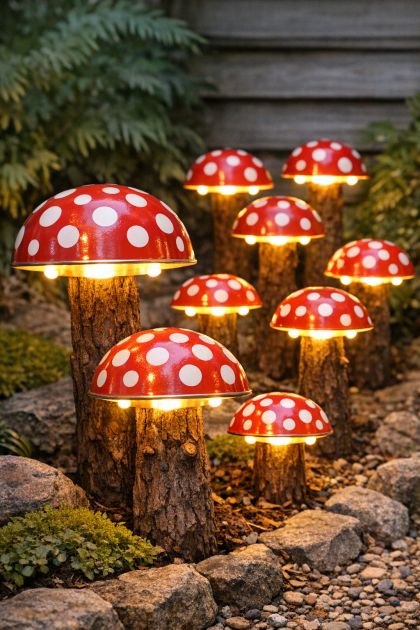
Glowing Mushroom Garden Lights
Materials
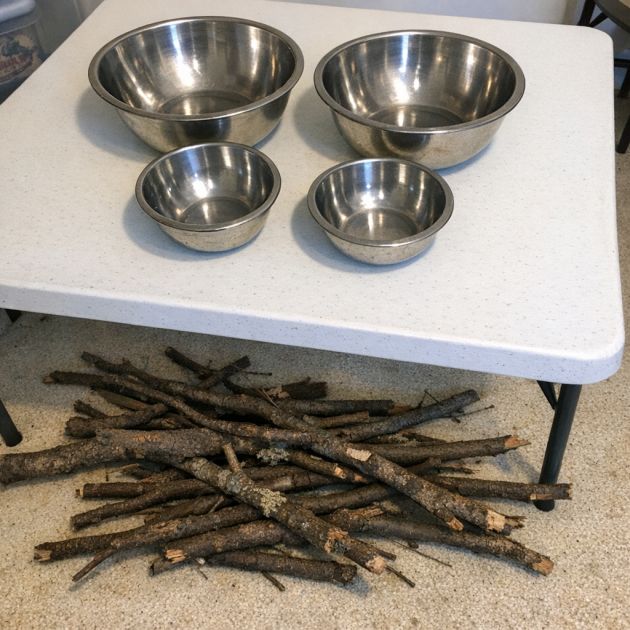
12 stainless steel bowls (8-10 inches in diameter)
Red spray paint suitable for metal
White acrylic paint
Paintbrush
Thick brown tree branches (sturdy enough to hold the bowls)
Warm white LED puck lights or strip lights
Hot glue gun and glue sticks
Sandpaper (optional for roughening the surface of bowls)
Directions
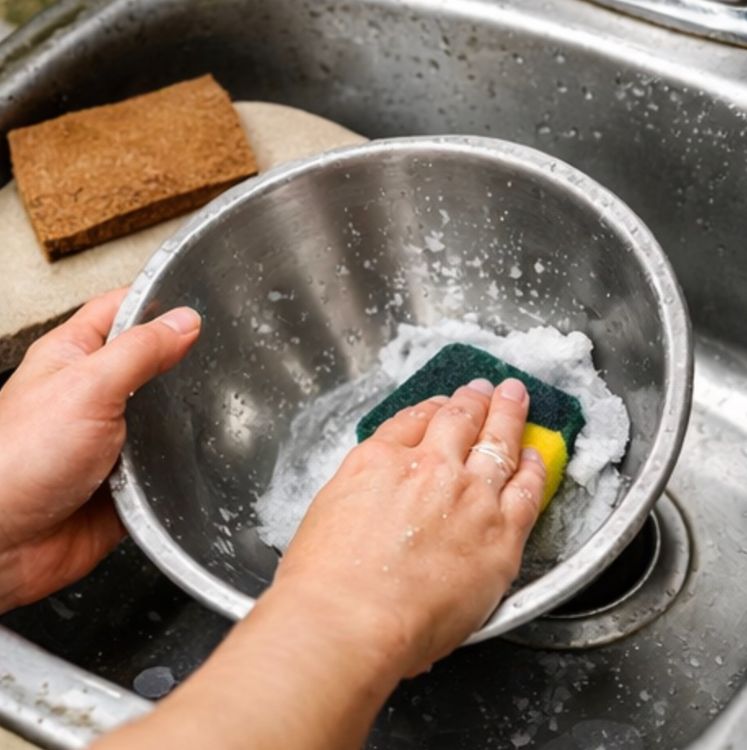
Begin by preparing the stainless steel bowls. Clean them thoroughly and, if necessary, use sandpaper to roughen the surface slightly to ensure better paint adhesion.
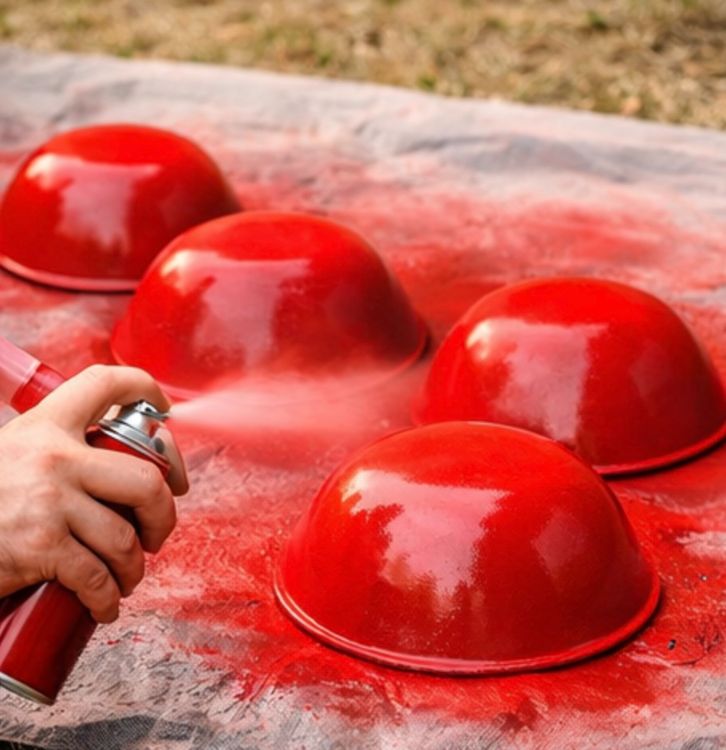
Spray-paint the outside of each bowl with red spray paint. Apply multiple thin coats for an even finish, allowing each coat to dry completely before applying the next.
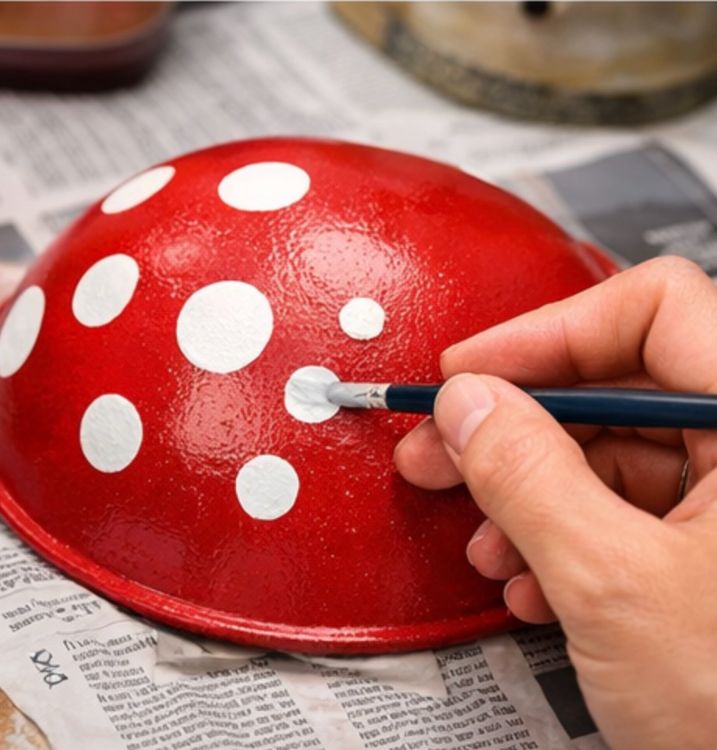
Once the red paint is dry, use a paintbrush to create white dots on the domed side of each bowl to mimic the appearance of a mushroom cap. Vary the size and placement of the dots for a natural look.
Select sturdy tree branches that will serve as the stems of your mushrooms. Make sure they are strong enough to support the weight of the bowls.
Attach the bowls to the branches using a hot glue gun. Position the bowl so that the open side faces down, resembling a mushroom cap.
Place warm white LED lights underneath each bowl, ensuring they are secure and will not fall out. If using puck lights, attach them to the inside of the bowl with adhesive or additional glue.
Position your completed mushroom lights in your desired garden location, ensuring they are stable and the lights can be easily turned on and off.
Variations & Tips
To personalize this DIY project, consider using different colors for the mushroom caps, such as blue or yellow, for a unique twist. You can also experiment with different types of lights, such as solar-powered LEDs, to make the installation more eco-friendly. For a larger display, vary the sizes of the bowls and branches to create a more dynamic landscape. Additionally, using metallic paints or adding a glossy finish can give the mushrooms a more modern, sleek look.