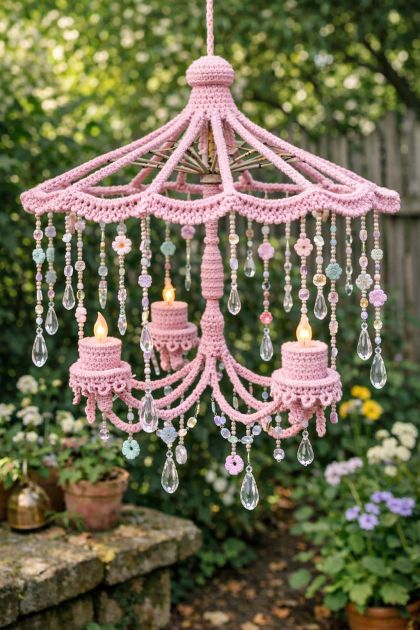
Transform an old metal umbrella frame into a whimsical outdoor garden chandelier using pastel pink acrylic yarn and crochet techniques. This unique DIY project not only recycles materials but also adds a touch of charm and elegance to your garden or patio. By wrapping the frame with soft, pastel-hued yarn, you create a focal point that combines functionality with artistic flair. Perfect for those who enjoy crafting and want to bring a handmade touch to their outdoor spaces.
Incorporate this crochet chandelier into a garden setting where soft lighting can enhance the ambiance. Pair it with fairy lights or LED candles to create a magical atmosphere during evening gatherings. The pastel pink color complements natural surroundings and can be matched with other pastel-colored outdoor decor, such as cushions, tablecloths, or garden sculptures. Consider hanging it from a pergola or a sturdy tree branch to maximize its visual impact.
DIY Crochet Whimsical Outdoor Garden Chandelier
Materials
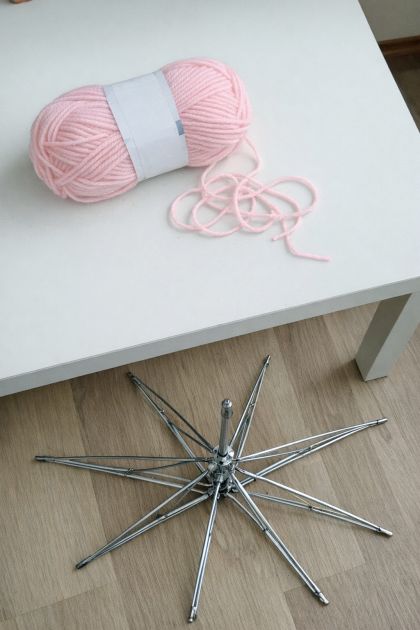
Stripped metal umbrella frame
Pastel pink acrylic yarn (approximately 300 yards)
Size H/8 (5 mm) crochet hook
Scissors
Measuring tape
Yarn needle
Clear drying glue (optional for securing ends)
Directions
Begin by measuring the circumference of the umbrella frame ribs. This will help guide how much yarn you'll need for each section.
Attach the yarn to the base of one rib using a slip knot.
Using the crochet hook, start crocheting a single crochet stitch around the rib, ensuring the yarn is tightly wound. Continue up the length of the rib.
Secure the end of the yarn with a knot once you reach the top of the rib. Use a yarn needle to weave in the ends for a neat finish. Optionally, apply a dot of clear glue to secure the end further.
Repeat steps 2-4 for each rib of the umbrella frame, ensuring an even coverage across all sections.
For the central hub of the umbrella, crochet a circle using the magic ring technique: Make a magic ring, then crochet 6 single crochets into the ring. Pull to tighten and slip stitch to close the ring.
Continue crocheting in rounds, increasing evenly to fit the hub's diameter: Round 2: 2 single crochets in each stitch around. Round 3: *1 single crochet, 2 single crochets in next stitch*, repeat around.
Attach this crocheted circle to the hub using the yarn needle, ensuring it is centered and secure.
Add decorative touches by creating crochet flowers or tassels in the same or complementary yarn colors. Attach these to the edges of the ribs or around the hub for added whimsy.
Hang the finished chandelier in your desired outdoor location, ensuring it is securely fastened to prevent movement during windy conditions.
Variations & Tips
For a different look, consider using multiple colors of yarn to create a striped or gradient effect. You can also experiment with different types of yarn, such as cotton or wool, for varied textures. If you prefer a sturdier structure, use a thicker yarn or double up on the strands as you crochet. To add more light, incorporate small LED fairy lights into the design by weaving them between the crochet work. This will create a stunning illuminated effect, especially during nighttime.