In the ever-evolving world of home crafts, wooden crates and fabric scraps have emerged as the latest trend. Transforming these simple materials into a functional, stylish rolling craft supply cart is not only a practical solution for organizing craft supplies but also a personalized statement piece for any craft room. This DIY project empowers crafters to repurpose everyday items into a mobile storage solution, enhancing both creativity and functionality in their workspace.
The finished wooden crate rolling craft supply cart can serve as a vibrant addition to your craft room or living space. Style it with bright, colorful fabric scraps that complement the room's decor, adding a pop of color to neutral or earthy-toned spaces. Position it near a work desk for easy access to supplies, or use it as an accent piece against a plain wall. The natural wood texture of the crates can be left as is for a rustic charm or painted for a more polished look. Pair it with other wooden or metal accents in the room to create a cohesive aesthetic.
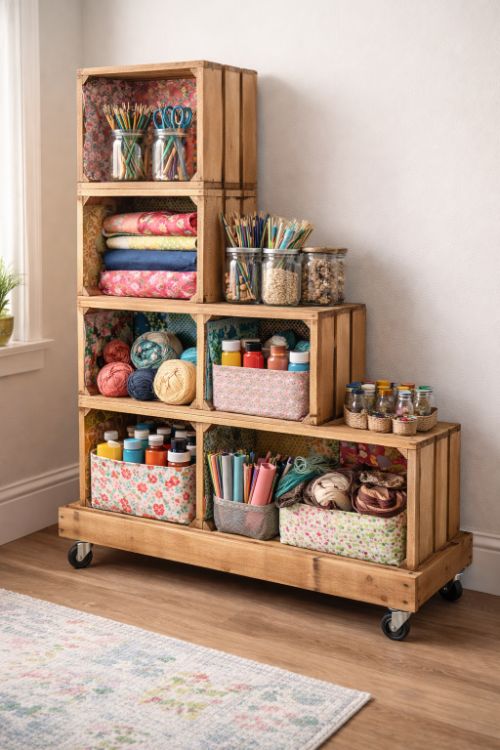
Wooden Crate Rolling Craft Supply Cart

Materials
7 wooden crates (approximately 12x12 inches each)
4 caster wheels
1 wooden base board (48x12 inches)
Screws and screwdriver
Drill
Sandpaper
Fabric scraps (variety of colors and patterns)
Staple gun
Wood glue
Directions
Sand each of the wooden crates to remove any rough edges.
Attach four crates horizontally on the wooden base board using screws and wood glue to ensure stability.
Stack the remaining three crates vertically on top of the horizontal row, securing them with screws and wood glue.
Attach the caster wheels to the bottom of the wooden base board for mobility.
Use the staple gun to attach fabric scraps to the interior sides of each crate, creating a colorful lining.
Ensure all screws are tightened, and the structure is stable before loading it with craft supplies.
Position the cart in your desired location and enjoy your new rolling craft supply organizer.
Variations & Tips
For a personalized twist, consider painting the wooden crates in a color that coordinates with your existing room decor before assembling the cart. You could also add hooks or small rods to the sides of the crates for hanging tools or ribbons. For added functionality, include a small handle on one side of the cart to make it easier to move around. If you require additional storage, attach a small wooden shelf on the top surface of the vertical crate stack.