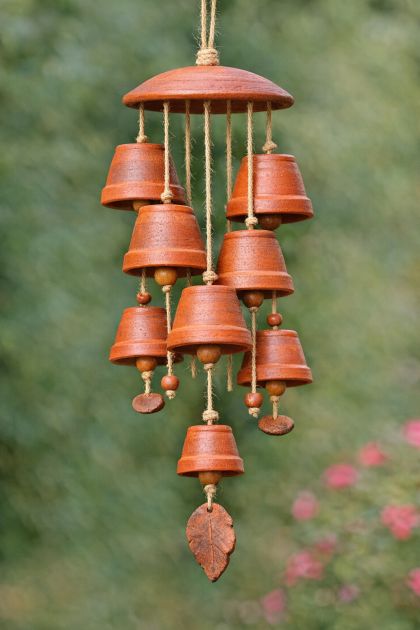
Creating a terra cotta pot wind chime is a unique way to repurpose old pots while adding a charming element to your outdoor space. This DIY project not only breathes new life into unused materials but also provides a delightful auditory experience when the wind passes through. Perfect for garden enthusiasts or anyone looking to add a personal touch to their porch or patio, this wind chime is both functional and aesthetically pleasing.
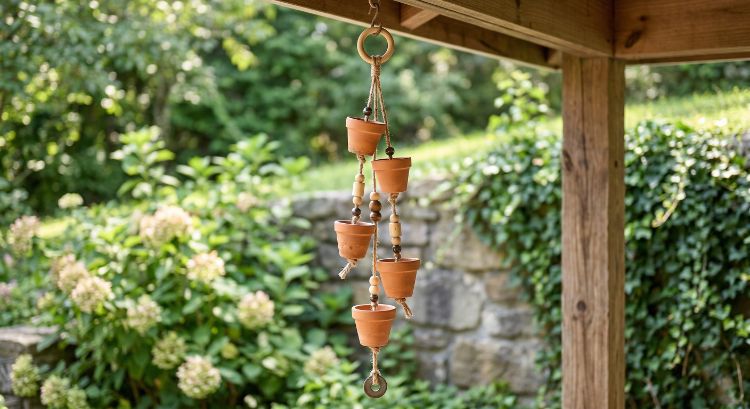
The finished wind chime can be styled in various outdoor settings such as hanging from a porch ceiling, a garden arbor, or a tree branch. Its natural earthy tones complement lush greenery and bright floral arrangements. For a cohesive look, pair it with other rustic or bohemian decor elements like woven baskets, macramé plant hangers, or wooden garden furniture. The terra cotta's warm hues work well with both neutral and vibrant color palettes, enhancing the overall aesthetic of any outdoor area.
Terra Cotta Pot Wind Chime
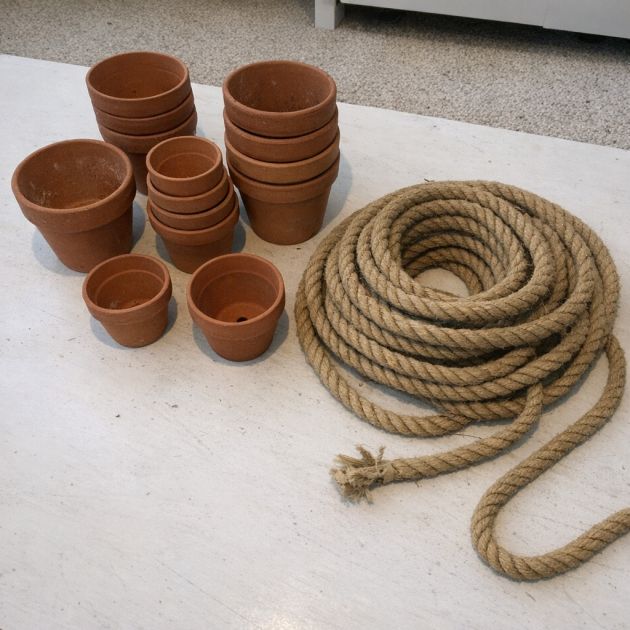
Materials
7 small terra cotta pots (approximately 4 inches in diameter)
1 hand-held electric drill with a ceramic drill bit
1 roll of durable twine or nylon string
1 wooden ring (3 inches in diameter)
1 metal washer (1 inch in diameter)
Decorative beads (optional, for embellishment)
Clear sealant spray (optional, for weatherproofing)
Directions
Start by placing a small piece of masking tape over the center of the bottom of each terra cotta pot to prevent the drill from slipping.
Using the electric drill with a ceramic drill bit, carefully drill a hole through the center of the bottom of each pot.
Cut a length of twine or nylon string approximately 6 feet long. This will be used to string the pots together.
Tie one end of the string to the wooden ring, ensuring it is secure. This ring will serve as the top from which the wind chime hangs.
Thread the string through the hole of the first pot, starting from the inside of the pot. Add a decorative bead below the pot on the string, if desired.
Continue threading the string through each pot, alternating with beads if using them, until all pots are strung.
Once all pots are in place, tie the metal washer at the bottom of the string to provide weight and help the pots move in the wind.
Adjust the spacing between the pots to your liking, then secure the string with knots above and below each pot to maintain the spacing.
If desired, spray the pots with a clear sealant to protect them from weather elements.
Hang the completed wind chime in your desired location and enjoy the gentle clinking sound it produces.
Variations & Tips
For a personalized touch, consider painting the pots with weather-resistant acrylic paints in patterns or colors that match your outdoor decor. You can also experiment with different types of string or wire, such as jute or fishing line, to alter the visual texture and durability. Adding small bells or charms alongside the beads can enhance the auditory element of the wind chime. Alternatively, use larger pots for a more dramatic visual impact, but ensure the string is strong enough to support the additional weight.