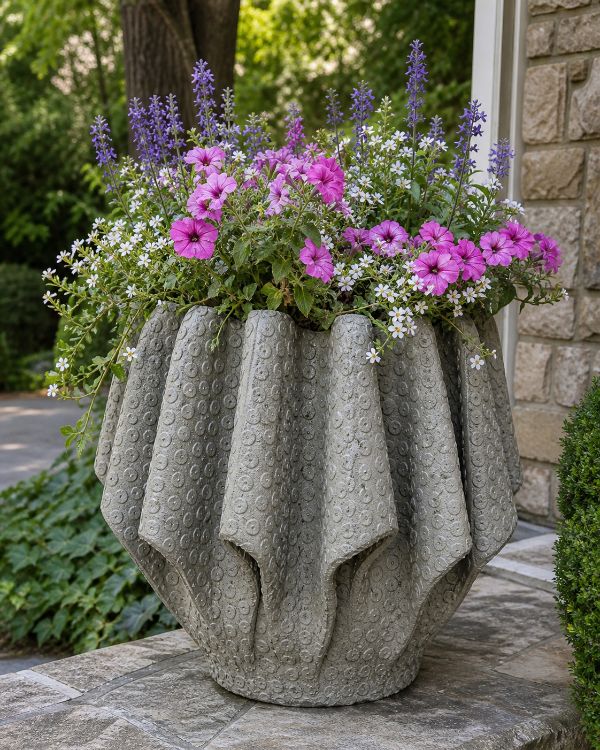
Transform your front yard with these DIY rustic faux-stone fluted garden urns, made by creatively using inexpensive rubber bath mats and concrete. This project is perfect for adding a touch of elegance and unique character to your garden or entryway. By utilizing everyday materials in an innovative way, you can create stunning garden features that mimic the look of carved stone without the high cost.
Place the finished urns flanking your front steps or as focal points in your garden. Their neutral, stone-like appearance pairs beautifully with both traditional and modern landscapes. Coordinate with greenery or seasonal flowers to enhance the urns' rustic charm. Their textured surfaces add depth and interest, making them a versatile addition to any outdoor space.
Rustic Faux-Stone Fluted Garden Urns
Materials
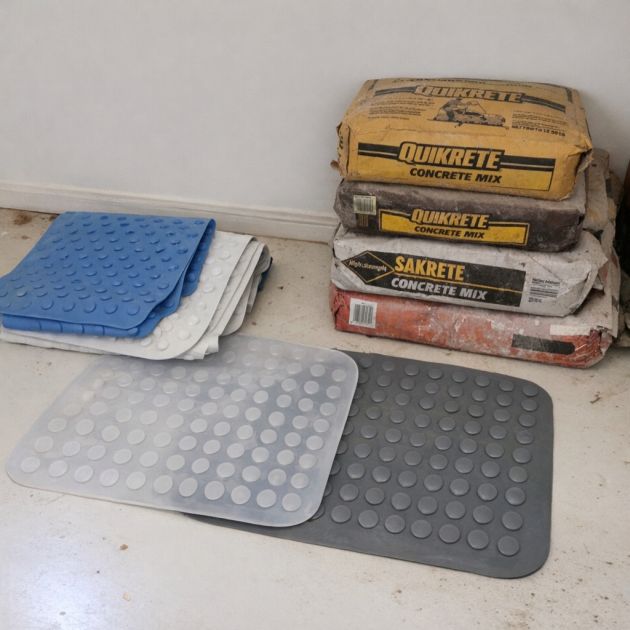
30 cheap rubber bath mats
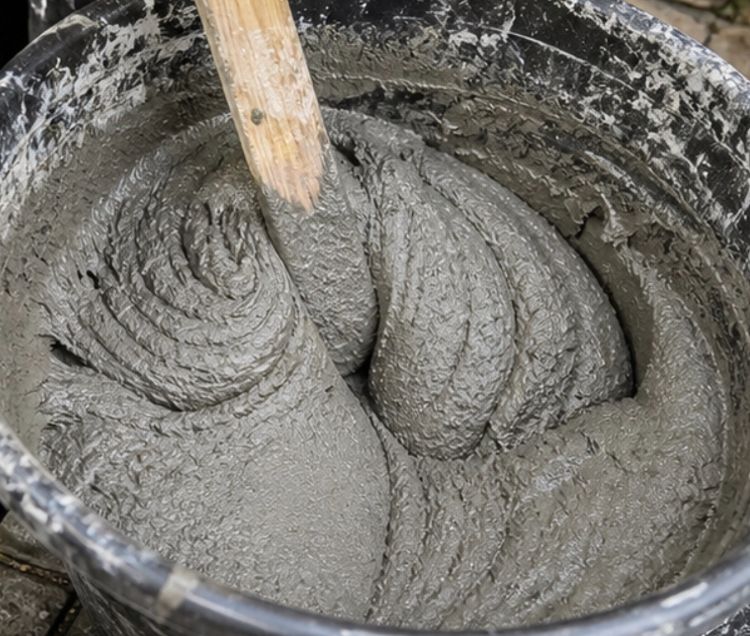
Heavy liquid concrete mixture (enough to cover mats)
Large bucket or tub for mixing concrete
Protective gloves
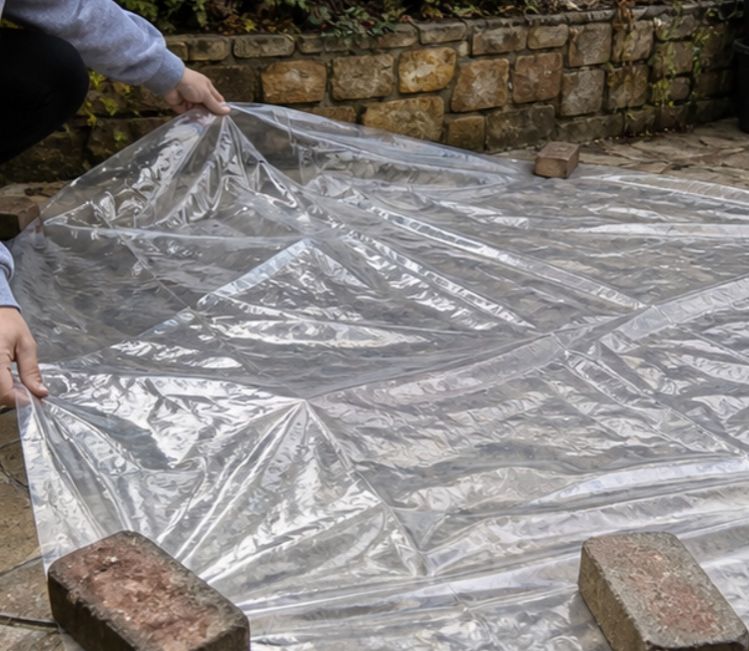
Plastic sheeting or tarp
Paintbrush (optional for texturing)
Directions
1. Lay out plastic sheeting or tarp to protect your work area from concrete splatters.
2. Mix the heavy liquid concrete in a large bucket or tub according to the manufacturer's instructions until it reaches a thick, pourable consistency.
3. Take one rubber bath mat at a time, submerge it completely into the concrete mixture, ensuring it's fully coated.
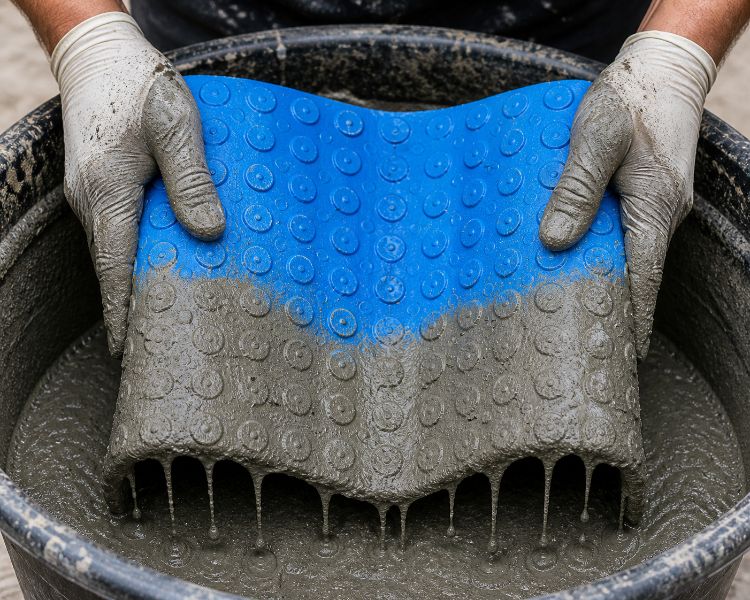
4. Remove the mat, allowing excess concrete to drip off, and drape it over a form to create the desired fluted urn shape. Use objects like overturned buckets or large pots as molds.
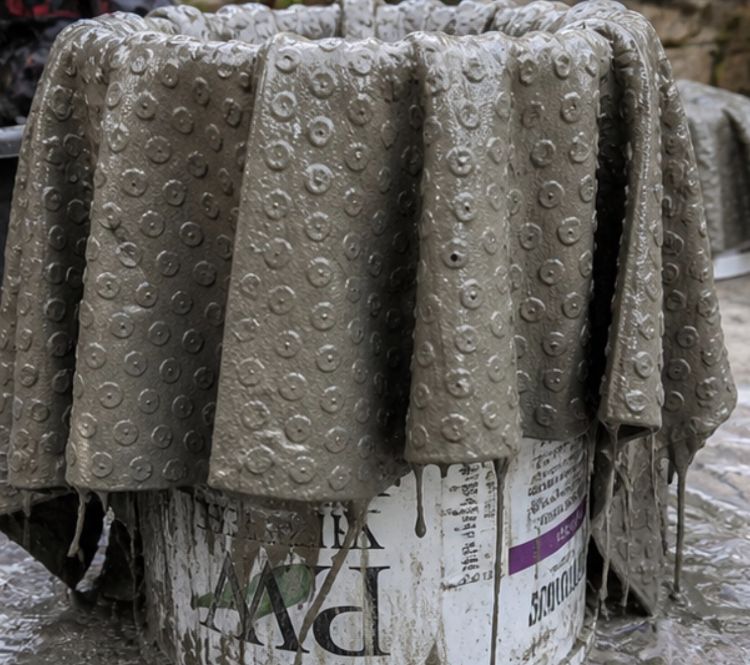
5. Repeat the process with all 30 mats, layering and shaping them as needed to form the urn structure. Allow each layer to partially dry before adding the next to ensure stability.
6. Once the urn shape is complete, let it dry and cure for at least 24-48 hours, or as recommended for the concrete mix used.
7. If desired, use a paintbrush to add additional texture or details to the surface before the concrete fully cures.
8. Once fully dry, position the urn in your chosen outdoor location, ensuring it's secure and stable.
Variations & Tips
For a different look, experiment with colored concrete mixes to match your home's exterior or garden theme. You can also vary the height and width of the urns by using different molds or forms as bases, creating a set of urns in varying sizes for visual interest. Adding embellishments like mosaic tiles or embedded stones to the surface of the concrete before it cures can further personalize the urns, enhancing their decorative appeal while maintaining the core structure of the DIY.