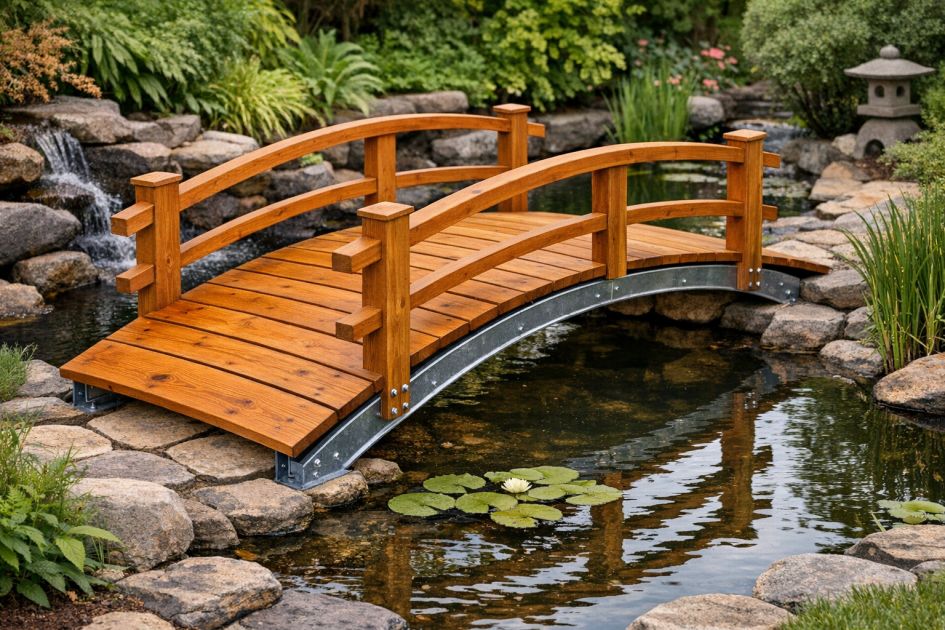
Creating a pond bridge in your backyard can transform the space into a serene retreat reminiscent of a luxurious resort. This project not only enhances the visual appeal of your garden or yard but also provides a functional and charming walkway over a pond, connecting different areas of your outdoor space seamlessly. By using durable cedar planks and a sturdy galvanized steel frame, this bridge is built to last, bringing both beauty and practicality to your home landscape.
This DIY pond bridge suits a variety of outdoor styles, from rustic gardens to modern minimalist landscapes. The natural honey-stained cedar harmonizes with earthy tones and greenery, making it an excellent fit for naturalistic and Japanese-inspired gardens. Its sleek, arched design also complements contemporary settings, adding a touch of elegance and structure. Pair with surrounding stone pathways, lush plants, and water features for a cohesive backyard design.
Arched Cedar Pond Bridge
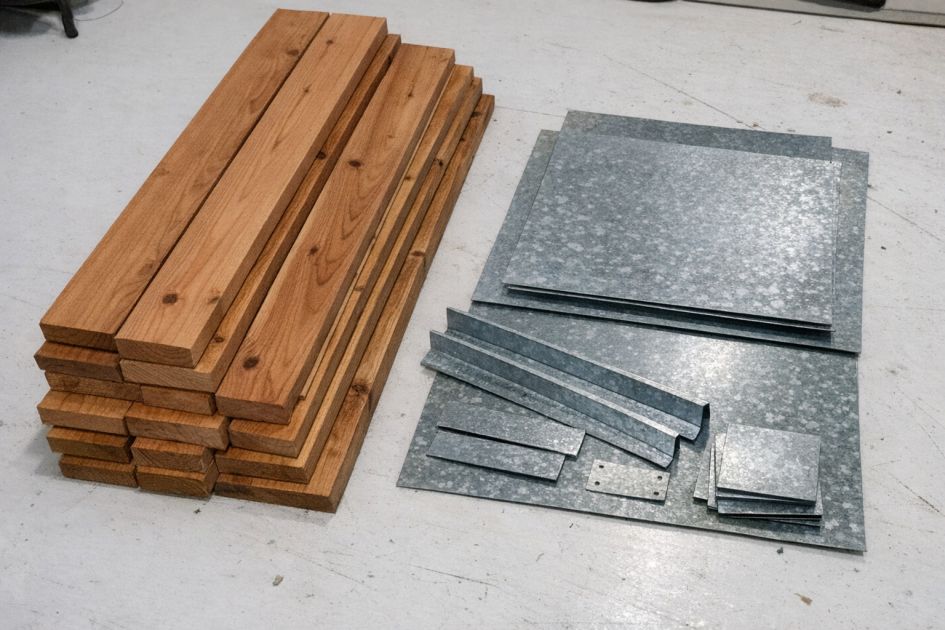
Materials
Cedar planks, 2x6 inches, honey-stained, quantity: 12
Galvanized steel frame, arched, pre-fabricated, size: 6 feet long, 3 feet wide
Galvanized steel screws, 2 inches, quantity: 50
Electric drill with screwdriver bit
Saw (if adjustments to plank length are needed)
Sandpaper, medium grit
Wood sealer for outdoor use
Paintbrush or roller for sealer application
Measuring tape
Protective gloves
Directions
1. Measure the width of the steel frame and cut the cedar planks to fit, if necessary, ensuring each plank can be laid across the frame with a slight overhang on each side.
2. Sand the edges and surfaces of the cedar planks to remove any rough spots and ensure a smooth finish.
3. Apply a coat of wood sealer on each plank using a paintbrush or roller to protect the wood from moisture and UV damage. Allow to dry completely.
4. Begin attaching the cedar planks to the steel frame, starting from one end. Use the electric drill to drive galvanized screws through the planks into the frame at regular intervals for secure attachment.
5. Continue laying the planks, ensuring even spacing and alignment, until the entire frame is covered.
6. Inspect the bridge for any loose screws or uneven planks and make adjustments as needed.
7. Position the completed bridge over your pond, ensuring it is stable and level. Adjust the placement as necessary for safety and aesthetics.
Variations & Tips
For a more rustic appearance, consider using reclaimed wood planks instead of new cedar. Alternatively, for a more contemporary look, opt for composite decking materials that offer enhanced durability and a variety of color options. To further personalize the bridge, add decorative railings or incorporate solar-powered lighting along the edges for a captivating nighttime effect. Regular maintenance, such as resealing the wood and checking the structural integrity, will ensure the bridge remains a stunning and functional feature for years to come.