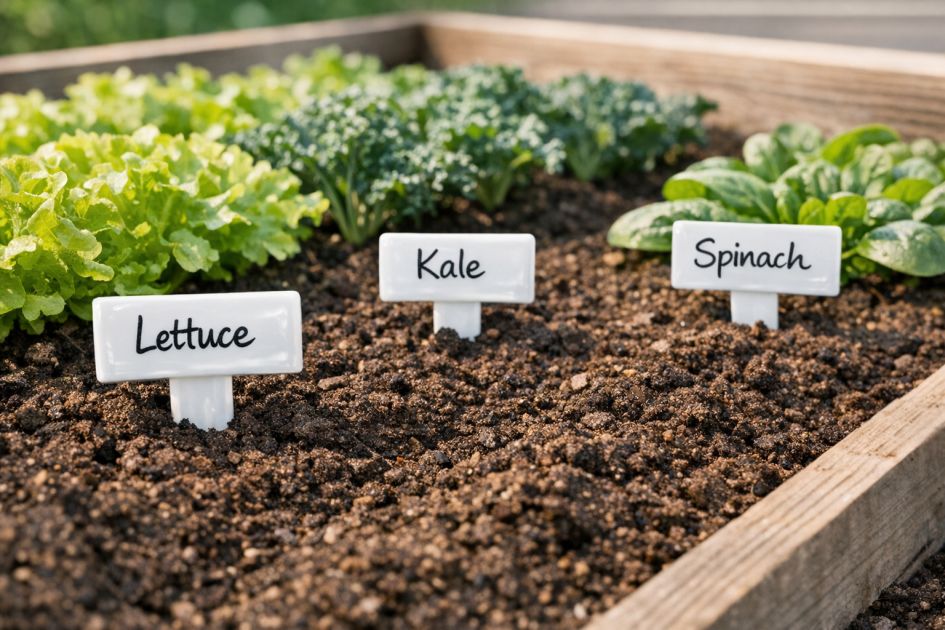
In the world of gardening, labeling plants is essential for organization and successful cultivation. Instead of purchasing expensive plant labels, use melted white plastic grocery bags to create flexible, durable plant labels. These DIY labels are not only cost-effective but also environmentally friendly, offering a creative way to repurpose plastic waste. Ideal for seasonal gardeners or perennial enthusiasts, these labels withstand weather elements while ensuring your garden remains well-organized and aesthetically pleasing.
These flexible plant labels integrate seamlessly into various garden styles, from modern to rustic. They're perfect for labeling vegetables in raised beds, herbs in containers, or flowers along borders. Their minimalist design complements a contemporary garden while their eco-friendly nature aligns with a more rustic or cottage-style setting. Use them to label seasonal crops like tomatoes and basil, or perennial flowers such as peonies and roses, ensuring each plant is identified accurately.
Flexible Plant Labels from Melted Plastic Bags
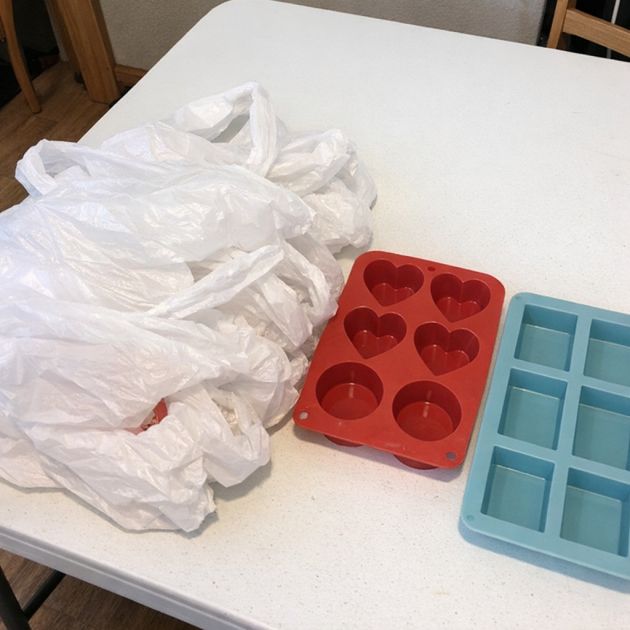
Materials
White plastic grocery bags (5-10 depending on size)
Small rectangular silicone molds
Protective gloves (for handling melted plastic)
Blue tarp (to cover work surface)
Directions
1. Lay the blue tarp over your work surface to protect it from any spills or mess.
2. Cut the white plastic grocery bags into small pieces to facilitate even melting.
3. Preheat your oven to 300°F (150°C).
4. Fill the silicone molds with the cut pieces of plastic, packing them down lightly.
5. Place the filled molds onto a baking sheet and carefully put them in the oven.
6. Allow the plastic to melt for 10-15 minutes. Monitor closely to avoid over-melting.
7. Once melted, carefully remove the baking sheet from the oven using protective gloves.
8. Let the melted plastic cool slightly before pressing it firmly into the mold with your hands, ensuring a smooth, even finish.
9. Allow the plastic to cool completely and harden before removing from the molds.
10. Use a permanent marker to label each piece with the name of the plant and any additional information like planting date or care instructions.
Variations & Tips
Consider using colored plastic bags to create vibrant plant labels that stand out in the garden. For a more durable option, mix in a small amount of clear plastic packaging material, which can enhance the labels' strength. If gardening in a humid climate, apply a waterproof sealant over the written labels to prevent smudging. To adapt for specific plants, such as those with longer names or additional care details, create larger labels by using bigger silicone molds.