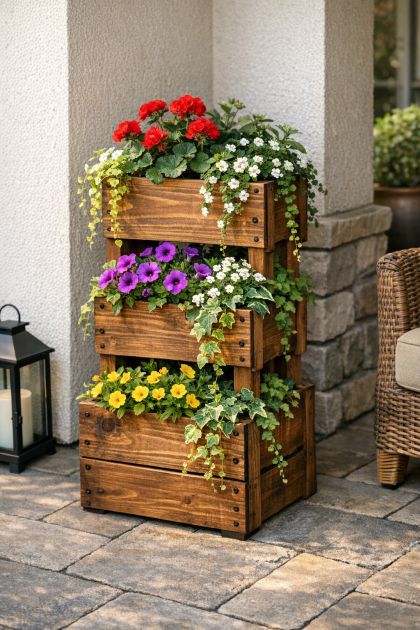
Transform ordinary wooden crates into a stunning vertical planter that not only saves space but also adds a rustic charm to your garden or home. This simple yet effective DIY project is perfect for those who love gardening and want to bring a touch of nature into their living space. By stacking and securing three wooden crates, you can create a unique planter that serves as a focal point while providing ample room for your favorite plants or herbs.
Place the vertical planter in a well-lit area such as a patio, balcony, or kitchen corner to maximize the aesthetic appeal. Coordinate the natural wood tones with green foliage or colorful blooms to enhance the rustic yet modern look. Integrate the planter with contemporary decor elements like metal accents or minimalist furniture to create a cohesive design. Consider using plants with trailing vines or vibrant flowers to add visual interest.
Vertical Wooden Crate Planter
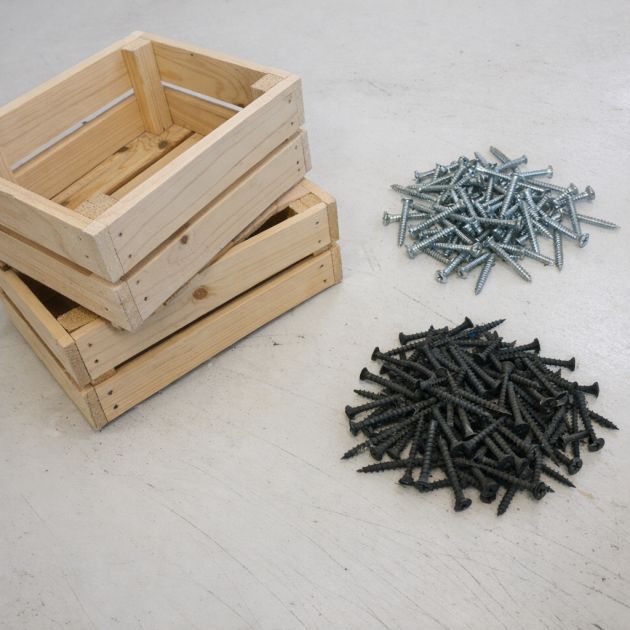
Materials
3 wooden crates (each approximately 12x18x9 inches)
1 drill with a wood drill bit
12 wood screws (1.5 inches)
Sandpaper (medium grit)
Wood stain or sealant (optional)
Paintbrush (optional)
Gardening fabric or plastic lining
Potting soil
Assorted plants or herbs
Directions
Sand each wooden crate to smooth out any rough edges or splinters.
Optionally, apply a wood stain or sealant to the crates to protect them from moisture and enhance their appearance. Allow to dry completely.
Drill four holes on the top edges of each crate (two on each side) to prepare for stacking and securing them together.
Align the crates vertically, ensuring each crate is oriented the same way, with the open side facing outward. Secure the crates together by drilling screws into the pre-drilled holes, connecting each crate to one another.
Line the interior of each crate with gardening fabric or plastic lining to retain soil and moisture.
Add potting soil to each lined crate, filling them to about three-quarters full.
Plant your chosen assortment of plants or herbs into the soil, ensuring they are spaced appropriately and have enough room to grow.
Variations & Tips
For a more colorful variation, paint the exterior of each crate in different pastel shades before assembling them. This can add a playful touch to your planter and complement a variety of garden designs. Alternatively, attach small caster wheels to the bottom crate for easy mobility, allowing you to reposition the planter as needed to catch the sunlight or bring it indoors during colder months. These adjustments maintain the integrity of the original design while enhancing its practicality and visual appeal.