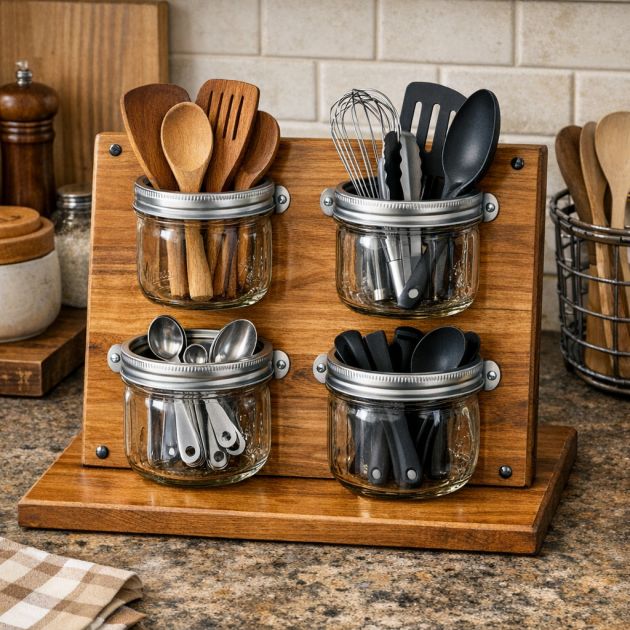
Repurposing old items not only gives them a new life but also adds unique functionality to your home. This DIY project transforms an old cutting board into a stylish and practical utensil station, perfect for organizing your kitchen essentials. By attaching jar lids to the board, you create a convenient and accessible storage solution that keeps utensils within arm's reach. This innovation not only declutters your space but also adds a touch of rustic charm to your kitchen decor.
The finished utensil station should be styled in a kitchen with a rustic or farmhouse theme. Place it on a countertop near the stove or prep area for easy access. Coordinate with wooden or natural-fiber kitchen accessories to enhance the warm, cozy aesthetic. Consider using mason jars with metallic or vintage-style lids to complement the cutting board's natural wood tones. For a cohesive look, pair with a kitchen backsplash in neutral or earth tones.
Jar Lid Cutting Board Utensil Station
Materials
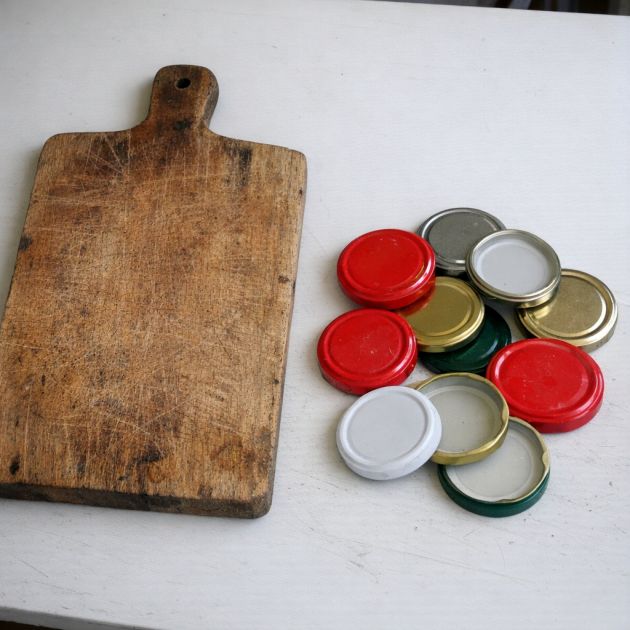
1 old wooden cutting board (approx. 12x18 inches)
4 mason jar lids (with bands, approximately 3 inches in diameter)
4 glass mason jars (to fit the lids)
8 screws (1 inch long)
Electric drill
Screwdriver
Sandpaper (medium grit)
Wood finish or mineral oil (optional, for board treatment)
Directions
Sand the surface of the cutting board to remove any rough spots and ensure it is clean and smooth.
Decide on the placement of the mason jar lids on the cutting board. Arrange them in a grid pattern, leaving equal space between each lid.
Using the electric drill, carefully drill two holes in each mason jar band, opposite each other, for securing them to the board.
Place each lid band on the board according to your arrangement. Use the screwdriver to insert and tighten screws through the drilled holes into the cutting board, securing each lid band in place.
If desired, apply a coat of wood finish or mineral oil to the cutting board for added protection and a polished look.
Once the board is ready, screw each mason jar into its corresponding lid band, ensuring they are securely attached.
Position the completed utensil station in your desired kitchen location and fill the jars with utensils, such as spatulas, whisks, or wooden spoons.
Variations & Tips
To customize this DIY, consider painting the cutting board with a chalkboard finish for labeling each jar's contents. Alternatively, use colored mason jars or lids for a pop of color that matches your kitchen's theme. For additional functionality, attach hooks to the bottom of the board for hanging measuring spoons or pot holders. These variations maintain the core structure of the utensil station while allowing for personal touches.