Transform your backyard into a summer oasis with a DIY outdoor shower that combines practicality with style. This project uses a simple garden hose threaded through a copper pipe frame to create a functional and refreshing outdoor shower. Ideal for cooling off on hot days or rinsing off after gardening or a swim, this shower is a perfect addition to any backyard. This DIY not only adds a touch of elegance and innovation to your outdoor space but also enhances your home's efficiency, making it a must-have for any homeowner who enjoys spending time outdoors.
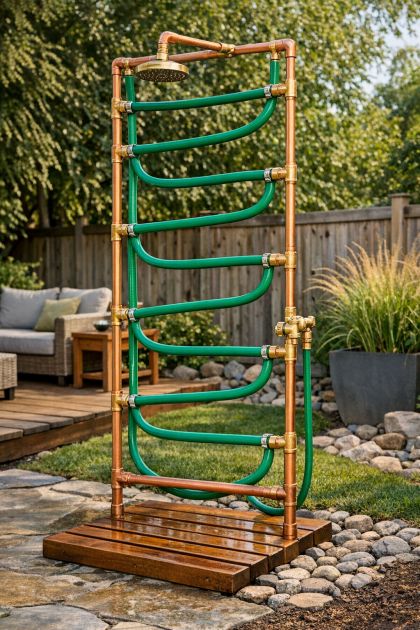
The finished DIY outdoor shower seamlessly fits into various backyard styles, from modern to rustic. Its sleek copper piping complements industrial and minimalist aesthetics, while the natural green of the garden hose adds a pop of color that blends well with lush gardens or wooden decks. Position this shower near a pool area or in a corner of your backyard for a chic and functional addition that does not disrupt the existing landscape. The shower's simplicity ensures it doesn't overpower the space, allowing it to integrate effortlessly into your outdoor environment.
Copper Frame Outdoor Shower with Garden Hose
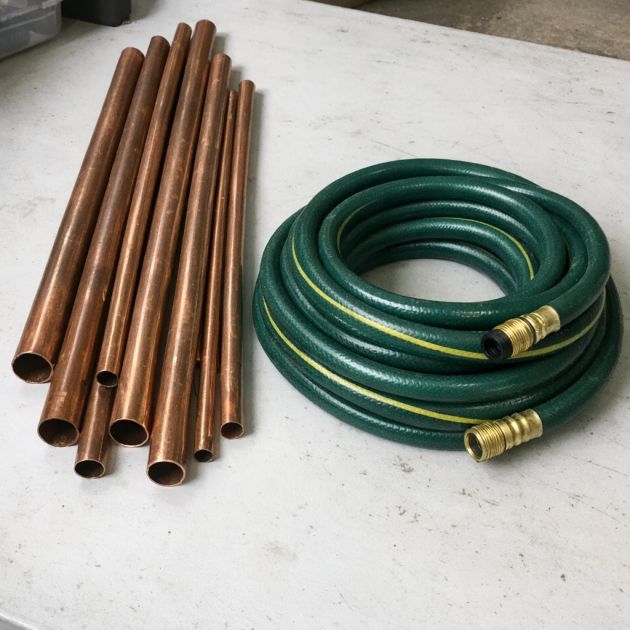
Materials
1 garden hose (standard green, 50 feet)
Copper pipes, 3/4 inch diameter (4 x 6-foot lengths)
Brass fittings for copper pipes
Copper pipe elbows (3 x 90-degree)
Pipe cutter
Pipe wrench
Drill with masonry bit
Anchor screws
Teflon tape
Hose clamps
Outdoor faucet adapter
Measuring tape
Level
Safety goggles
Work gloves
Directions
Measure and mark the area where you want to install the shower frame in your backyard.
Using the pipe cutter, cut two of the copper pipes into 3-foot sections for the base and two 6-foot sections for the vertical supports.
Attach the 90-degree copper pipe elbows to create a rectangular frame: connect two 3-foot sections with elbows at the bottom, attach the 6-foot vertical pipes to the top with the remaining elbows.
Drill holes into the ground or wall where you want to mount the frame, insert anchor screws to secure the frame firmly.
Wrap Teflon tape around the threads of the brass fittings, and attach them to the top of the frame's vertical pipes.
Thread the garden hose through the frame, starting from the bottom and extending it up and around the frame, securing it with hose clamps as you go.
Connect the garden hose to the outdoor faucet adapter, ensuring a tight fit to prevent leaks.
Use the level to ensure the frame is straight, adjusting as necessary.
Test the shower by turning on the water to check for leaks or adjustments.
Variations & Tips
For a more rustic look, consider using galvanized steel pipes instead of copper, which will develop a charming patina over time. To increase durability, apply a clear coat of outdoor sealant to the copper and brass fittings. For added comfort, install a wooden slat floor beneath the shower to provide a stable surface that drains water efficiently. Customize the shower by painting the copper pipes in a color that matches your outdoor décor or by wrapping the hose in weather-resistant fabric for a softer appearance. Consider adding a small shelf or hooks for towels and toiletries to enhance functionality.