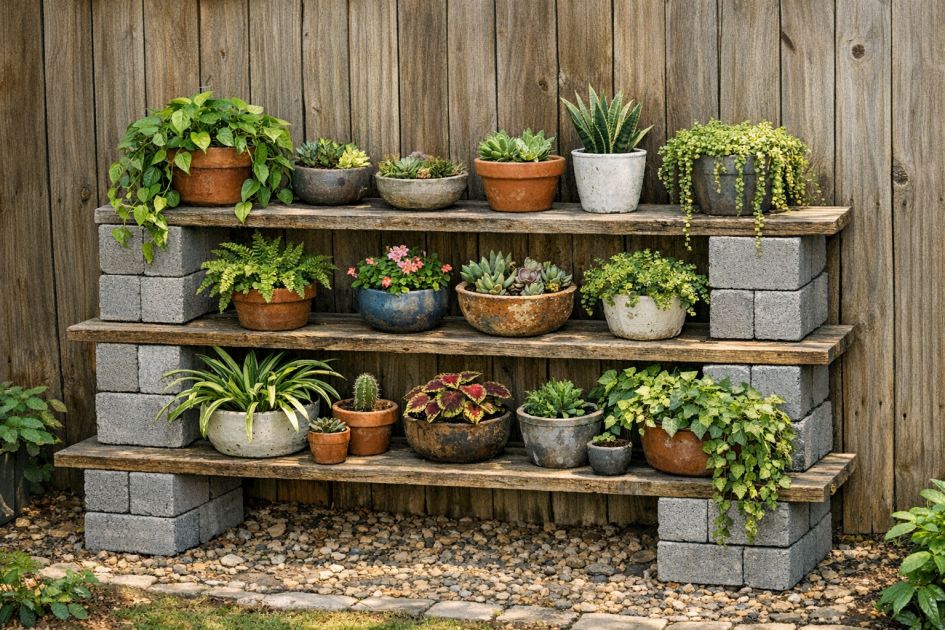
This DIY outdoor plant shelf project is a clever and practical way to organize and display your plants in the backyard. By using simple materials like gray cinder blocks and weathered wooden boards, you can create a functional and stylish plant shelf that enhances the aesthetics of your outdoor space. Homeowners will appreciate the ease of assembly and the flexibility it offers for arranging plants, making it a great addition for both gardening enthusiasts and those looking to add a decorative element to their backyard.
This DIY outdoor plant shelf seamlessly integrates into a variety of home styles, including modern, rustic, and minimalist. Its simple lines and neutral colors make it versatile enough to complement existing outdoor furniture and decor. Placed against a fence or garden wall, it can serve as a focal point or blend into the background, depending on styling preferences. The shelf can be painted or stained to match the home's exterior or left in its natural state for a more rustic feel, making it adaptable to personal taste and the overall style of the backyard.
Cinder Block and Wooden Board Plant Shelf
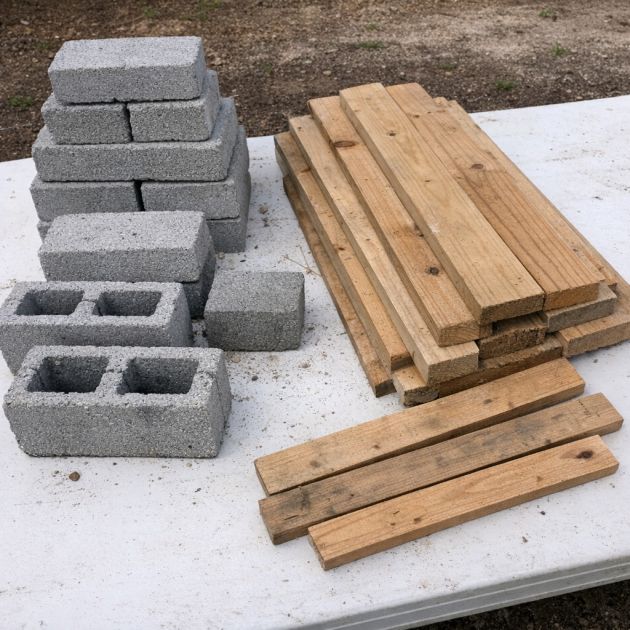
Materials
Gray cinder blocks (16x8x8 inches) - Quantity: 6
Weathered wooden boards (6 feet long, 12 inches wide, 1 inch thick) - Quantity: 3
Sandpaper (medium grit, 120-150 grit)
Tape measure
Level
Gardening gloves (optional)
Directions
1. Begin by selecting a flat and stable area in your backyard where you want to place the plant shelf.
2. Use the tape measure to mark the spacing for the cinder blocks, ensuring they are evenly spaced to support the wooden boards securely.
3. Sand the edges and surfaces of the wooden boards using medium-grit sandpaper to remove any splinters or rough areas.
4. Place two cinder blocks on the ground parallel to each other, with a gap slightly narrower than the length of the wooden boards.
5. Slide one wooden board between the two cinder blocks, ensuring it sits securely and level. Adjust the blocks if needed.
6. Stack another pair of cinder blocks on top of the first set, aligning them carefully to maintain stability.
7. Slide the second wooden board between the second layer of cinder blocks, repeating the leveling process.
8. For the final layer, stack the remaining cinder blocks and slide the last wooden board into place.
9. Check the entire structure with a level to ensure all boards are even and the shelf is stable.
10. Arrange your plants on the shelves, starting with larger pots on the bottom and smaller ones on the top for balance.
Variations & Tips
For a personalized touch, consider painting the cinder blocks in a color that complements your garden decor or staining the wooden boards for a more polished look. You can also opt for different types of wood, such as cedar or pine, for added durability and aesthetic appeal. To enhance the shelf's longevity, apply a weather-resistant sealant to the wooden boards. For customization, add hooks to the sides of the cinder blocks to hang small garden tools or decorative items, further enhancing the practicality and charm of your outdoor plant shelf.