Transform your backyard into a stunning artistic space with these DIY textured faux-stone artisan urns. By using inexpensive rubber bath mats and concrete, you can create beautiful, durable urns that mimic the look of real stone at a fraction of the cost. These unique pieces not only serve as eye-catching decorative elements but also offer practical uses, such as planting or water features. This project is perfect for anyone looking to add a touch of elegance and creativity to their outdoor area without breaking the bank.
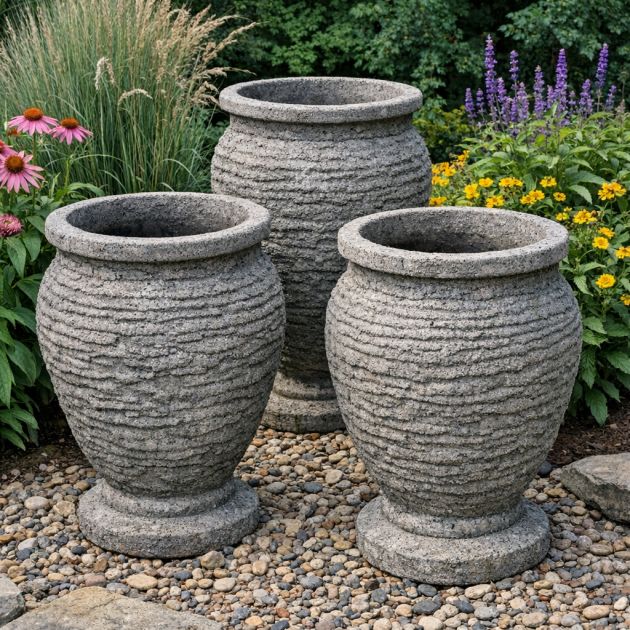
Place the finished urns strategically around your garden or patio to create focal points. Consider grouping them in threes for a balanced look, or position them at the corners of a seating area to frame the space. Choose plants or decorative items that complement the natural stone-like texture, such as succulents, ferns, or ornamental grasses. The neutral tones of the urns will pair well with both vibrant and muted color schemes, making them versatile additions to any outdoor decor.
Textured Concrete Faux-Stone Urns

Materials
6 rubber bath mats, approximately 18x24 inches each
Heavy-duty liquid concrete mix, 50 lbs
Large plastic container for mixing concrete
Trowel
Protective gloves
Drop cloth
Plastic wrap
Wire brush
Directions
Lay down the drop cloth to protect your working area from concrete spills.
Put on the protective gloves.
Mix the heavy-duty liquid concrete mix in the large plastic container according to the manufacturer's instructions until you achieve a thick, smooth consistency.
Submerge one rubber bath mat into the liquid concrete, ensuring it is fully saturated and coated.
Lift the mat out of the concrete and drape it over an object that can shape it into an urn form (such as a large bucket or planter). Allow excess concrete to drip off.
Repeat the process with the remaining bath mats, shaping each one into a similar urn form.
Let the concrete-covered mats dry and cure for 24-48 hours, or until fully hardened.
Once dry, use a wire brush to gently remove any loose concrete and enhance the textured surface.
Wrap each urn in plastic wrap loosely to help it retain moisture and cure completely for an additional week.
After the final curing period, unwrap the urns and place them in your desired outdoor location.
Variations & Tips
For a more personalized touch, consider adding concrete dye to the mix to create urns in earthy tones like terracotta or slate blue. You can also experiment with different rubber mat patterns to achieve varied textures. If you prefer a smoother finish, lightly sand the surface after the initial curing stage before the final curing wrap. Incorporating small mosaic tiles or pebbles into the surface before the concrete dries can also add an intricate detail to your urns, making them even more unique.