Transform ordinary materials into functional and stylish yard forms with this simple DIY project. By breaking down cheap white styrofoam drink coolers and combining them with a bag of thick gray cement powder, you can create heavy insulated yard forms that are perfect for garden edging or decorative outdoor installations. This project not only upcycles materials but also ensures durability and insulation, making it a practical and environmentally friendly addition to your outdoor space.
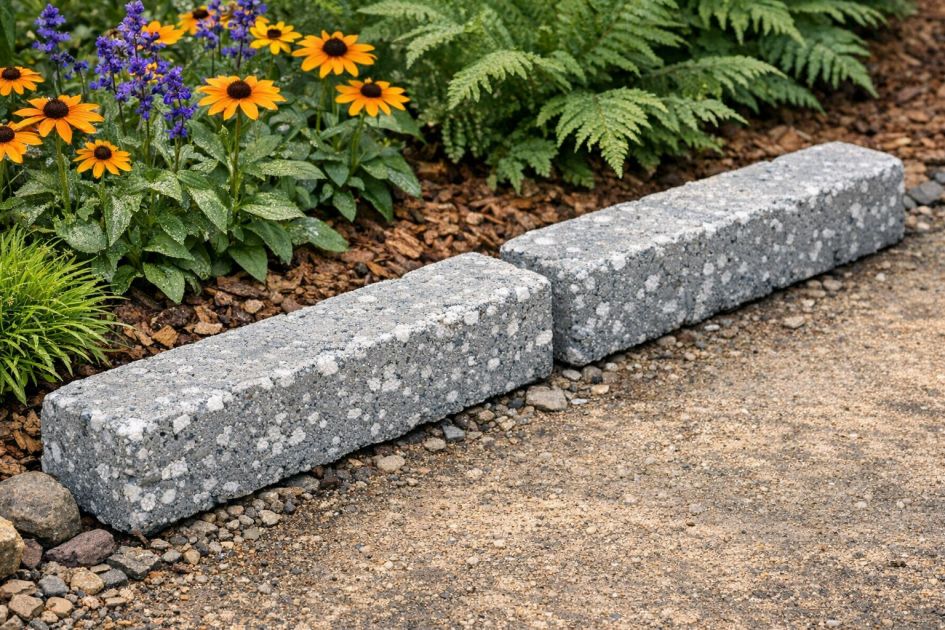
Place these DIY insulated yard forms along garden paths, around flower beds, or as boundary markers. Their neutral gray color will complement natural landscapes, while the textured surface adds a modern touch. For a cohesive look, coordinate them with other garden elements like stone pathways or wooden benches. The forms can be painted to match or contrast with surrounding greenery, providing a customizable aesthetic that enhances your outdoor area.
Insulated Cement Yard Forms
Materials
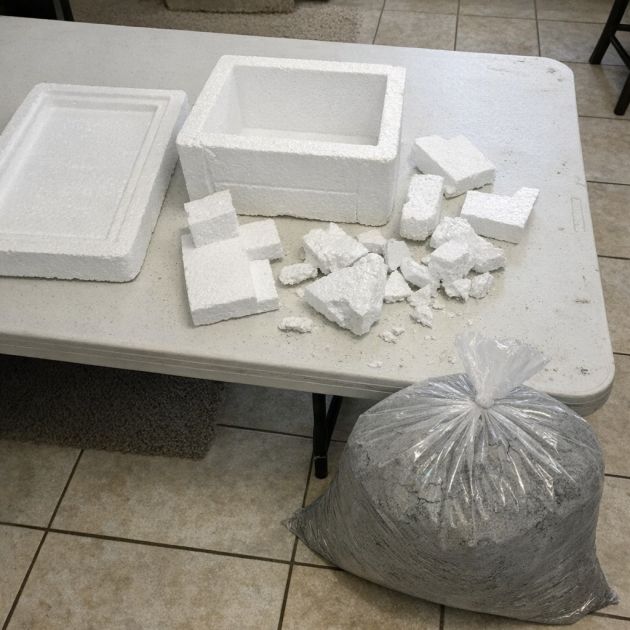
2 cheap white styrofoam drink coolers
1 bag of thick gray cement powder (50 lbs)
1 large mixing container
1 sturdy mixing tool (e.g., trowel or stick)
Protective gloves
Dust mask
Water (as needed)
Plastic sheeting or tarp (for workspace)
Directions
Put on protective gloves and a dust mask to ensure safety while handling materials.
Place a large plastic sheet or tarp over your workspace to catch debris and spills.
Break the styrofoam cooler panels by hand into rough, uneven pieces on your workbench. Aim for a variety of sizes but keep them generally around 4-6 inches in diameter.
In a large mixing container, combine the broken styrofoam pieces with the gray cement powder.
Gradually add water to the mixture, stirring consistently with your mixing tool until you achieve a thick, workable consistency.
Mold the cement-styrofoam mixture into the desired shape for your yard forms. Ensure the forms are at least 4 inches thick to maintain insulation and durability.
Allow the forms to dry and cure completely, which may take 24-48 hours depending on weather conditions.
Once dry, remove any excess debris from the surface and place the yard forms in your desired outdoor location.
Variations & Tips
For a more colorful display, consider dyeing the cement mixture with outdoor-safe pigments before molding. This allows you to create yard forms that match or complement specific garden themes or personal preferences. Alternatively, experiment with different shapes, such as circular or triangular forms, to add variety and visual interest to your garden design. Incorporating small pebbles or decorative stones into the cement mix can also enhance texture and appearance, while remaining true to the core structure of the DIY.