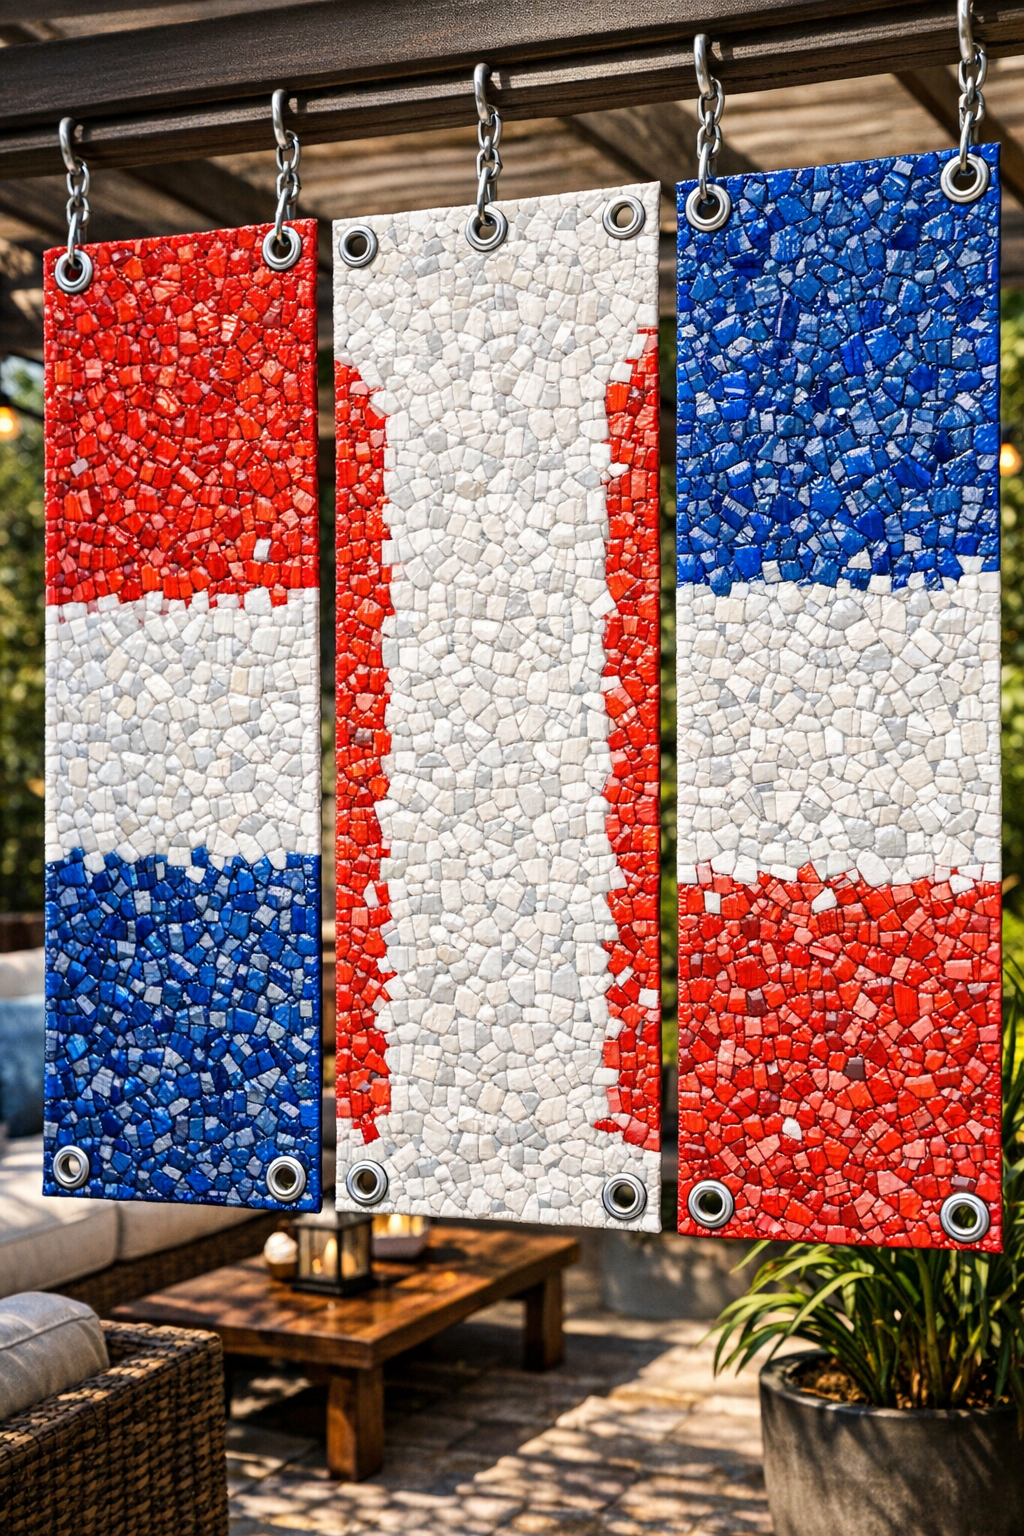
When I want a backyard project that feels a little clever and a lot useful, I love turning simple household odds and ends into something sturdy enough to earn a real job outside. These heavy-duty patio panels are made by fusing chopped red, white, and blue plastic straws between sheets of parchment paper, and the finished panels can be used as decorative privacy screens, tabletop protectors, tray liners, or accents for an outdoor play space.
This is a good project for patient beginners, older kids helping with supervision, or anyone who likes budget-friendly upcycling with a bold patriotic look. I’m always drawn to projects that turn “use what you have” into something surprisingly practical, and this one really does give you a rugged panel with only three main materials.
Materials
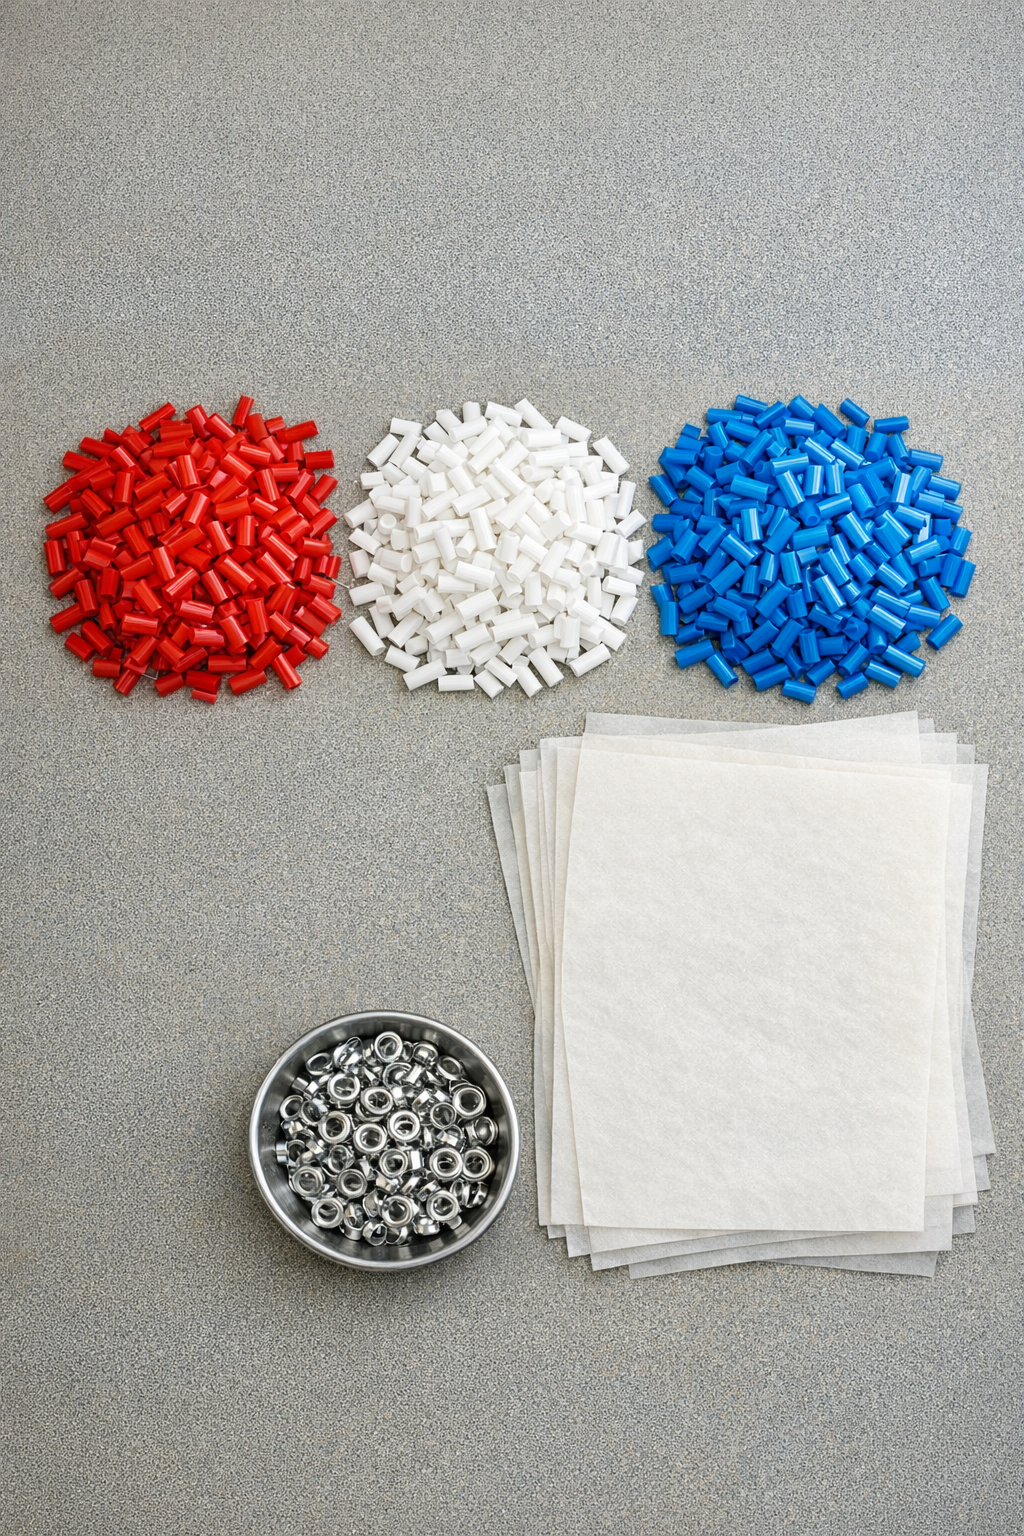
Red, white, and blue plastic straws, 300 to 350 standard-size straws total
Instructions
1. Cut all the straws into 1/4-inch to 1/2-inch pieces, keeping the red, white, and blue colors in separate bowls until you are ready to arrange a pattern.
2. Lay one 16 x 16-inch sheet of parchment paper on your ironing surface, then scatter a thick, even layer of chopped straw pieces into a 14 x 14-inch square in the color pattern you want.
3. Cover the straw pieces with a second sheet of parchment paper, making sure the entire plastic area is enclosed so the iron never touches the straws directly.
4. Iron over the parchment on a medium setting with no steam for 20 to 30 seconds at a time, lifting the iron between passes instead of dragging it, until the pieces begin to soften and bond.
5. Peel back one corner carefully to check the melt, then continue ironing in short passes until the panel is fully fused into one solid sheet with only a little texture left from the chopped pieces.
6. Let the fused sheet cool completely under a flat, heavy book or baking sheet for 10 minutes so it firms up without curling.
7. Trim the edges into a clean rectangle or square, then repeat the process to make as many matching panels as you need for your patio project.
8. Set one grommet in each corner and add extra grommets every 8 to 10 inches along the sides if you plan to hang the panels or tie several together as a screen.
9. Hang the finished panels on hooks, zip ties, or cord through the grommets, or fasten them to a simple frame to create a durable decorative patio barrier.
Variations & Tips
For a stronger panel: Make the straw layer a little thicker before ironing, and fuse both sides evenly so the finished sheet feels firm and substantial.
For picky pattern preferences: If your family likes things neat and orderly, arrange the colors in stripes or blocks; if they enjoy a more playful look, scatter the colors like confetti for a mottled finish.
For easier ironing: Work in short heating sessions instead of trying to melt everything at once, because too much heat can cause thin spots or overly shriveled areas.
For outdoor use: These panels do best in covered patio spaces rather than in constant blazing sun, since prolonged extreme heat can soften thin fused plastic over time.
For joining panels together: Line up the grommets and connect the panels with outdoor cord, metal rings, or zip ties so you can make a longer screen without building a complicated frame.
For safer crafting: I always keep the area well ventilated and make this kind of heat-fusing project when I can give it my full attention, especially if kids are nearby and curious.