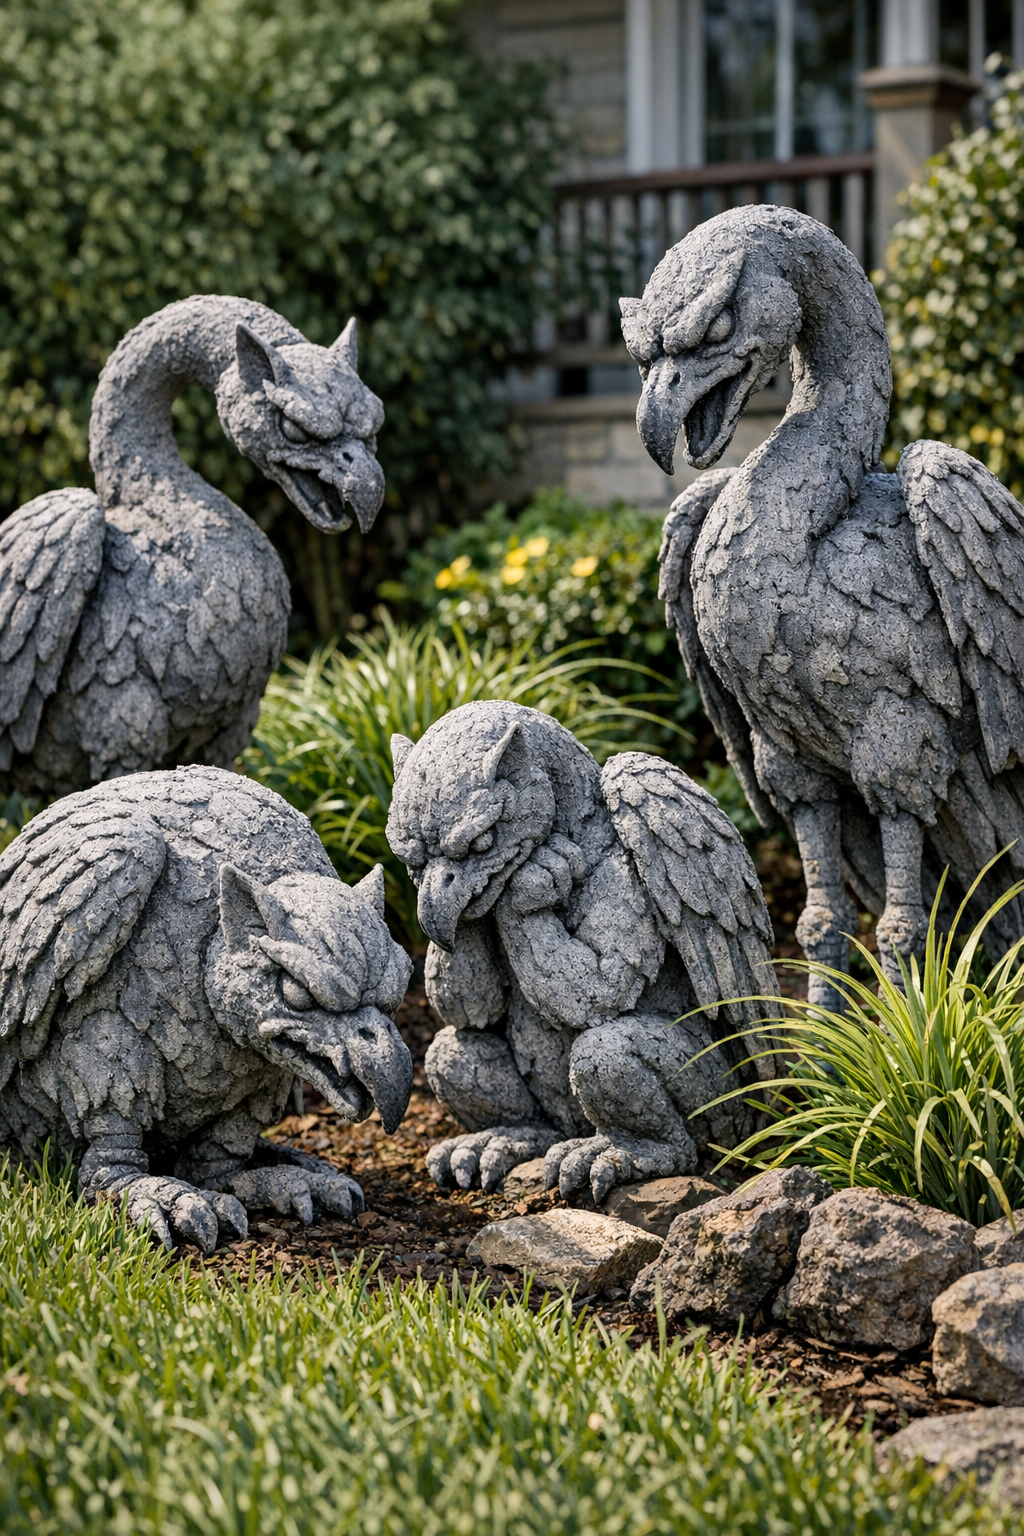
I’ve spent most of my life making do with what I have, and if there’s one thing country living teaches you, it’s how to see possibility in the oddest pile of materials. This project turns a flock of plain plastic flamingos into a set of dramatic faux-stone front yard gargoyles using gray cement, and the result is the sort of thing that makes folks slow down at the road and ask how on earth you made them. It’s part yard art, part conversation piece, and part good old-fashioned creative mischief.
This is a project for anyone who enjoys bold outdoor décor and doesn’t mind a little mess in exchange for a big payoff. I like it especially for gardeners, Halloween decorators, and thrifty makers who want the weathered look of carved stone without paying for real masonry statues. The process is straightforward, but it does take patience while the cement cures, so it’s best for a weekend when you can work steadily and let each piece rest properly.
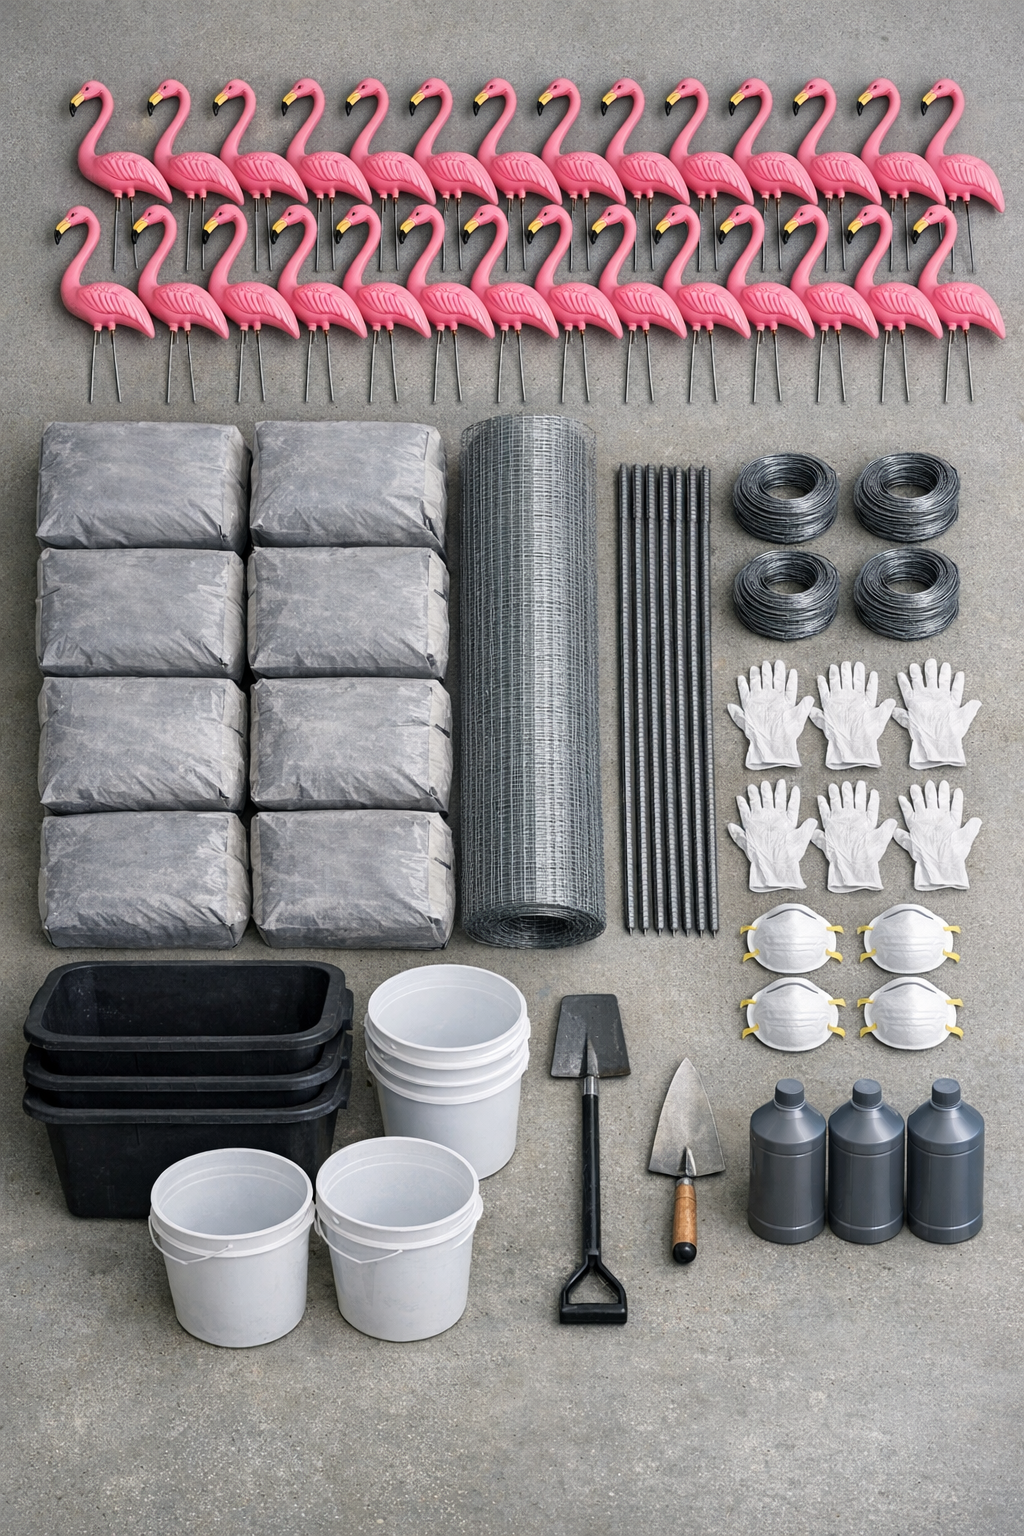
Materials
50 plastic flamingos with metal yard stakes, standard lawn size, about 24 to 30 inches tall
Instructions
1. Choose a flat, well-ventilated work area outdoors or in an open garage, and cover the ground with painter’s plastic so the cement doesn’t stain your driveway or patio.
2. Sort the 50 flamingos into the poses you want to keep, then remove any loose parts and wash off dust, mud, and stickers so the cement can grip the plastic better.
3. Push an 18-inch rebar stake into each flamingo’s leg area or alongside its metal yard stake to give every piece a solid core that won’t wobble once the cement weight is added.
4. Bend hardware cloth around each flamingo’s body, neck, and head to bulk out the shape and create rough gargoyle features like heavier brows, hunched shoulders, or a broader chest, then tie it in place with short lengths of galvanized wire.
5. Add small handfuls of straw or packing paper under the wire mesh anywhere you want extra volume, especially on the back, chest, or head, keeping the overall shape balanced so the figure still stands upright.
6. Brush a thin coat of concrete bonding adhesive over the plastic and mesh surfaces, and let it turn tacky for the amount of time recommended on the container.
7. Mix a small batch of gray mortar to a thick peanut-butter consistency in a plastic tub, adding water gradually so it clings to a trowel without sliding off.
8. Press on a scratch coat about 1/4 inch thick over each flamingo, working from the legs upward and pushing mortar firmly through the mesh openings so it locks onto the armature.
9. Let the scratch coat firm up for 30 to 60 minutes, then rough it lightly with the edge of the trowel so the next coat has something to bite into.
10. Mix a second batch of mortar and build the surface to about 1/2 to 3/4 inch total thickness, shaping ridges, brows, folded wings, clawed feet, and a stony beak or snout so the flamingo disappears into a gargoyle silhouette.
11. Use your gloved fingers, a trowel edge, or a stiff brush to add stone texture, shallow cracks, and chiseled-looking planes while the cement is still workable.
12. Repeat the coating and shaping process for all 50 flamingos, mixing mortar in manageable batches so it stays workable and consistent from piece to piece.
13. Mist the finished figures lightly with water and let them cure slowly for 24 to 48 hours out of direct hot sun, covering loosely with plastic if the weather is dry or windy.
14. After curing, inspect each gargoyle and patch any thin spots or hairline cracks with fresh mortar, feathering the repairs into the surrounding texture.
15. If you want a darker aged look, sponge on a diluted wash made from black masonry tint and water, then wipe back the high spots to leave the color settled in the creases.
16. Let the surface dry completely, then apply a coat of matte exterior masonry sealer to help the faux-stone finish stand up to rain, frost, and repeated watering from nearby beds.
17. Set the finished gargoyles in your front yard by pressing their stakes firmly into the ground or anchoring them beside shrubs, along a walkway, or in a clustered flock for the biggest visual effect.
Variations & Tips
Smaller flock: If 50 pieces feels like too much for one round, start with 6 to 12 flamingos and use the same method to make a smaller clustered display.
Safer coating choice: Mortar mix is easier to sculpt on plastic forms than standard concrete with large aggregate, and it gives a finer faux-stone finish.
Weather tip: I always avoid working in blazing afternoon heat, because cement sets too fast and gets fussy; a cool morning gives you much more control.
Weight warning: Once coated, these figures become much heavier than ordinary lawn ornaments, so reinforce the legs and stakes well before you begin applying cement.
More character: For an old courthouse look, vary the faces slightly from one figure to the next by changing the brow angle, neck curve, or wing texture.
Freeze-thaw protection: In cold climates, a good sealer and full curing time make a big difference, especially if the statues will stay outdoors through winter.
Placement idea: I like grouping them near evergreens or foundation shrubs where the gray finish stands out nicely and looks almost like salvaged stone from an old estate.
Cleanup note: Rinse tools right after use and never wash cement slurry into a household drain; let residue harden in a tub and dispose of it with solid waste instead.