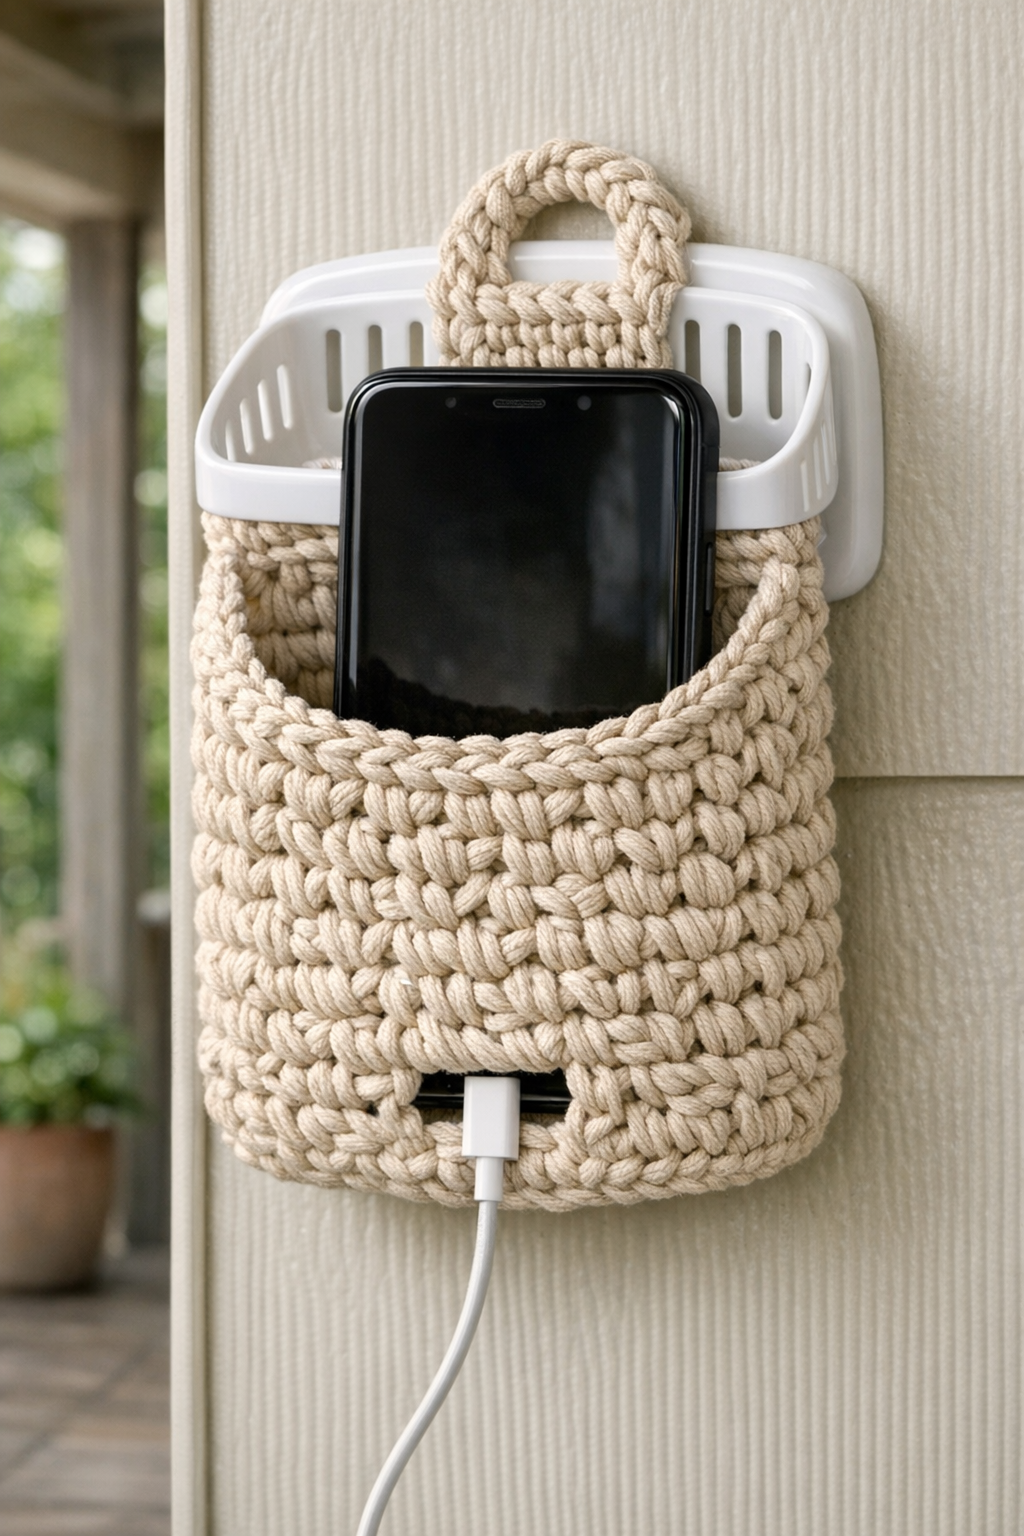
I love a project that solves an everyday annoyance and still manages to look charming, and this crochet wall-mounted phone charging station does exactly that. By using a simple plastic soap dish as the base and crocheting a sturdy cotton holder through it, you get a neat little pocket that keeps a phone off the floor, countertop, or patio table while it charges.
This is a particularly good project for anyone who likes practical crochet, small-space organizing, or clever upcycling. I’m an experienced cook by trade and habit, so I tend to appreciate tools and setups that keep things tidy and easy to reach; this project has that same satisfying, functional quality. It’s beginner-friendly if you know basic crochet stitches, and the finished holder works especially well in a covered outdoor kitchen, porch charging nook, mudroom, or entry wall.
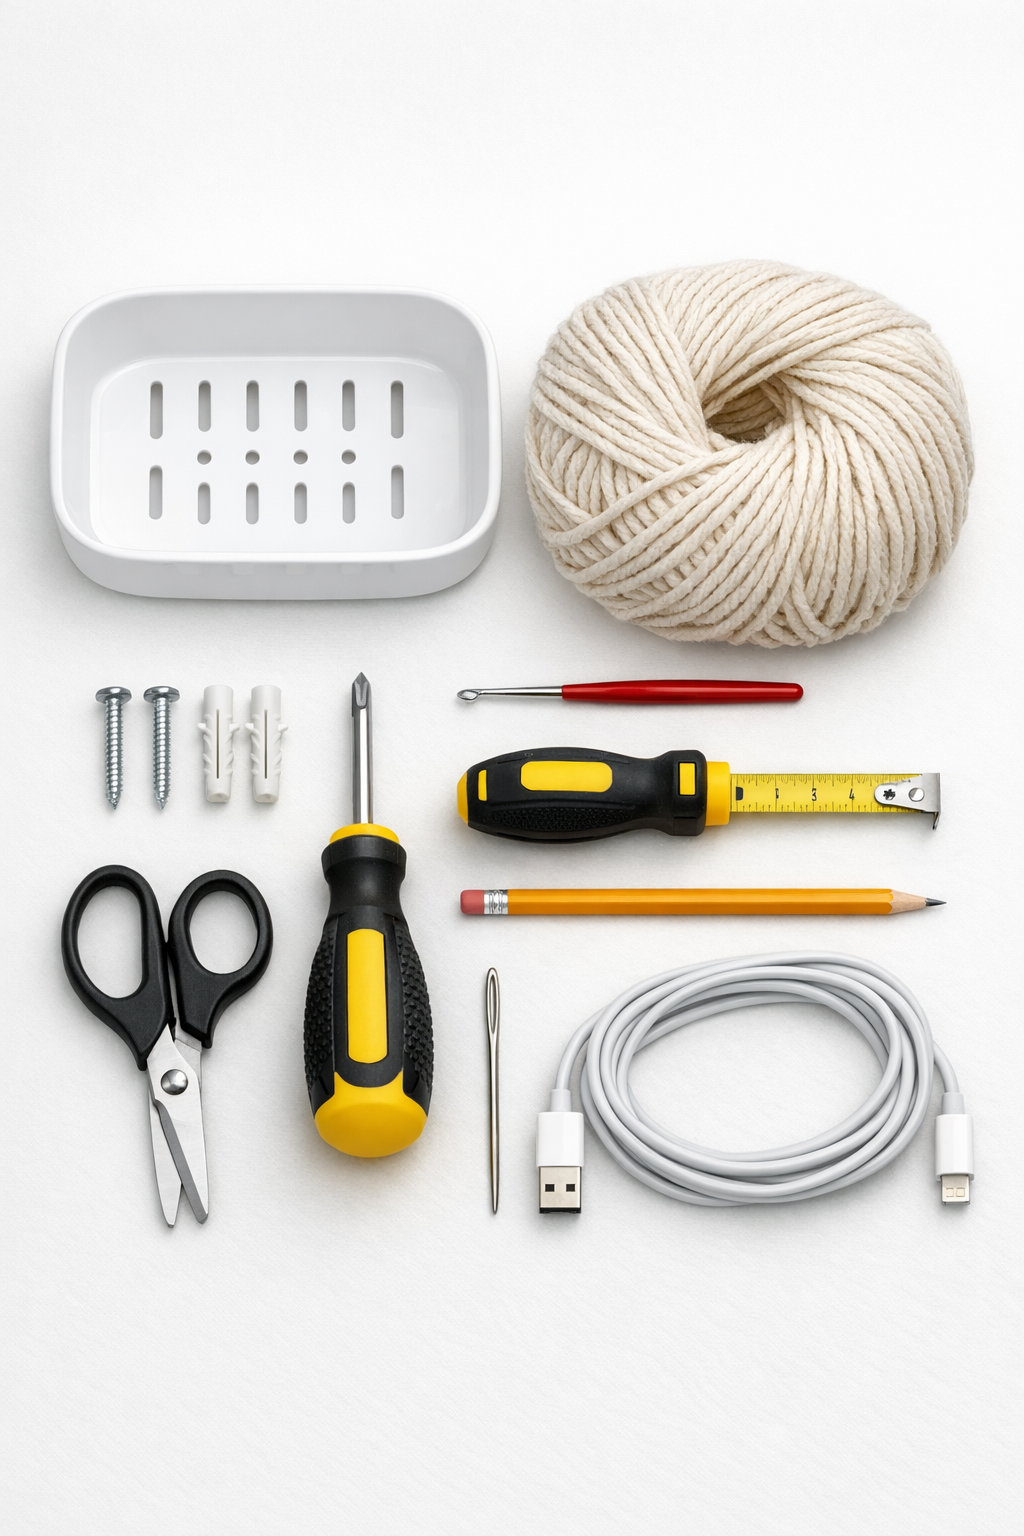
Materials
1 plastic wall-mount soap dish, approximately 5 to 6 inches wide and 4 to 5 inches deep, with drainage holes or slots
Instructions
1. Hold the soap dish against the wall at a comfortable charging height and mark the screw locations with a pencil. Make sure the spot is close enough to an outlet or protected outdoor power source for your charging cable to reach comfortably.
2. Install the wall anchors if needed, then screw the plastic soap dish firmly to the wall. Check that it sits level and does not wiggle, because the crocheted pocket will depend on this base for support.
3. Thread the cotton yarn through one hole or slot near the upper edge of the dish and tie a secure double knot on the back side. This anchors your work directly to the dish so the crochet grows from the plastic frame.
4. Work a round of single crochet through the holes or around the open rim of the soap dish, spacing the stitches as evenly as possible. Add 24 to 30 stitches total, depending on the size of your dish, so the base edge is covered without puckering.
5. Chain 1 and single crochet in each stitch for 3 more rows to build the back and side walls of the pocket. Keep the stitches snug, since cotton stretches a bit and you want the holder to support the phone without sagging.
6. Shape the front opening by working back and forth instead of in full rounds, stopping about 1 inch below the back height. This lower front edge makes it easier to slide the phone in and out while still keeping it secure.
7. Test the depth by slipping your phone into the pocket with the charging port facing down. If needed, add 1 or 2 more rows to the back or sides so the phone sits securely with about one-third of it still visible at the top.
8. Work one final edging row of single crochet evenly around the top opening and sides to strengthen the shape. Fasten off, then weave in all yarn ends with a yarn needle on the back or underside where they will not show.
9. Feed the charging cable up through the bottom or side opening of the dish and into the crocheted pocket. Position the connector so it sits where the phone can plug in easily without bending the cable sharply.
10. Place the phone in the holder, plug it in, and check that the weight is supported evenly by the dish and crochet fabric. If the pocket droops, add a few hand-sewn reinforcement stitches with leftover cotton yarn along the side corners.
Variations & Tips
Use mercerized cotton: If you want a crisper, more polished finish, mercerized cotton yarn is an excellent choice. It resists fuzzing and gives the stitches a clean look, much like using the right oil for a finishing drizzle in cooking makes the whole dish feel more refined.
Pick the right soap dish: A dish with multiple drainage holes is easiest for crocheting through. If yours has only a few openings, you can crochet around the outer rim instead, but make sure the stitches are distributed evenly.
Keep it in a protected area: Cotton is durable, but this project will last longer in a covered outdoor space rather than fully exposed rain. Think porch, covered deck, outdoor kitchen wall, or enclosed sunroom.
Customize the size: For a larger smartphone, simply increase the number of stitches in the first round and add an extra row or two of height. For a smaller device, keep the stitch count tighter so the phone doesn’t slide around.
Add a decorative edge: A crab stitch or simple picot edging along the top can make the holder look more finished. I’d keep embellishment minimal for outdoor use, but a small detail can give it real personality.
Reinforce high-stress points: The upper side corners carry the most weight when the phone is inserted and removed. A few extra whipstitches in matching cotton yarn there can greatly improve durability.
Mind electrical safety: If you’re using this outdoors, only place it near a covered, weather-protected outlet and use an outdoor-rated charging setup if applicable. Keep the phone and cable away from direct rain or standing water.