This patio chandelier looks sculptural in the daytime and beautifully glowy at night, and the best part is that it’s built from two humble hardware-store staples: silver chicken wire and a whole lot of black zip ties. By rolling the wire into a cylinder and weaving the ties through the openings, you get a modern artisan shade with texture, movement, and a surprisingly polished finish that reads far more expensive than it is.
I love projects like this because they sit right at the crossroads of practical and dramatic. As someone who spends plenty of time thinking about atmosphere around a table, I can tell you lighting changes everything, whether it’s a weeknight dinner on the patio or a late summer gathering with friends. This one is especially good for DIYers who want a bold outdoor statement piece without advanced wiring skills or specialty tools.
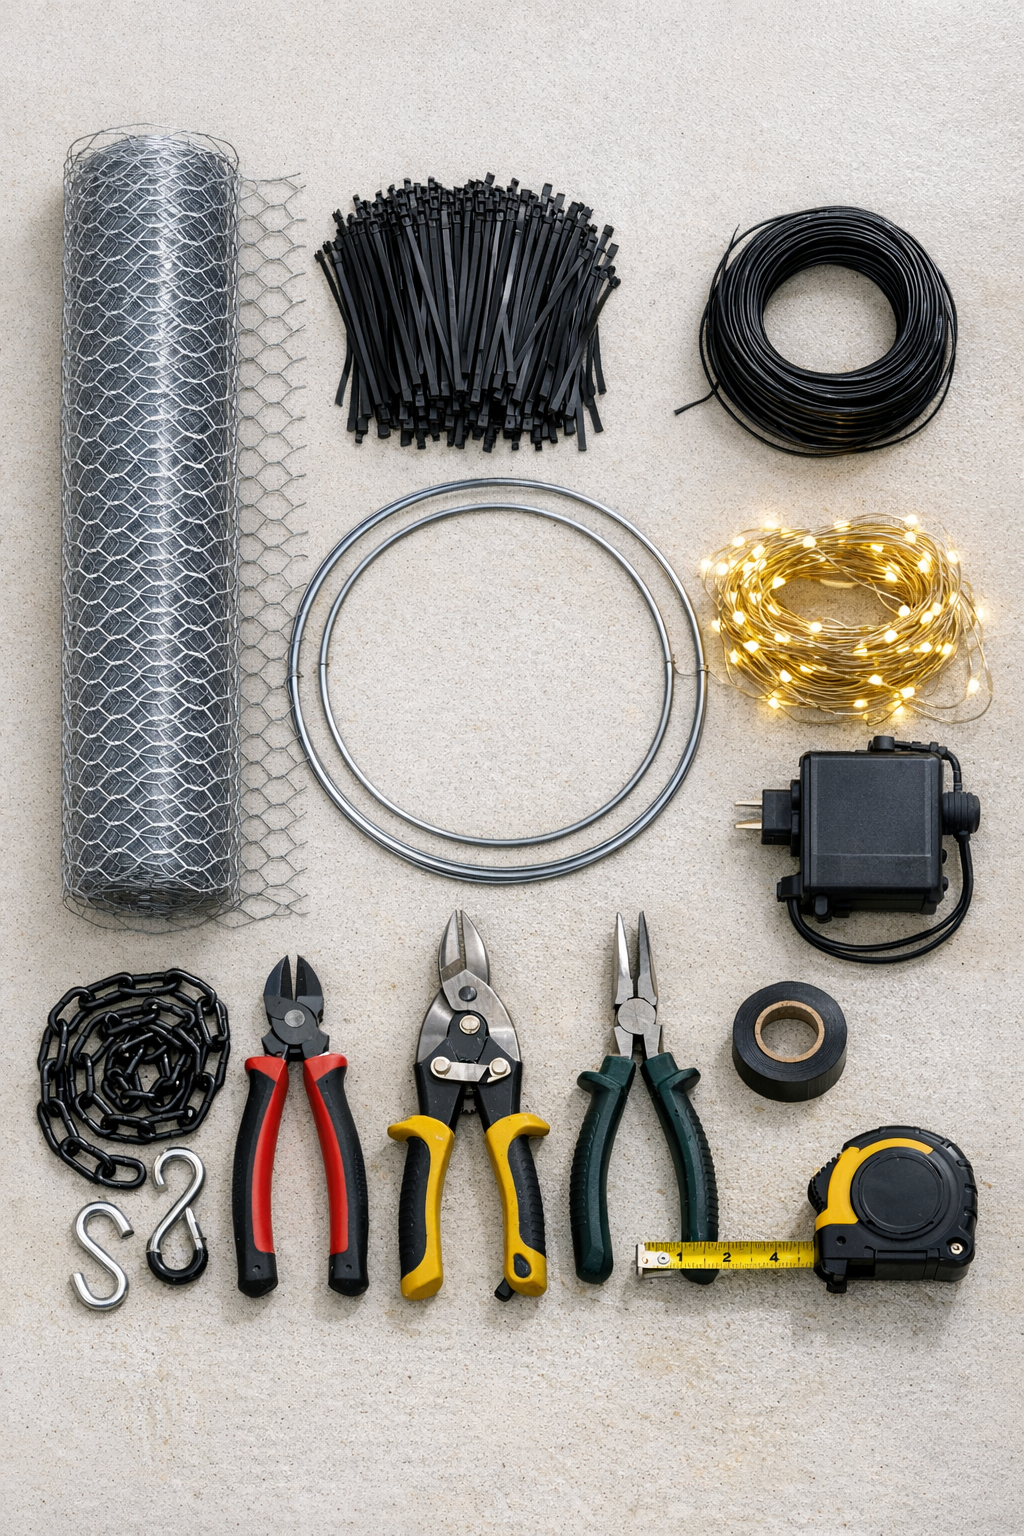
Materials
Instructions
1. Cut a 36-inch-long section of chicken wire from the roll using tin snips, then trim away any sharp protruding ends so the edges are as even as possible.
2. Roll the cut wire into a cylinder about 12 inches across and 24 inches tall, overlapping one full column of mesh to keep the shape sturdy.
3. Twist 6-inch pieces of black floral wire through the overlapped seam every 3 to 4 inches from top to bottom, then tighten them with pliers to lock the cylinder closed.
4. Fit one 12-inch metal ring inside the top opening and one inside the bottom opening, then lash each ring to the chicken wire with short lengths of floral wire at 6 evenly spaced points.
5. Start weaving black zip ties through the chicken wire near the top edge, inserting each tie from the outside in and back out through adjacent openings so the loop sits visibly on the surface.
6. Continue adding zip ties row by row, spacing them closely enough to create a dense fringe-like texture while still allowing light to pass through; use about 150 ties on the upper half and 150 on the lower half.
7. Rotate the cylinder as you work so the ties stay evenly distributed, and vary the angle slightly for a more artisanal, less rigid look.
8. Tighten every zip tie fully, then trim the tails flush with wire cutters so the exterior looks clean and the silhouette reads more like a finished fixture than a hardware project.
9. Wrap the LED fairy lights around the inside frame from top to bottom, securing them lightly to the chicken wire with a few small floral-wire twists or extra zip ties placed discreetly inside.
10. Position the battery pack or power connection near the top interior of the chandelier, and camouflage it with the black plastic sheet and electrical tape if it remains visible from below.
11. Cut three 12-inch lengths of black chain and attach them evenly around the top ring, then connect their upper ends to the locking carabiner with the S-hooks so the chandelier hangs level.
12. Hang the finished chandelier from a sturdy covered-patio hook or beam, switch on the lights, and make any final adjustments to the zip ties so the glow looks balanced from every side.

Variations & Tips
Softer Glow: If you want more of a lantern effect and less visible wiring, add a cylinder of heat-safe frosted plastic liner inside the frame before installing the lights.
Larger Chandelier: Use a 48-inch section of chicken wire and 14- or 16-inch rings for a bigger statement piece, but plan on increasing the zip ties to 400 or more to keep the texture full.
Color Change: Black zip ties give this project its crisp modern look, but bronze or dark green ties can blend beautifully into different patio styles and garden settings.
Weather Tip: Use only UV-resistant zip ties and outdoor-rated LED lighting, especially in Midwestern summers where sun, humidity, and storms will test cheaper materials very quickly.
Hanging Safety: This piece is lightweight, but it still needs a solid anchor point; I always recommend testing the hook or beam with more weight than the chandelier before hanging it over a dining area.
Finishing Touch: If a few cut tie ends feel sharp, lightly sand them or rotate those ties inward so the fixture is safer to handle when cleaning or rehanging.