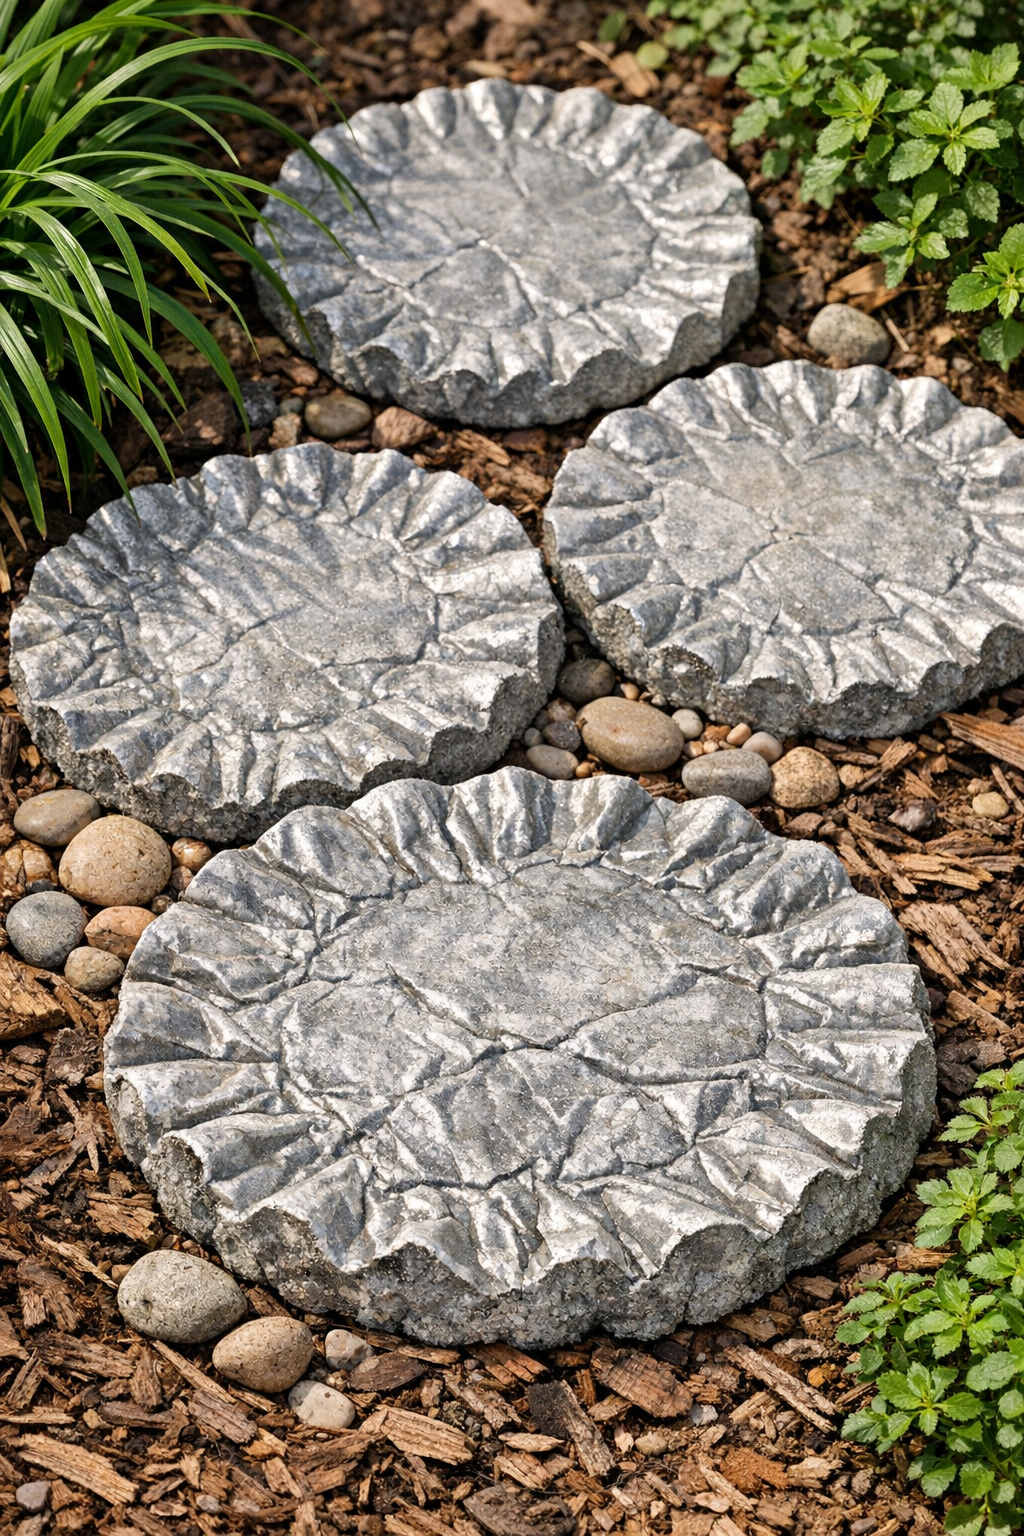
These heavy fluted yard slabs are one of those simple projects that look far fancier than the supply list would suggest. By pressing crumpled aluminum pie pans into thick wet cement and using one secret helper item to hold that sculpted shape, you can make sturdy garden accents that look a bit like weathered stone flowers or vintage architectural pieces.
I love projects like this because they stretch a tiny budget and still give you something with real presence in the yard. If you enjoy easy outdoor DIYs, want a handmade stepping-stone-style accent, or just like turning humble kitchen disposables into something beautiful, this is a very satisfying afternoon project.
Materials
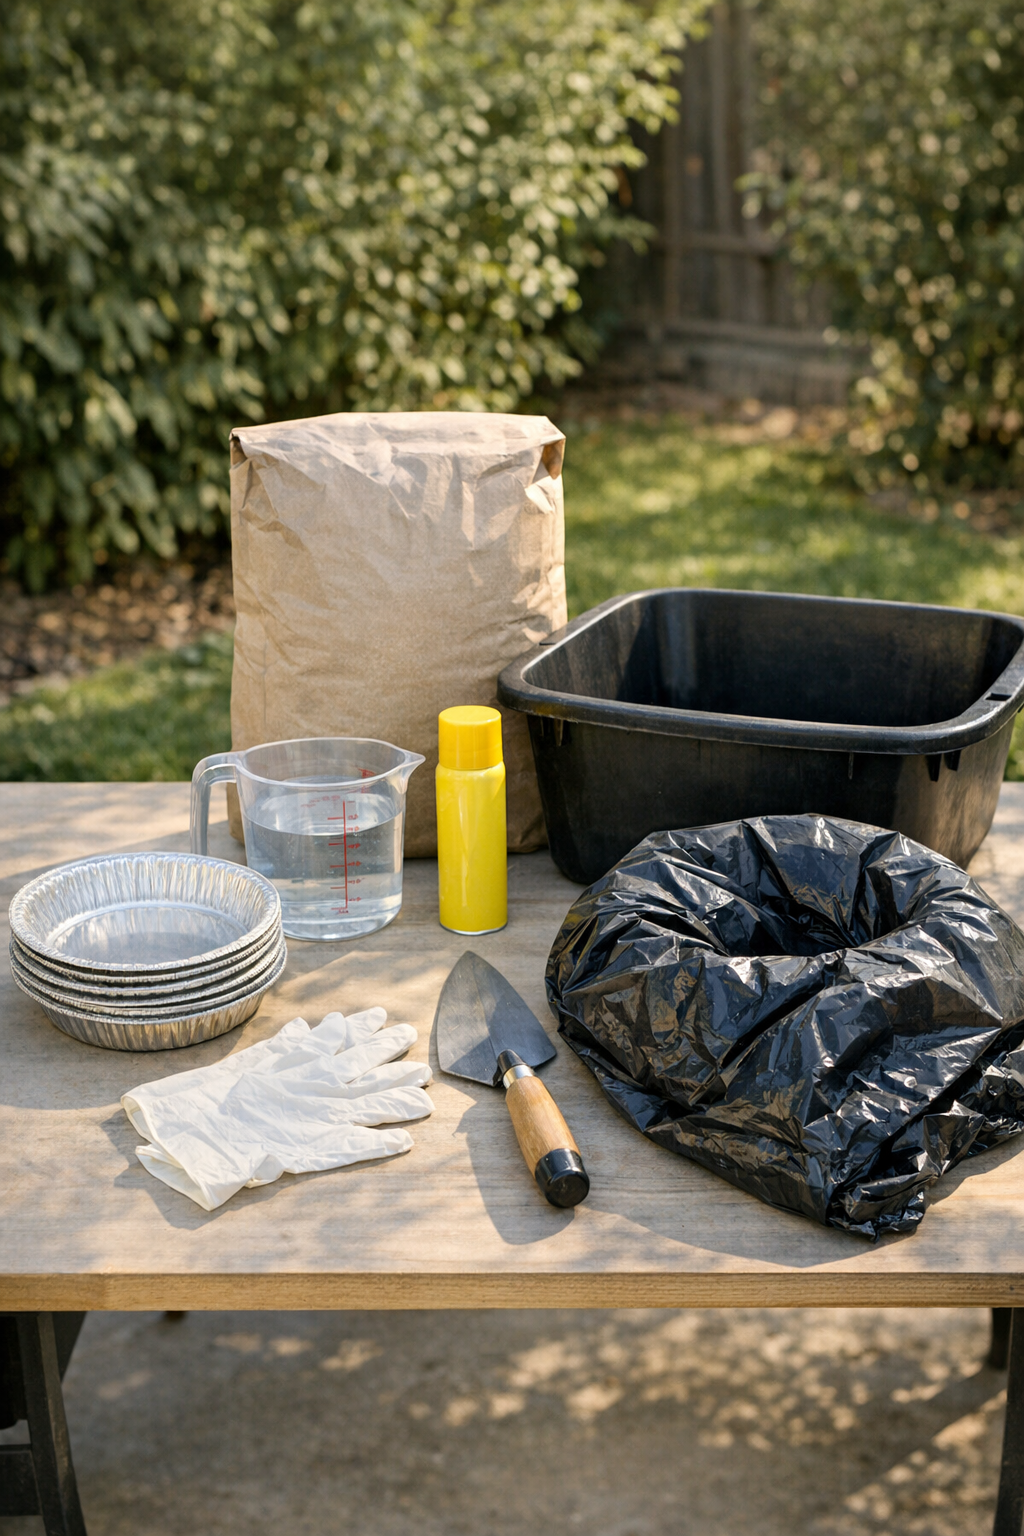
8 disposable aluminum pie pans, 9-inch size
Instructions
1. Cover your work surface with a plastic drop cloth or cardboard and set it somewhere level where the slabs can sit undisturbed for at least 24 hours. Lightly coat the inside of each aluminum pie pan with cooking spray so the cement releases more easily later.
2. Crumple each pie pan gently with your hands, then open it back up enough to keep a round shape with deep fluted ridges and natural wrinkles. Don’t flatten them smooth again, because those crinkles are what give the finished slabs their carved, petal-like texture.
3. Mix the cement in a tub, adding water a little at a time until it reaches a thick wet consistency similar to very stiff brownie batter. It should hold its shape when scooped, not run like pancake batter.
4. Tear or spread out pieces of the plastic trash bag, because this is the secret item that helps support the shape and keeps the wet cement from sticking where you don’t want it. Set one piece under each pie pan if your workspace is rough or uneven.
5. Scoop cement into each crumpled pie pan until it is about 1 to 1 1/2 inches thick across the center. Press the mix firmly into all the folds so the finished slab captures every ridge.
6. Lift and scrunch the loose edges of the plastic trash bag gently around the outside of each filled pan to help hold the dramatic fluted form while it sets. If a pan spreads too wide, nudge it inward with the plastic so the edges stay ruffled and raised.
7. Smooth only the top surface of the cement lightly with your trowel, leaving the bottom and sides textured by the pan. If you want these to sit more steadily in the garden, make the top as even as possible so the back cures flat.
8. Let the cement firm up for 2 to 3 hours, then check one piece by touching the surface lightly with a gloved finger. When it feels set but still slightly green, peel away the pie pan carefully without pulling off the fluted edges.
9. Leave the slabs to cure fully for 24 to 48 hours, misting them very lightly once or twice if the weather is hot and dry. After curing, move them into the yard, nestle them into mulch or gravel, or use them as decorative stepping accents in a garden bed.
Variations & Tips
For deeper flutes: Crumple the pie pans more firmly before reopening them. The stronger the creases, the more dramatic the finished stone texture will be.
For picky-design folks like my family: If you prefer a cleaner look instead of lots of wrinkles, reshape the pans a little more neatly before filling them. You’ll still get the pretty scalloped edge without quite so much crinkled texture.
Add color: Once fully cured, dry-brush the raised ridges with outdoor masonry stain or diluted exterior paint in soft gray, mossy green, or sand tones for an aged garden look.
Make them sturdier: Keep each slab at least 1 inch thick, especially through the center. Thin edges look lovely, but the middle needs enough body to support the weight.
Use them creatively: These are beautiful tucked under potted plants, lined along a flower bed, or grouped in threes as a focal point. I especially like them where morning light catches all those ridges and shadows.
Curing tip: Don’t rush moving them. Cement can feel hard on the outside before it has fully strengthened, and giving it that extra day makes a big difference in preventing chips.