This project turns an ordinary moving box and a basic party cooler into a surprisingly festive Fourth of July drink station. By crocheting chunky red, white, and blue yarn directly through the walls of a cardboard box, you get the cozy, oversized texture of fiber art with the practical structure of a quick backyard-party hack.
I love projects like this because they sit right at the intersection of craft and function. As someone who usually thinks in terms of texture, layering, and presentation in the kitchen, I find this one especially satisfying: it dresses up a cooler the way a good garnish finishes a platter. If you want a patriotic centerpiece for a cookout, block party, or porch gathering without building anything complicated, this is a very doable afternoon project.
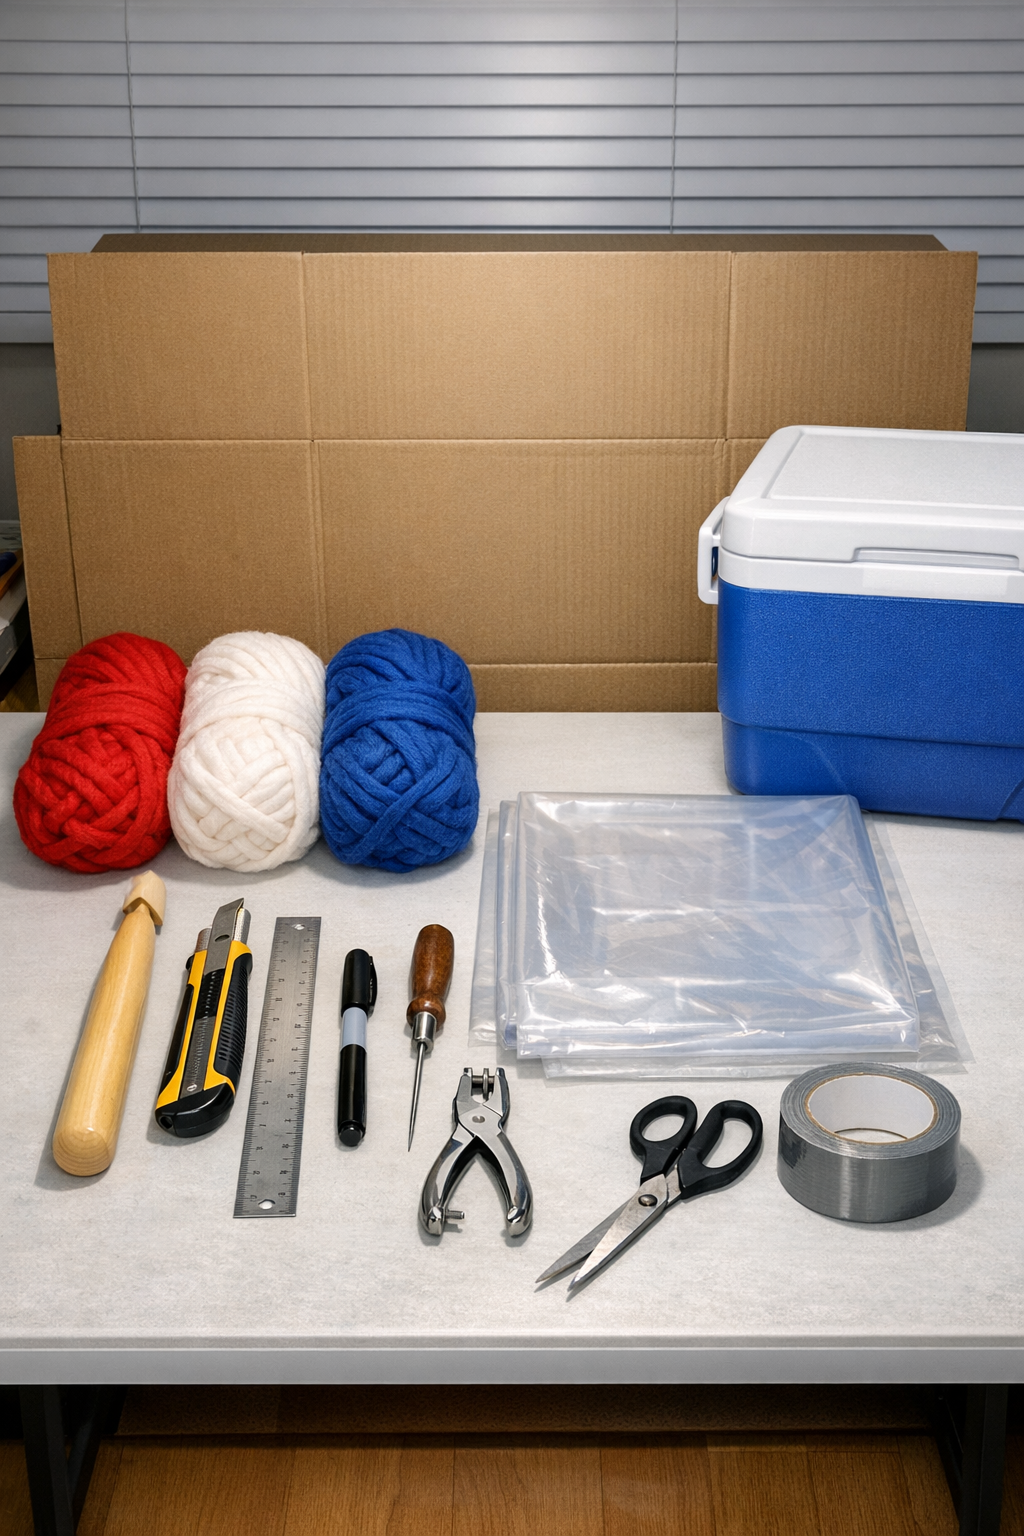
Materials
Instructions
1. Set your cooler inside the moving box and mark the finished height you want for the cover, leaving the cooler lid accessible. Trim the box so it stands just below the lid line, then tape the bottom seams securely.
2. Cut the box so you have a clean rectangular shell, and decide which side will be the front. If needed, overlap and tape one side seam so the box fits snugly around the cooler without bowing.
3. Line the inside of the box with clear plastic sheeting or a cut-open contractor bag, pressing it into the corners. Tape the liner along the top edge and seams so melted ice or condensation will not soak the cardboard.
4. On the outside of the box, draw horizontal guidelines every 1 1/2 inches from top to bottom. Along each line, mark vertical hole placements 1 1/2 inches apart to create an even grid for your crochet stitches.
5. Test your hole spacing on scrap cardboard first, then punch holes at each marked point on the box. Make the holes large enough for the crochet hook and yarn to pass through comfortably without tearing the cardboard.
6. Start at a bottom corner and pull up a loop of blue yarn through the first hole, leaving a 4-inch tail inside the box taped down. Work one round of single crochet or simple loop stitches through the bottom row of holes to anchor the yarn to the box.
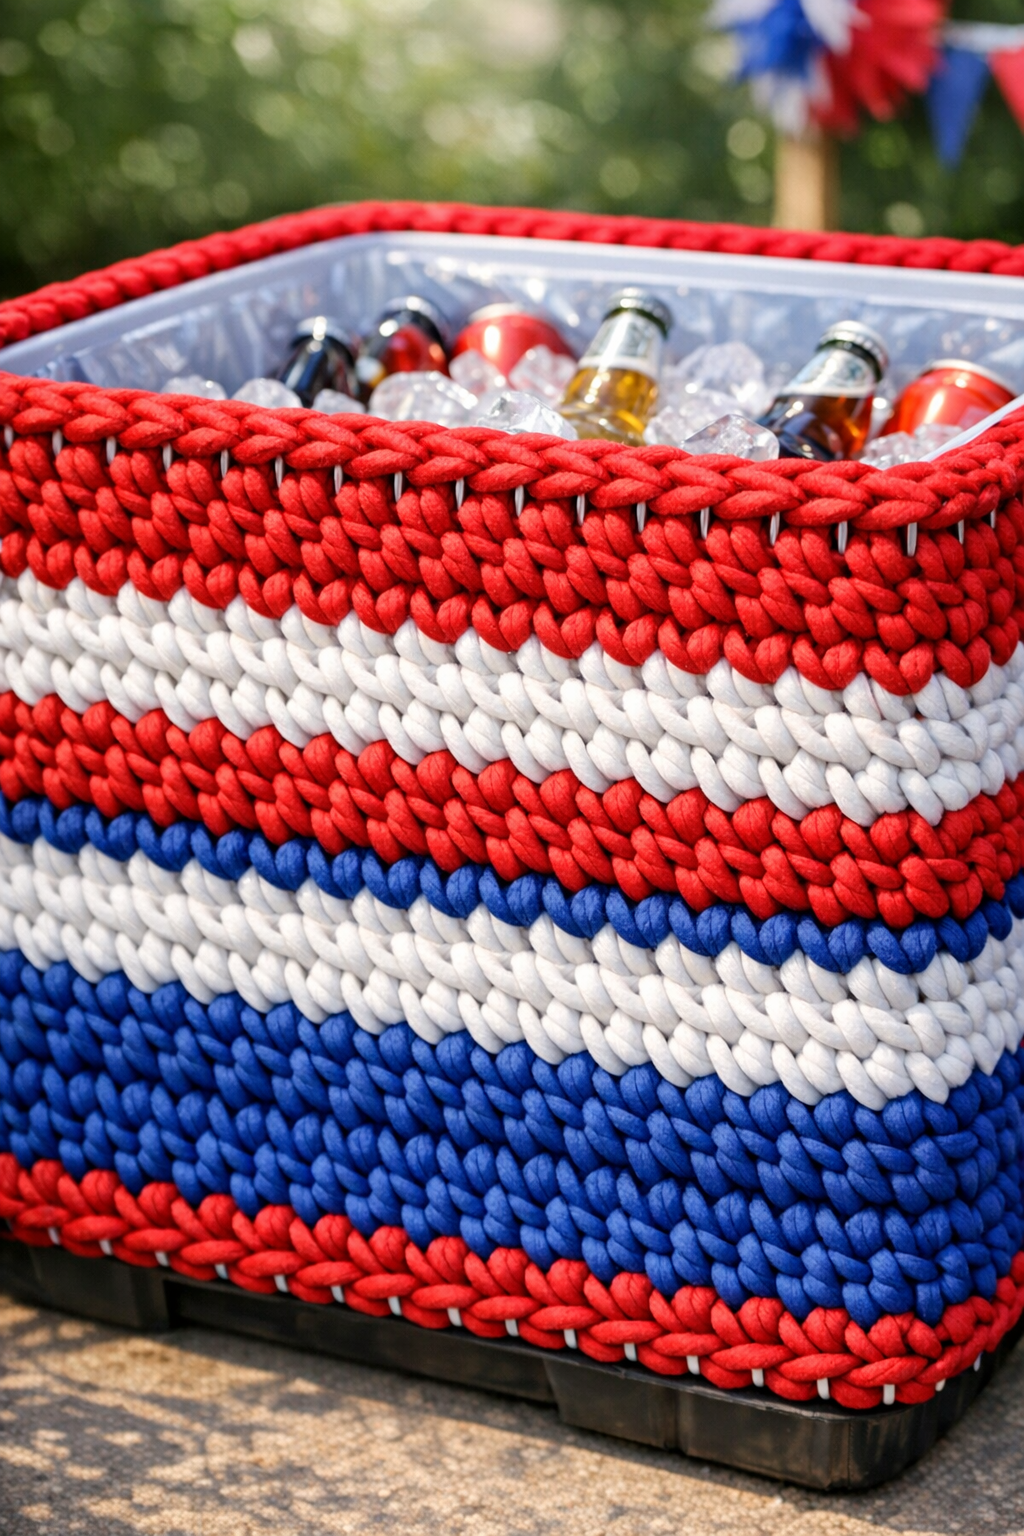
7. Continue crocheting through the holes row by row, changing colors every 2 to 4 rows to create bold patriotic stripes. Keep the tension firm enough to cover the cardboard but loose enough that the walls do not buckle.
8. At each corner, work the yarn through adjacent holes on both panels so the stripes wrap continuously around the box. If a corner feels weak, reinforce the inside with a short strip of duct tape before stitching over it.
9. Cover the box all the way to the top, then add a final row in the color of your choice for a tidy edge. Weave the yarn tails back through a few stitches and tape them flat on the inside between the cardboard and plastic liner.
10. Set the cooler inside the finished cover and check that the lid opens freely. If you want extra stability, add a few rolled strips of cardboard or folded plastic between the cooler and box so the cover sits snug and upright during the party.
Variations & Tips
Make it more flag-inspired: Use blue on one short side only and alternate red and white stripes around the remaining panels for a subtle nod to the flag without needing intricate stitch changes.
Choose the right yarn: Jumbo chenille gives the plushest look, but a super bulky acrylic yarn will hold up better outdoors on a hot day. If I know the cover will be near melting ice all afternoon, I lean toward acrylic because it dries faster.
Protect the cardboard well: The plastic liner matters more than it may seem at first. Condensation is relentless, much like steam in a busy kitchen, so taping the liner securely into the corners will help the cover last through the event.
Keep the stitches even: If your rows start to drift, stop and count the holes in the next section before you continue. A simple grid is what makes this project look intentional rather than improvised.
Add a serving-station upgrade: Slip a shallow tray or wood board across the cooler top when the lid is closed to create a temporary landing spot for cups, tongs, or a bowl of citrus wedges.
Reuse the idea beyond July: Change the palette to school colors, team colors, or neutral jute and cream for a more everyday patio look. The same cardboard-and-crochet method works beautifully for casual parties all summer long.