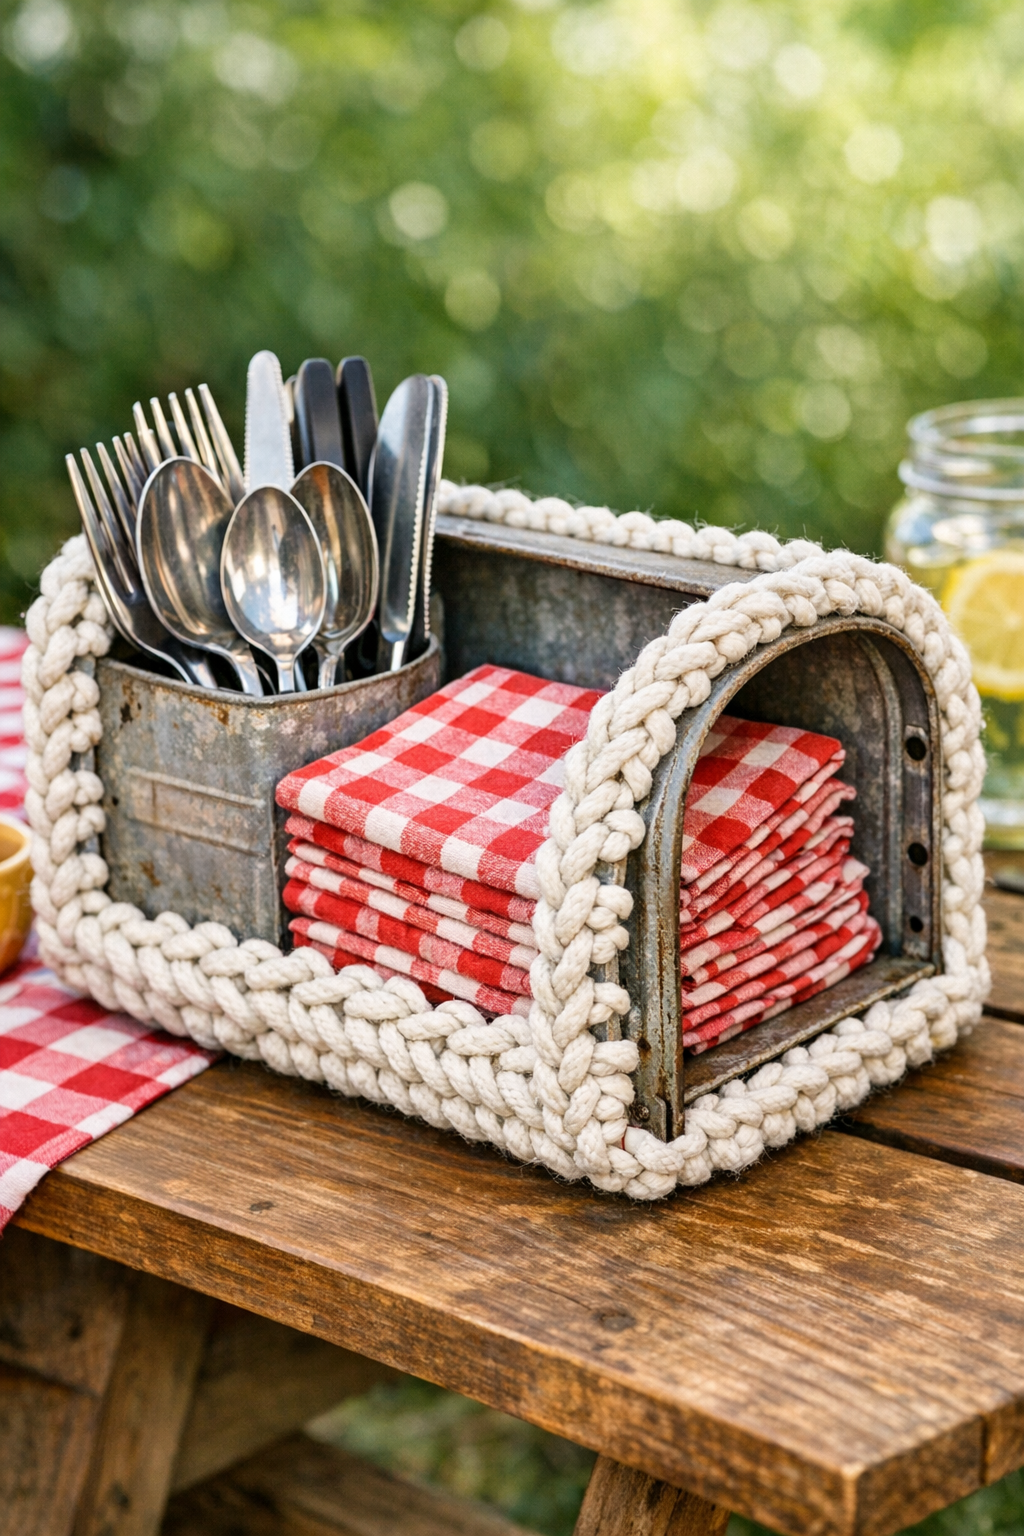
There’s something mighty satisfying about taking an old piece of metal that’s seen better days and turning it into something useful for a summer gathering. This crochet outdoor utensil holder starts with a vintage mailbox, the door removed, and a length of thick cotton rope worked right through the opening to make a sturdy, breathable basket-style liner that’s just right for forks, napkins, condiment packets, or grilling tools. It has that farmhouse-backyard charm I’ve always loved, and it feels right at home on a picnic table beside a bowl of potato salad and a pitcher of sweet tea.
I’m especially fond of projects like this because they rescue something headed for the scrap pile and give it a second life with a bit of handwork. If you know a few basic crochet stitches and don’t mind a practical project with a little character, this one is very manageable. It’s a good weekend make for anyone who enjoys upcycling, porch decorating, or simply likes having their cookout supplies tidy and easy to reach.
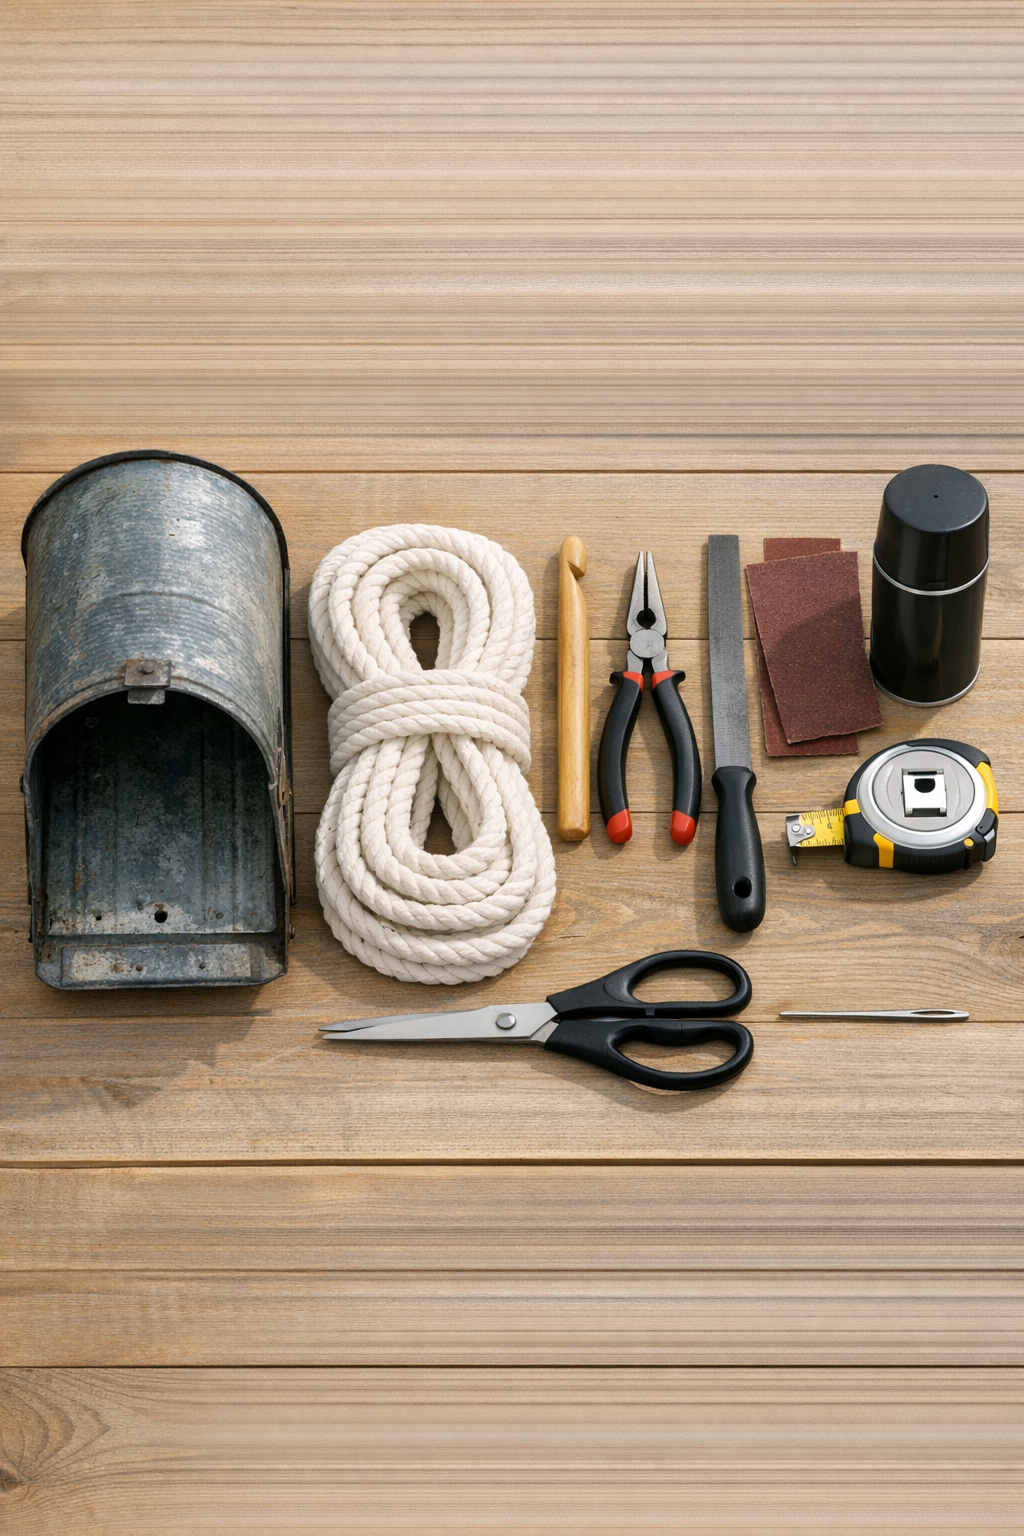
Materials
1 vintage metal mailbox, approximately 19 to 21 inches long x 6 1/2 inches wide x 8 inches high, with door removed
Instructions
1. Remove the mailbox door completely if it is still attached, then take off any loose hardware or sharp bits around the opening. Use the pliers to bend in any jagged edges so the rope won’t snag while you work.
2. Sand the mailbox inside and out, focusing on rust spots and rough paint, then wipe away the dust. If needed, apply a light coat of rust-resistant spray paint and let it dry fully according to the can directions.
3. Measure the inside circumference of the mailbox opening and the interior length from front edge to back panel. These measurements help you judge the size of your crocheted liner so it fits snugly without sagging.
4. Crochet a foundation chain about 1 inch shorter than the interior length of the mailbox, then work single crochet rows until the panel is wide enough to span the curved bottom interior. Test-fit it as you go; the base should lie flat inside the mailbox without buckling.
5. Once the base fits, begin working around all four sides of the panel, placing single crochet stitches evenly around the perimeter to start building the walls. Add an extra stitch in each corner area so the sides rise cleanly.
6. Continue crocheting in rounds to form a soft basket shape, stopping when the height reaches about halfway to two-thirds up the inside of the mailbox. The liner should be deep enough to hold utensils upright but still leave the mailbox shape visible.
7. Set the crocheted basket inside the mailbox and use the crochet hook to pull loops of rope through existing side holes, hinge holes, or evenly spaced openings near the front rim. If your mailbox has no usable holes, carefully make small paired holes along the front sides only, keeping them smooth and snag-free.
8. Work a joining round by slip stitching or single crocheting through each pulled loop and the top edge of the basket to anchor the liner firmly to the mailbox opening. Keep the tension even so the top edge looks tidy and the basket doesn’t twist.
9. Weave in the rope end with the yarn needle, then tug gently around the rim to make sure every section is secure. Trim any excess and smooth the stitches with your hands.
10. If you want to hang the holder, mount the mailbox horizontally through its back panel or resting bracket with exterior screws or place it on a table with rubber pads underneath. Fill it with flatware, rolled napkins, sauce bottles, or grilling tools and set it out for your next backyard meal.
Variations & Tips
For a cleaner finish: If the mailbox paint is chipped but charming, I like to keep some of that age showing; just be sure to seal or smooth anything flaky so it won’t rub onto napkins or hands.
For easier crocheting: Cotton rope can be stiff at first, so I work slowly and keep my stitches a touch loose. A larger hook can help if your hands tire easily.
Add compartments: Crochet one or two narrow divider panels and stitch them inside the liner if you want separate sections for forks, spoons, and paper straws.
Change the look: Natural cotton rope gives a more rustic feel, while bright white looks crisp for summer tables. You can also spray-paint the mailbox a cheerful red, black, or soft sage green to suit your porch or patio.
Make it more weather-friendly: This holder is best brought under cover when not in use. Cotton rope handles outdoor parties beautifully, but storing it dry will keep it looking nice much longer.
Use what you have: If your mailbox is a little shorter or wider than mine, don’t fret. The beauty of crochet is that you can test-fit every few rows and let the piece tell you what size it needs to be.