There’s something mighty satisfying about turning a few humble party-store supplies into yard décor that looks like it has real age and character. This project uses synthetic red, white, and blue flower leis, cement, and just a couple of basic support items to make heavy textured yard forms that can sit right out in the garden, on the porch, or tucked beside a flower bed. Once the leis are soaked and shaped, they harden into sculptural pieces with a ruffled, petal-like texture that reminds me of old stone ornaments you might find half-hidden in a country garden.
I’m especially fond of projects like this because they take bright, temporary materials and give them a second life in a sturdier, more lasting way. If you like easy outdoor crafts, rustic garden accents, or budget-friendly upcycling with a dramatic finish, this one is a good afternoon project, with drying time doing most of the work for you.
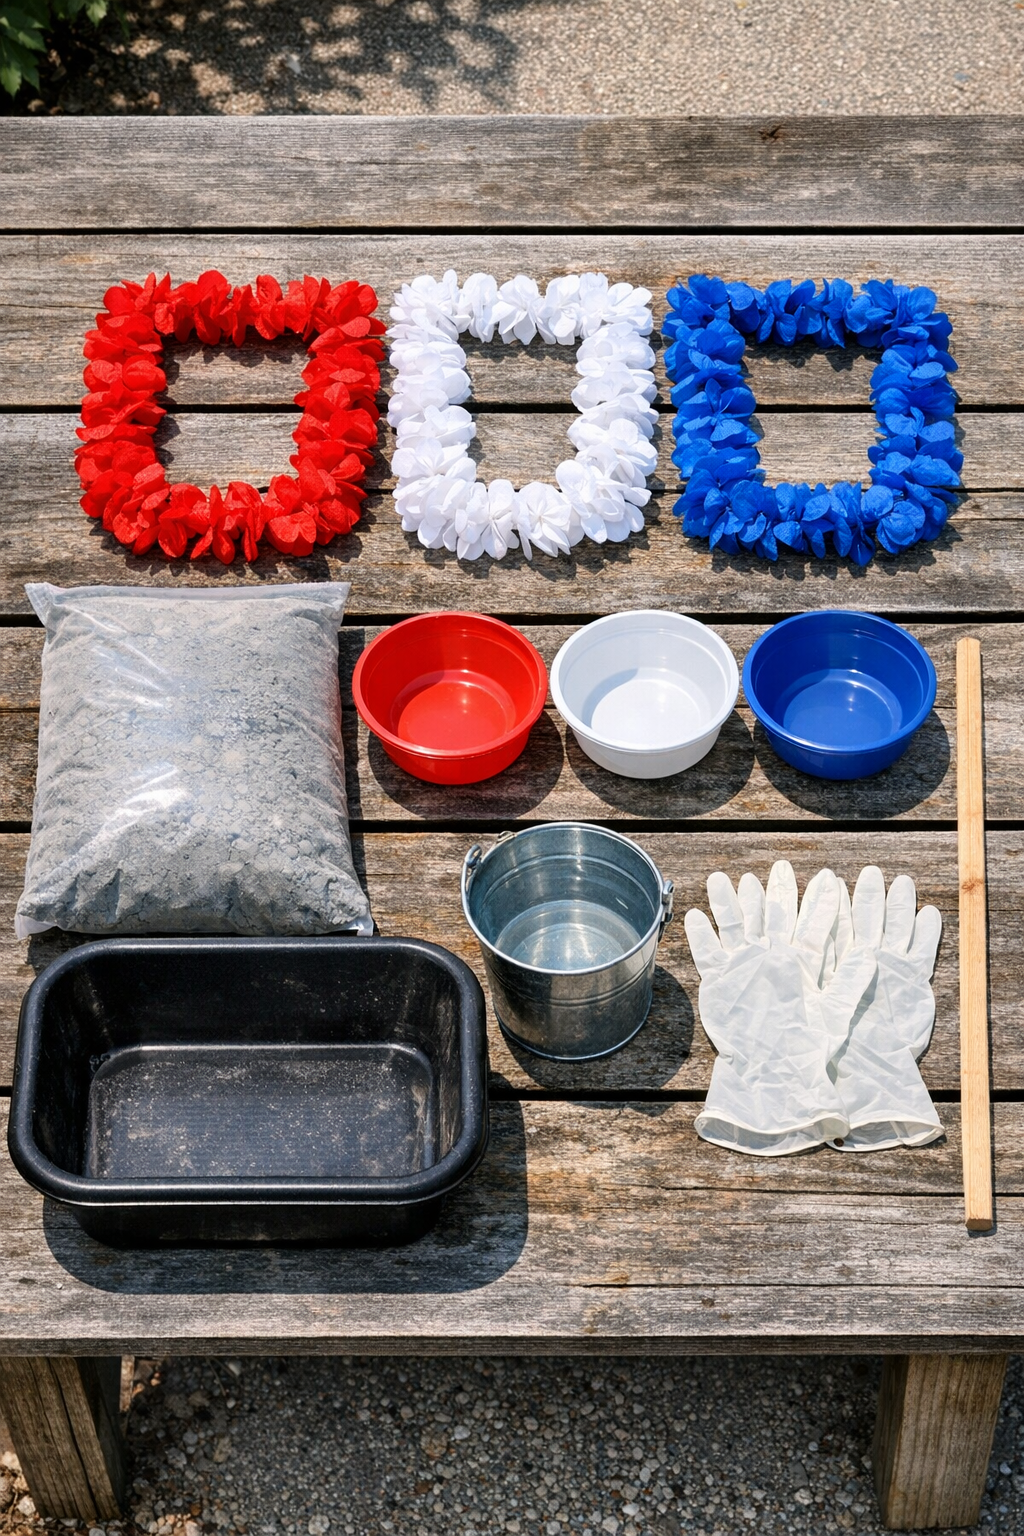
Materials
3 synthetic red, white, and blue flower leis, 36 to 40 inches each
Instructions
1. Spread the plastic drop cloth over your work surface and set the three plastic bowls upside down on top, leaving a few inches between them.
2. Put on gloves, then pour the cement mix into the mixing tub and add the water a little at a time, stirring until it reaches the consistency of thick pancake batter.
3. Dip the first lei into the cement mixture and press it down gently so every flower and strand is fully coated.
4. Lift the lei out slowly, letting the extra cement drip back into the tub for a few seconds so the coating stays thick but not overly heavy.
5. Drape the coated lei over one upside-down bowl, arranging the loops and ruffles so the edges fall naturally and create plenty of deep texture.
6. Repeat with the second and third leis, shaping each one a little differently so the finished yard forms do not all look identical.
7. If any spots look thin, pat on a little extra cement with your gloved hand, especially around the top curve and the lower folds that will show most once displayed.
8. Leave the forms undisturbed until they are firm enough to hold their shape, about 12 to 24 hours depending on temperature and humidity.
9. Carefully lift each hardened piece off its bowl and turn it upright; if the inside still feels damp, let it dry another 24 hours before placing it outdoors.
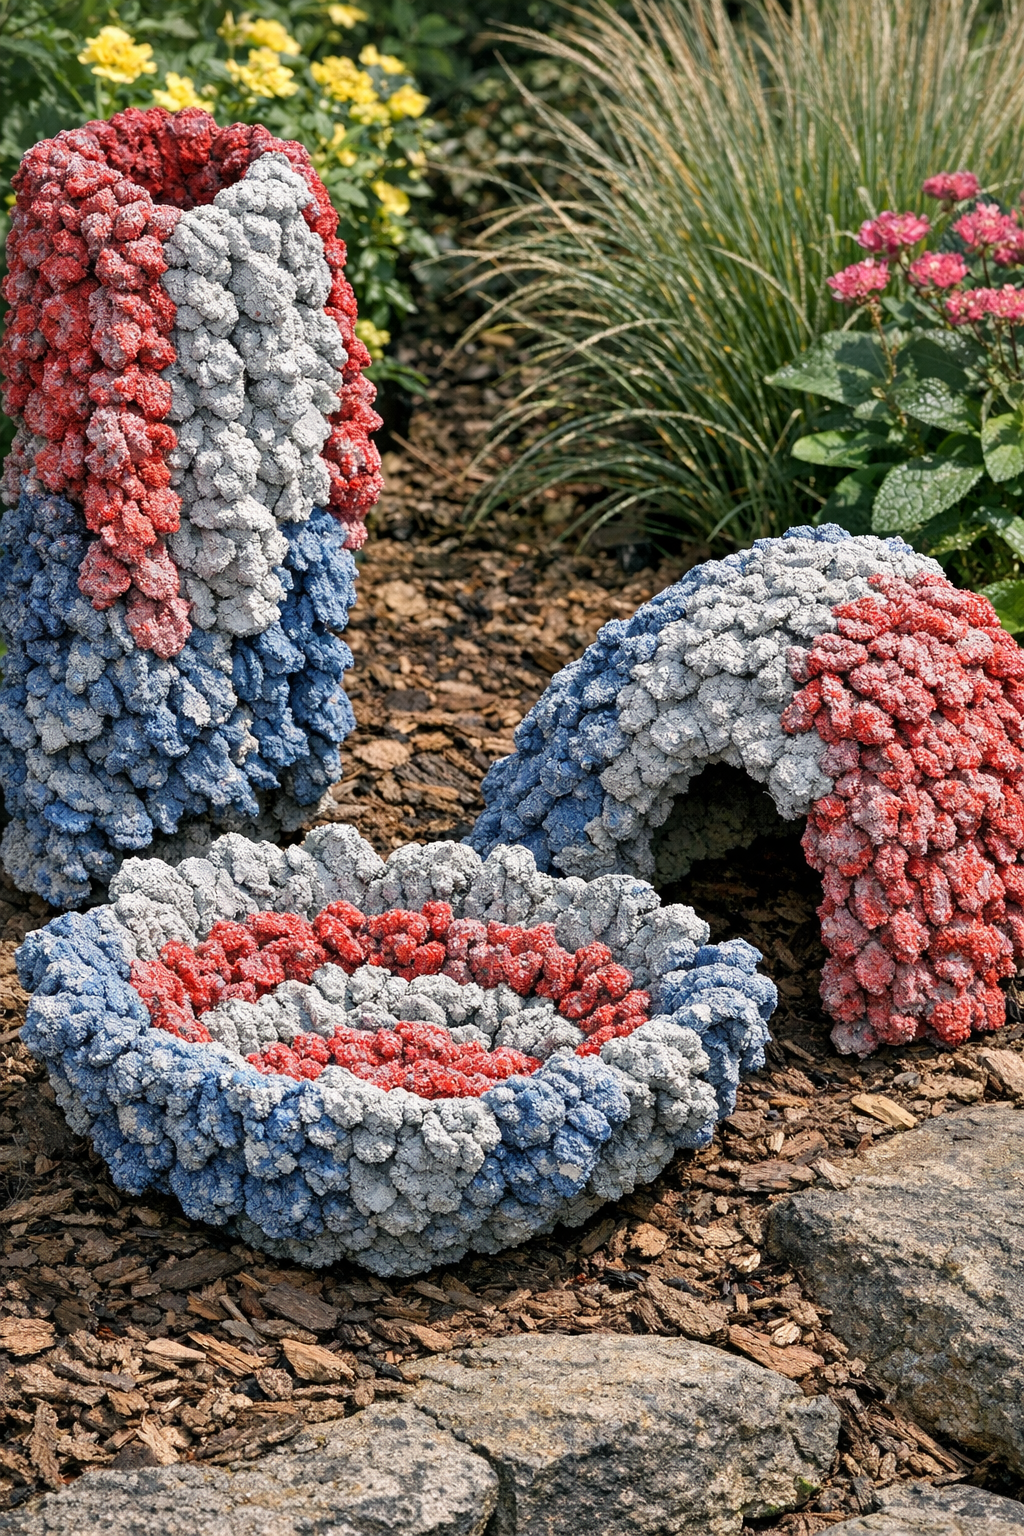
10. Set the finished forms in your yard, porch planters, or garden beds where their heavy stone-like texture can catch the light and contrast with greenery.
Variations & Tips
Different mold shapes: Try draping the cement-soaked leis over buckets, large cans, or shallow planters if you want taller or wider forms. I like mixing the shapes because a grouped display feels more collected and natural.
Extra texture: For a chunkier, more weathered finish, mix the cement just a touch thicker and press it deeper into the flower petals before draping. Those little folds and ridges are what make the finished pieces so handsome in the yard.
Color fading is fine: The original red, white, and blue may peek through at first, but it will soften under the cement and outdoor exposure. To my eye, that worn look only adds to the charm, much like old garden ornaments on a farmhouse path.
Weather protection: Let the forms cure fully for a couple of days before leaving them in heavy rain. If you want them to last longer, brush on an outdoor masonry sealer once they are completely dry.
Safe handling: Cement can be hard on the skin and lungs, so wear gloves and mix in a well-ventilated outdoor area. It’s a simple project, but I’ve learned over the years that a little care at the start makes the whole job easier.
Placement idea: These look especially pretty nestled near hostas, ornamental grasses, or along a walkway where the rough texture stands out against soft leaves. In my own mind, they have that old Midwestern garden feel, as if they’ve been there longer than they really have.