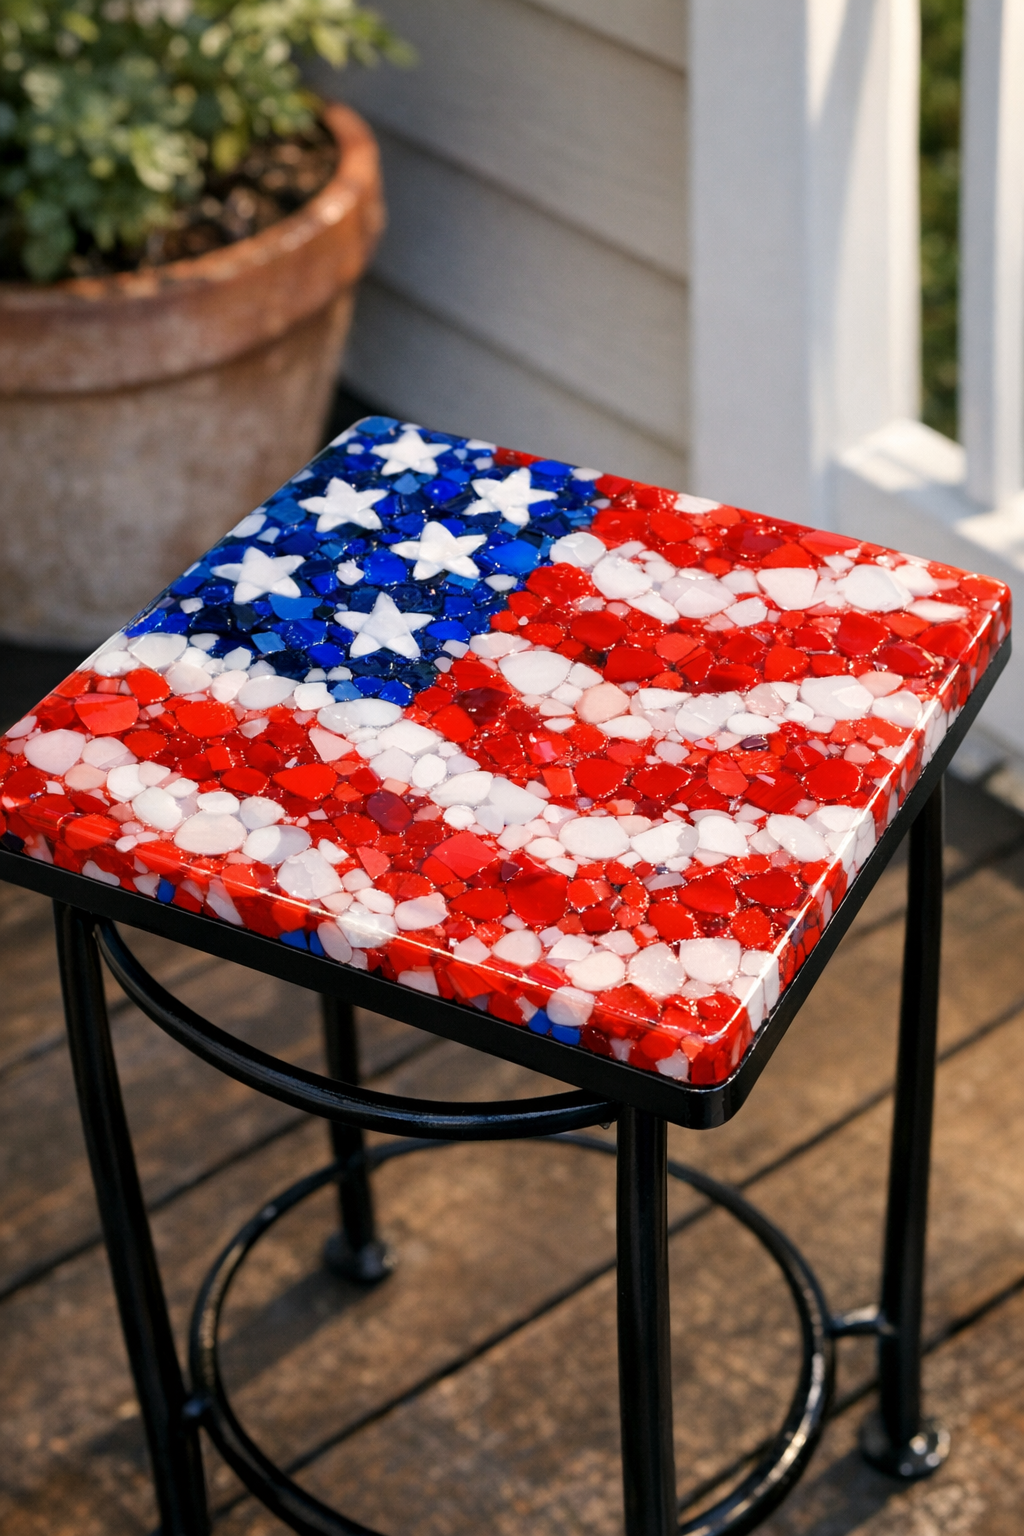
There’s something mighty satisfying about turning odds and ends into something cheerful and useful, especially when it’s headed for the porch or patio. This patriotic outdoor tabletop is made by melting red, white, and blue plastic bottle caps into a simple mosaic-style panel, then pairing it with two everyday items to create a sturdy little surface that looks far fancier than its humble beginnings.
I’m especially fond of projects like this because they remind me of the old Midwestern habit of wasting nothing if it could be made beautiful instead. If you’ve got a stash of bottle caps, a small metal side table frame or plant stand, and a baking sheet or tray to work from, you can make a festive tabletop that’s just right for summer gatherings, lemonade on the porch, or setting down a plate at the cookout.
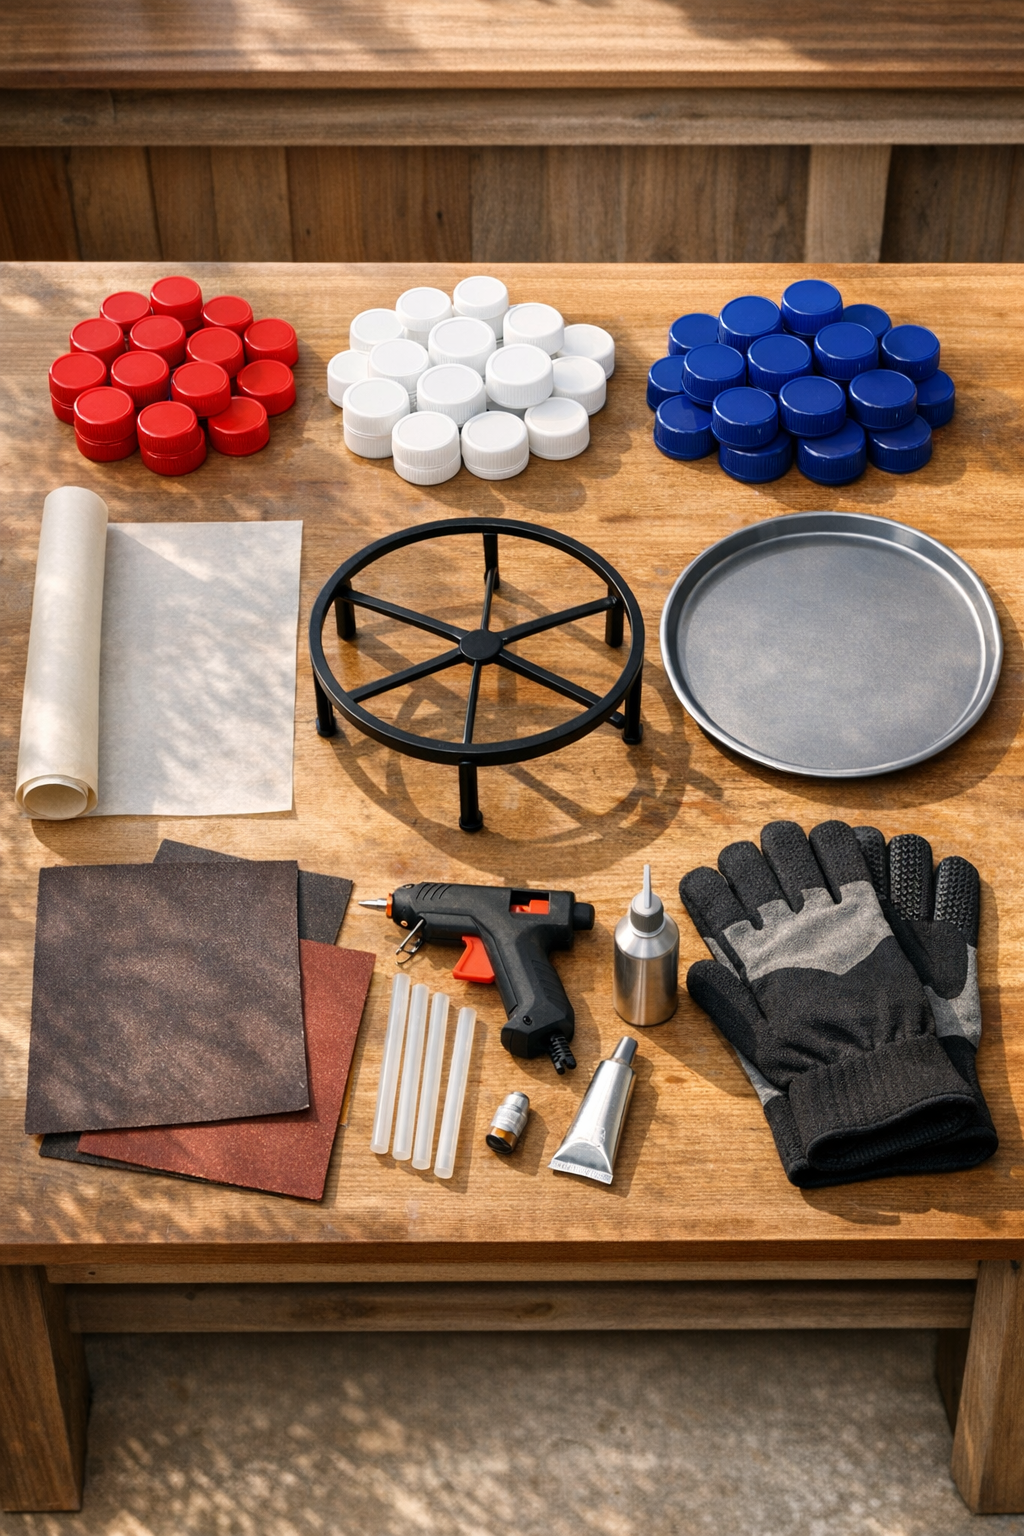
Materials
Instructions
1. Wash the bottle caps in warm soapy water, remove any liners if they pop out easily, and dry them thoroughly so they melt evenly.
2. Lightly sand the inside of the pizza pan or tray and wipe it clean with rubbing alcohol to help the finished plastic panel release cleanly and bond better later.
3. Line the pan with parchment paper, trimming it so it sits flat without large folds or ridges.
4. Arrange the caps inside the pan in a patriotic pattern, such as a blue corner with white accents and red-and-white stripes, keeping the caps tightly packed so they fuse together as they melt.
5. Place the pan in an oven dedicated to crafts or in a well-ventilated workspace oven set to 400 degrees Fahrenheit, and heat for 12 to 18 minutes until the caps soften and melt into one another.
6. Check carefully through the oven window if possible, and remove the pan once the caps have flattened and fused but before the colors begin to brown.
7. Let the melted panel cool completely in the pan until firm, then lift it out by the parchment and peel the paper away from the back.
8. Test-fit the panel on the plant stand or table base, and trim any rough overhangs carefully with sturdy shears only if needed once fully cooled.
9. Apply a generous bead of outdoor construction adhesive or epoxy to the top rim or support ring of the base, then center the melted cap panel on top and press it down evenly.
10. Allow the adhesive to cure according to the package directions before moving the table outdoors or placing anything on top of it.
Variations & Tips
Star Pattern: If you’re patient with layout, make a blue center with a simple white star shape and surround it with red rings for a bolder folk-art look.
Sizing Tip: Count and dry-fit your caps before heating so you know the pan will fill fully; gaps can leave weak spots in the finished panel.
Heat Safety: Melt plastic only with very good ventilation, and I always recommend using an oven that is not meant for everyday food cooking if possible.
Base Options: An old wire plant stand, thrifted side table frame, or metal stool base all work nicely as long as the top support is level and sturdy.
Surface Finish: If you want a smoother top, place a second sheet of parchment over the hot panel and press very gently with another flat pan once it has softened, taking great care with heat-resistant gloves.
Weather Tip: This table is best on a covered porch or patio; long stretches of intense direct sun can fade colors over time, just like any hardworking outdoor piece.