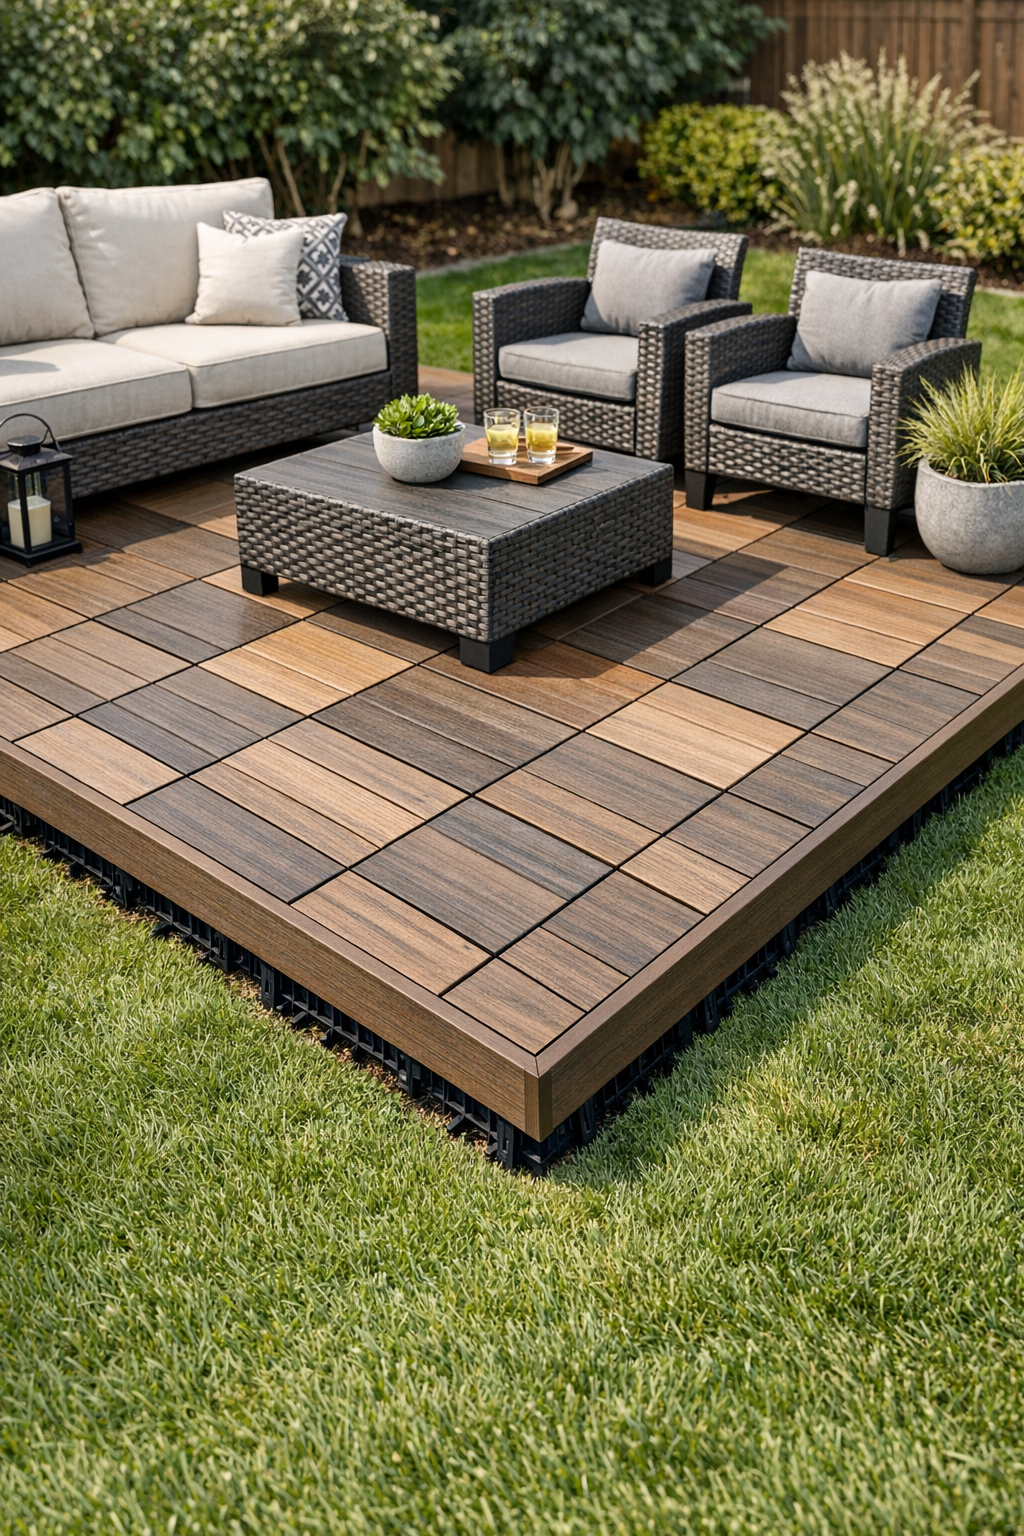
There’s something mighty satisfying about turning a plain patch of yard into a place where folks naturally want to gather. This floating deck is one of those practical projects I wish more people knew about: no pouring concrete, no digging deep footings, and no complicated framing. You’re simply creating a stable surface with interlocking plastic grid base panels and topping them with composite deck tiles for a neat, finished platform that can sit right over a level grassy area.
I like this kind of project because it gives you the look of a tidy deck without the full expense or commitment of a permanent build. It’s especially good for beginners, renters who can make temporary improvements where allowed, or anyone who wants a clean spot for a pair of chairs, a grill, or a little table out in the yard. It reminds me of the practical Midwestern way I grew up with—make it sturdy, make it useful, and make it welcoming.
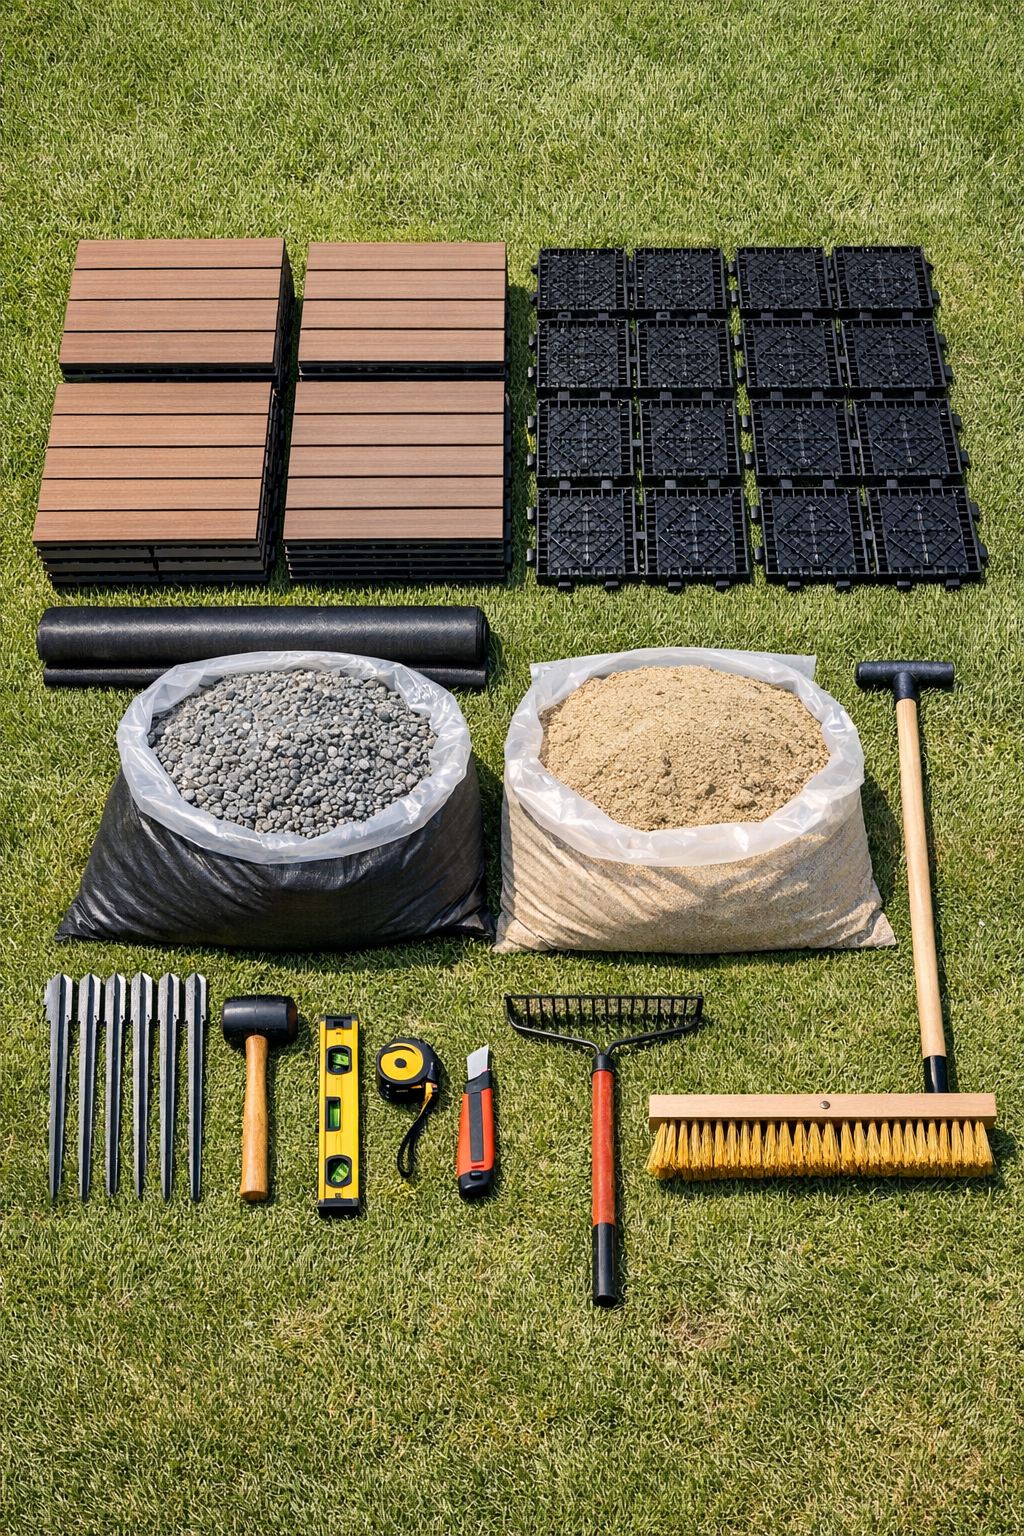
Materials
Instructions
1. Choose a spot that’s fairly level and drains well, then mark out the deck area to the finished size you want. A simple 4 ft. x 6 ft. rectangle is a good starter size and uses 24 one-foot tiles.
2. Measure corner to corner to square the layout, adjusting the lines until both diagonal measurements match. This little step saves a lot of fuss once the tiles start snapping together.
3. Cut the grass very short in the marked area and remove any loose sticks, roots, or stones. If the ground is bumpy, scrape down the high spots so you’re starting with the flattest base you can manage.
4. Lay the landscape fabric over the entire area, extending it a few inches past the perimeter, and pin it in place. This helps hold back weeds and keeps your base materials from sinking into the soil as quickly.
5. Spread 2 to 3 inches of paver base gravel over the fabric and rake it roughly level. Tamp it down firmly, then check the surface with a long level or straight board so it’s even across the whole footprint.
6. Add about 1 inch of leveling sand on top of the compacted gravel and smooth it carefully. Keep the surface flat and just slightly pitched away from the house—about 1/8 inch per foot—for drainage if the deck is near a structure.
7. Start in one corner and snap the plastic grid base panels together row by row, making sure each connection is fully locked. Press down as you go so the grid sits flat without rocking.
8. Check the assembled grid with your level in several directions and correct any low spots by lifting the grid and adding a little sand underneath. Take your time here, because a floating deck only looks as good as the base under it.
9. Lay the first composite tile into the corner of the grid base and lock it in according to the manufacturer’s connection system. Continue across the first row, keeping the tile edges aligned tight and straight.
10. Complete the remaining rows of composite tiles, stepping back every few pieces to check that the seams stay even. Use a rubber mallet only if the manufacturer allows it, tapping gently to seat stubborn connections.
11. If needed, cut the final row or edge tiles to fit using the manufacturer’s cutting guidance and a saw suitable for composite material. Brush away dust before snapping the cut pieces into place.
12. Install any snap-on edge trim for a more finished look, and secure exposed perimeter pieces with exterior adhesive only if recommended for your tile system. Sweep the surface clean and test for any movement, adjusting the base under problem spots if needed.
Variations & Tips
Small Patio Version: If you only want room for two chairs and a little table, build a 4 ft. x 4 ft. square using 16 tiles and 16 grid panels. That’s a nice manageable weekend project for a first try.
Better Drainage: In soggy areas, increase the gravel layer slightly and be extra careful about the gentle slope. Around here, we’ve learned the hard way that standing water always tells on you later.
Edge Finish: Matching edge trim makes the deck look more intentional and helps reduce tripping at the perimeter. I think it’s worth adding if the deck will sit out in open view.
Ground Prep Tip: Don’t skip leveling just because the tiles seem forgiving. Composite tile systems can hide a little unevenness, but they won’t hide a lumpy yard for long.
Seasonal Maintenance: Sweep leaves and dirt off regularly, and lift a few tiles once or twice a year to check for ant nests, washouts, or low spots. A floating deck is easy to refresh, and that’s one of its real charms.
Layout Option: If your tiles allow directional changes, alternate the pattern every other row or make a checkerboard look for extra character. It’s a simple touch that gives the whole yard a more finished, porch-like feel.