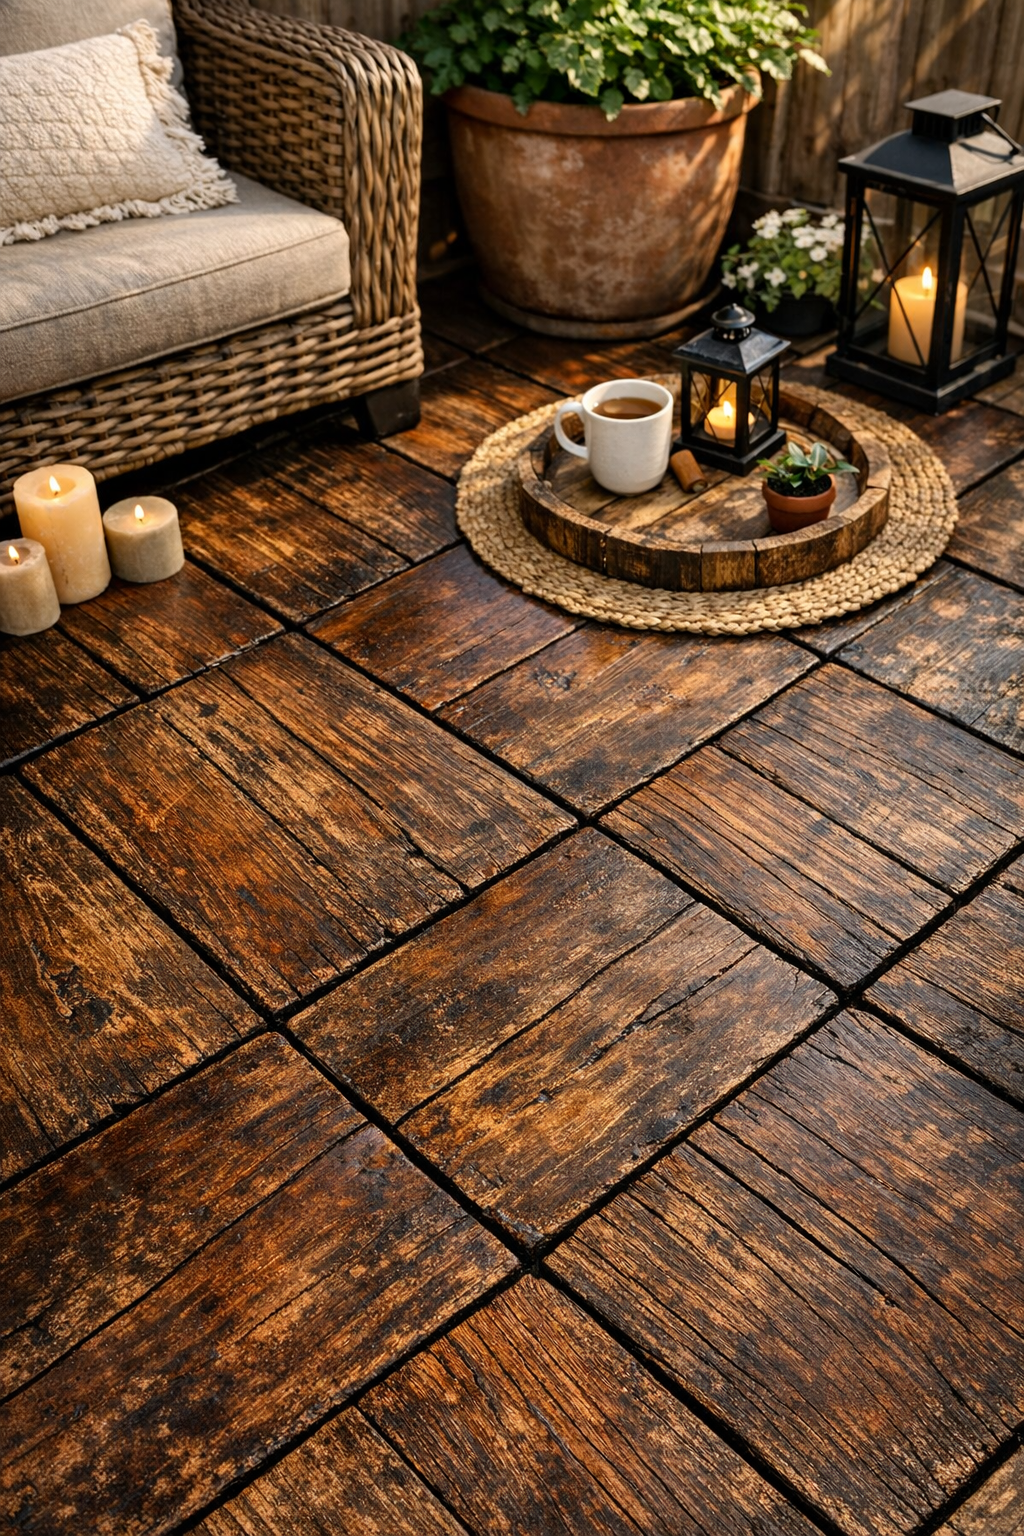
If you love a budget-friendly makeover with a big visual payoff, these rustic faux-wood patio tiles are such a fun project. I first tried this idea because I wanted something warm and woodsy for an outdoor corner, but I did not want the cost or upkeep of real wood decking. Using paper plates as the base sounds a little wild at first, but once they are sealed and coated in dark-tinted resin, they take on a surprisingly rich, rustic look.
This project is best for decorative patio zones, covered porches, and small seating nooks where you want the charm of wood without cutting lumber. I like projects like this because they feel creative and approachable, and if you are the kind of person who enjoys transforming humble materials into something conversation-worthy, this one is especially satisfying.
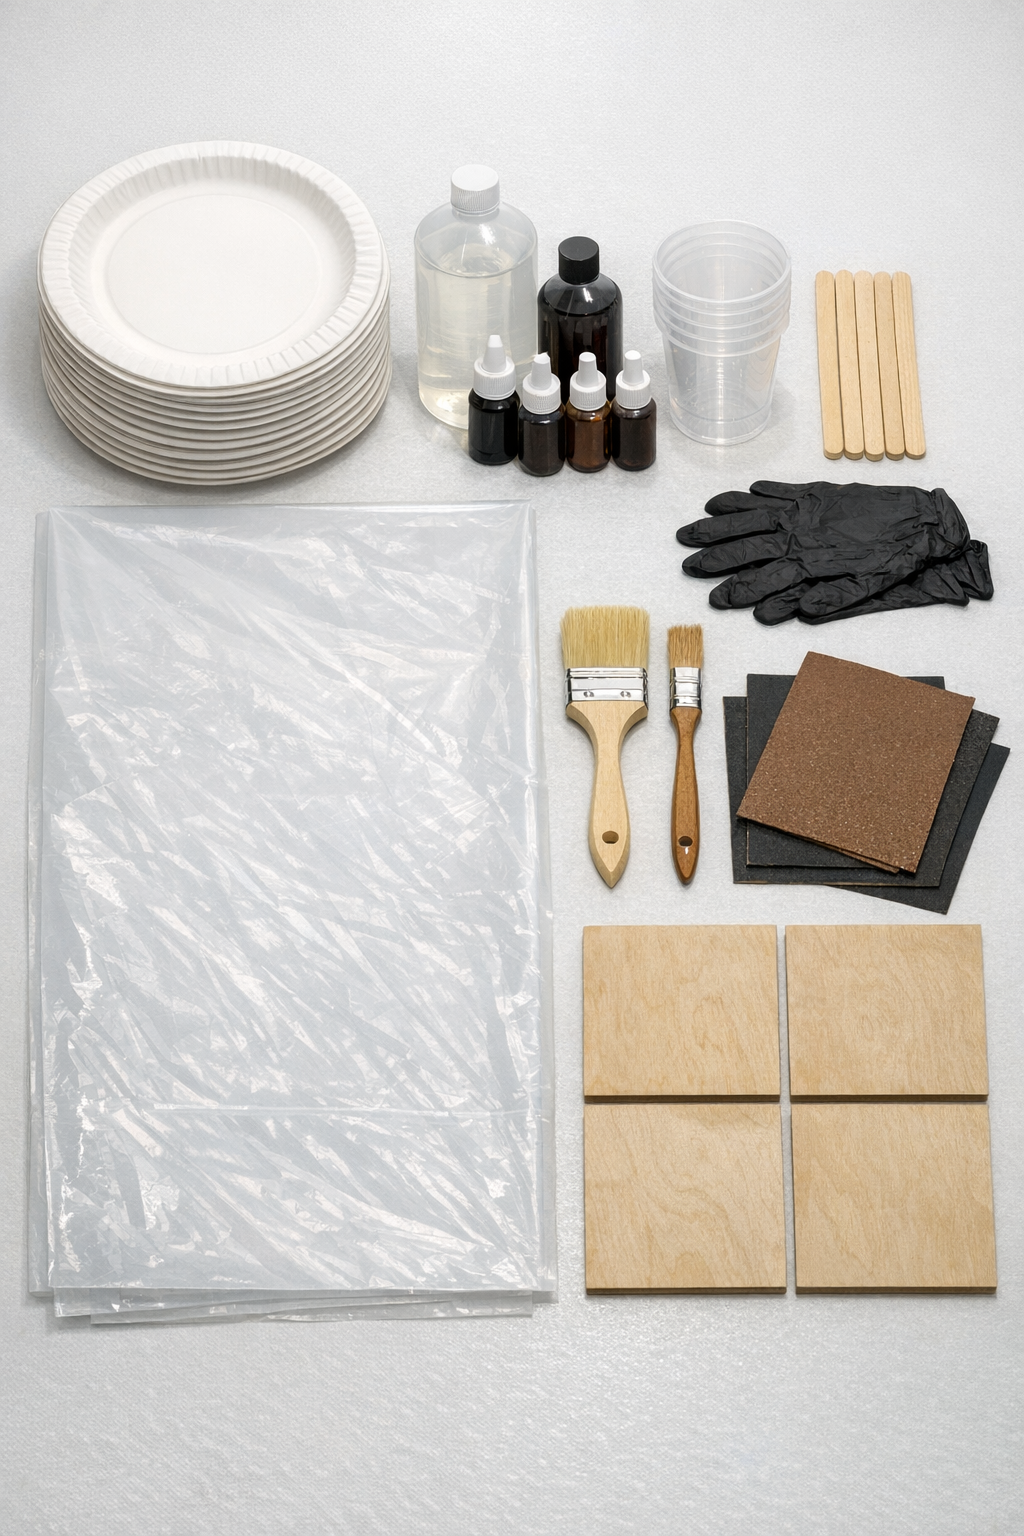
Materials
Instructions
1. Cover your work surface with the plastic drop cloth and make sure the area is level, dust-free, and well ventilated. Put on gloves before working with any resin.
2. Tape foil over each plywood backer panel, wrapping it smoothly around the edges to create a nonstick, protected base. Press the foil flat so the plate layers will sit evenly.
3. Arrange 25 paper plates on each backer panel in a tight layout, slightly overlapping the rims to form two square tile sections. Trim only a few edge plates if needed so the outer edges look balanced.
4. Lift one plate at a time and add a thin layer of craft glue beneath the overlap points, then press it back into place. Let the glued arrangement dry for 30 to 45 minutes so the pattern stays put.
5. Mix a small batch of resin according to the package directions, then tint it with mostly brown pigment and a little black until it resembles dark walnut. Stir slowly to reduce bubbles.
6. Brush a thin sealing coat of tinted resin over the top of the plates, working it into the ridges and rims. This first coat helps stiffen the paper and prepares the surface for the heavier finish coat.
7. Let the sealing coat cure until tacky but not fully hard, usually 4 to 6 hours depending on the resin. Keep dust and debris away during this stage.
8. Mix a larger batch of resin and deepen the color slightly with a touch more black pigment. Pour it across the surface in slow lines, then spread it with a foam brush so every plate is fully smothered and the overlaps visually blend together.
9. Drag a dry chip brush lightly through the wet resin in long, uneven strokes to mimic wood grain. Work in one direction and vary the pressure so the finish looks more natural.
10. Pop any surface bubbles with a quick pass of a heat gun or by gently exhaling across the resin if your product allows it. Then leave the panels flat to cure fully for 24 hours.
11. Once cured, check the surface and lightly sand any sharp drips or overly raised spots with 80-grit sandpaper, then smooth those areas with 220-grit. Wipe away all dust with a shop rag.
12. Turn the panels over and run construction adhesive anywhere the plate backs need extra support against the plywood. Press firmly and let the adhesive set according to the tube directions.
13. Brush on two thin coats of exterior matte polyurethane or outdoor sealer, allowing the first coat to dry fully before adding the second. This helps protect the finish and tones down excess shine for a more weathered wood look.
14. Add non-slip rubber pads to the underside corners and midpoint areas of each panel. Set the finished tiles in a covered patio area on a flat, dry surface.
Variations & Tips
For a lighter wood tone: Use less black pigment and add a warm medium-brown tint for a cedar or driftwood-inspired finish.
For picky decorators: If your family likes cleaner, less rustic lines, brush the grain effect more evenly so the finished tiles look closer to stained planks than reclaimed wood.
For outdoor use: I recommend keeping these in covered spaces rather than out in constant rain, since the paper core is decorative at heart even when well sealed.
For a smaller project: Make one 24-inch square panel as a plant stand base or a little outdoor side-table top before committing to a full set.
To make them sturdier: Mount each finished panel permanently to an existing patio mat base or a framed wood platform for less flex and longer wear.
My best resin tip: Mix slowly, scrape the sides and bottom of the cup well, and do not rush the cure time. Patience is what gives this project that surprisingly polished, viral-worthy finish.