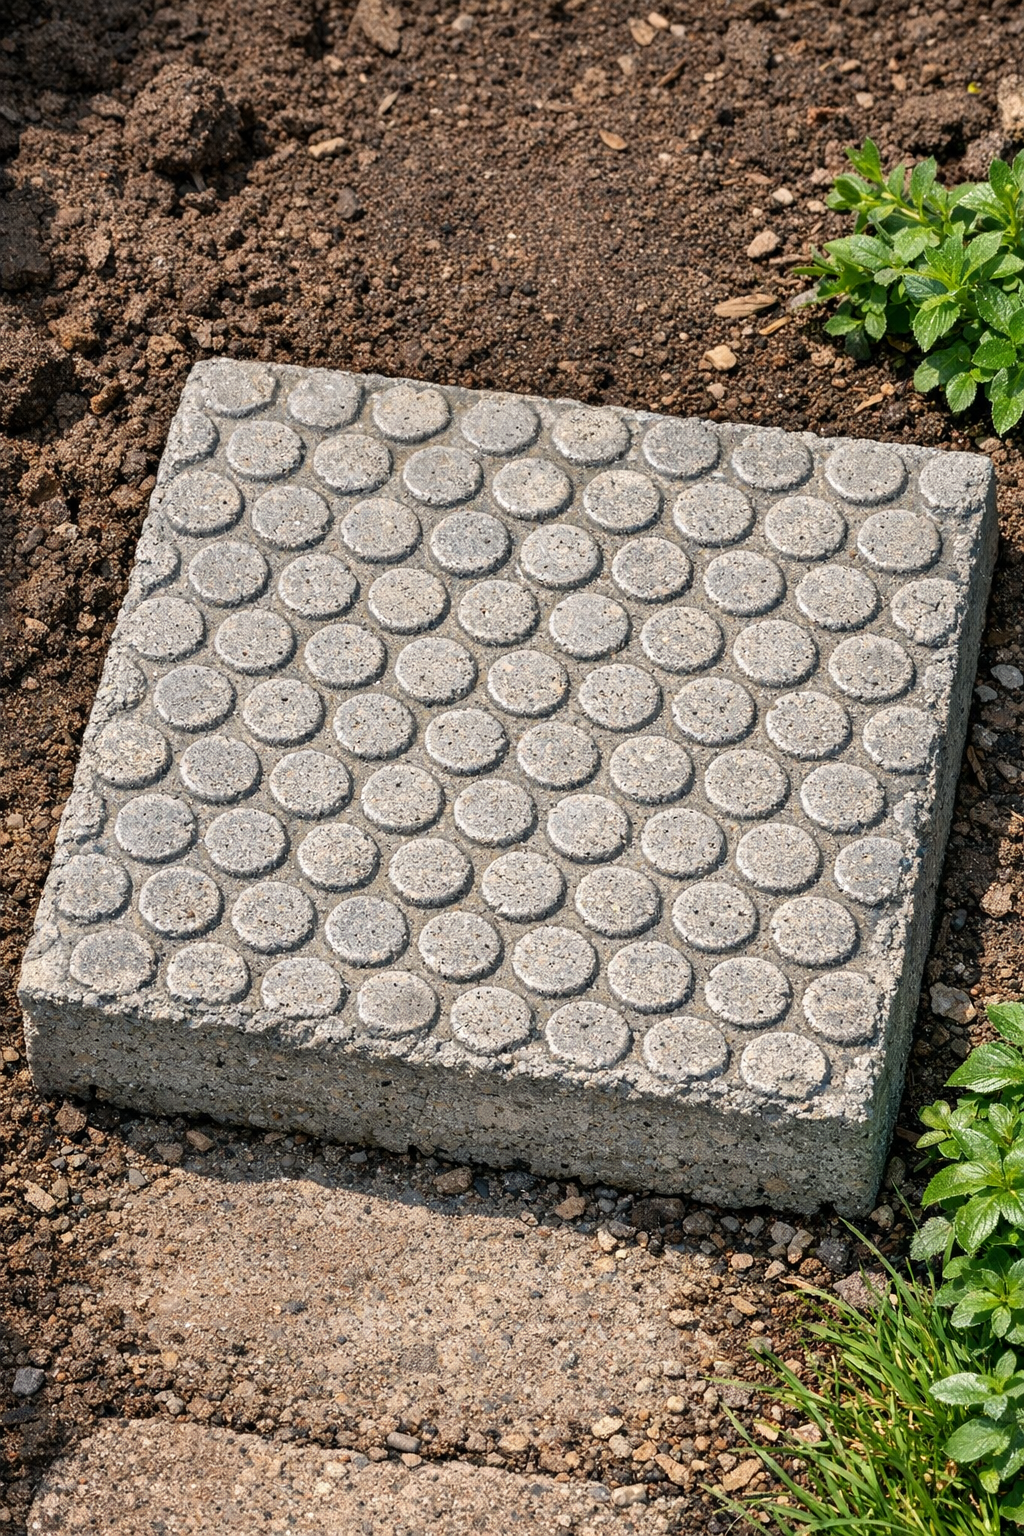
There’s something deeply satisfying about making a practical yard piece out of almost nothing, especially when the finished surface looks far fancier than the materials that went into it. These heavy honeycomb-textured yard slabs are made with wet cement, a sheet of plastic bubble wrap, and a couple of simple scrap items to shape and support them. When you press that bubble wrap into the surface, it leaves behind a wonderful pattern that reminds me of old pressed tin and honeycomb all at once.
I like this sort of project for anyone who wants an inexpensive garden path, a stepping area near a hose bib, or just a sturdy decorative slab tucked into the flower beds. It’s a good weekend job, and while the materials are humble, the end result has a handmade permanence that feels right at home in a yard that’s meant to be used and loved.
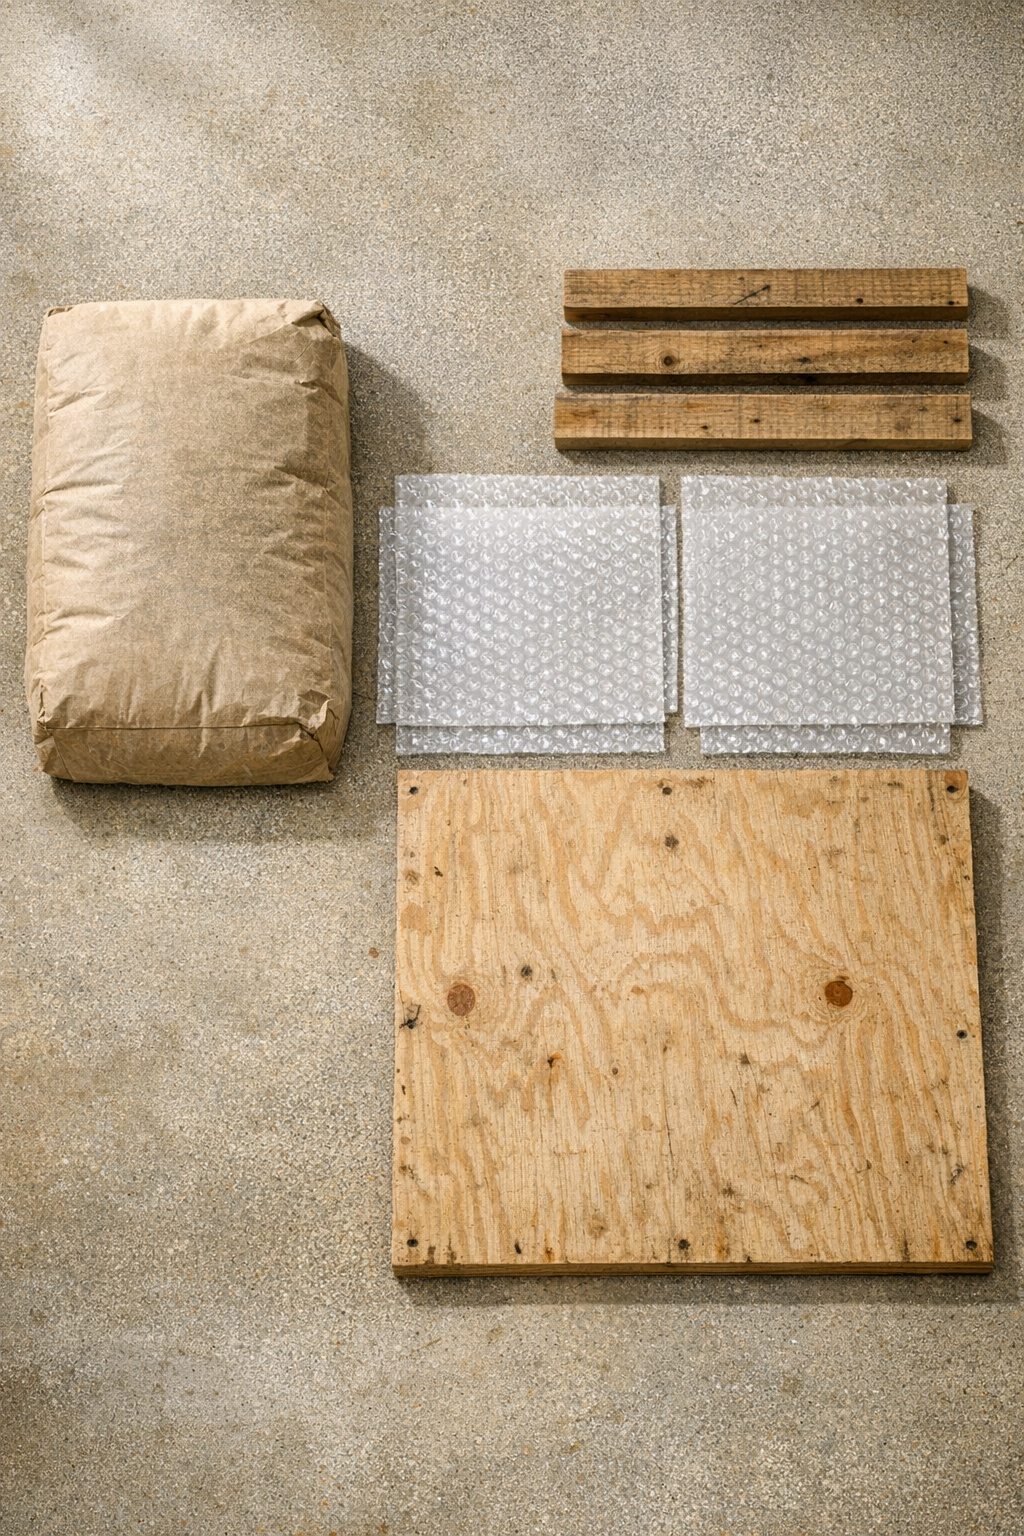
Materials
1 bag premixed concrete, 60 lb
Instructions
1. Set the scrap plywood on a flat, level surface outdoors or in a well-ventilated work area, then arrange the four scrap boards into an 18 x 18 inch square mold on top.
2. Press the mold corners tight and steady the boards so they won’t shift while you fill; if your scraps are uneven, turn the straightest edges inward for a cleaner slab.
3. Mix the concrete with water according to the bag directions until it reaches a thick, scoopable consistency, like stiff oatmeal that holds its shape but still settles when tapped.
4. Shovel or pour the wet concrete into the mold and spread it into the corners, aiming for a slab thickness of about 2 to 2 1/2 inches so it will hold up well in the yard.
5. Tap the plywood base and the outside of the mold several times to release trapped air, then smooth the top lightly without overworking it.
6. Cut a piece of bubble wrap to fit just inside the mold, then lay it bubble-side down onto the wet surface and press evenly with your hands so the pattern sinks in across the slab.
7. Add a second firm press using a flat scrap board or your palms to deepen the texture, but don’t push so hard that the plastic disappears beneath the surface.
8. Let the concrete rest until it starts to firm up, usually 30 to 60 minutes depending on weather, then peel the bubble wrap back slowly to reveal the honeycomb pattern.
9. Leave the slab in the mold to cure undisturbed for 24 to 48 hours, keeping it lightly covered or misted if the weather is hot and dry so it doesn’t cure too fast.
10. Remove the scrap boards, slide the slab carefully onto its final spot, and let it continue curing for about 5 to 7 days before putting full weight or heavy traffic on it.
Variations & Tips
Change the size: Use the same method for smaller stepping stones or larger patio-style pads, but keep the thickness around 2 inches minimum so the slab stays strong.
Try different scrap molds: If you have other straight scrap boards on hand, you can make rectangles instead of squares. I’ve always found simple shapes easiest to place in a yard and easiest to mow around too.
Mind the moisture: If the concrete is too wet, the bubble pattern will soften and slump. A slightly stiffer mix gives a cleaner honeycomb impression.
Press at the right moment: If the surface is soupy, wait a few minutes before adding the bubble wrap; if it’s already stiffening, mist the top very lightly and press right away. Concrete has its own temperament, and learning to watch it reminds me of biscuit dough—timing matters as much as ingredients.
Make a path set: For a coordinated garden path, prepare several identical bubble-wrap pieces and molds so each slab has the same texture and size.
Leave the finish natural: These look lovely plain, especially in a cottage garden or practical side yard. The soft gray ages beautifully outdoors and lets the texture do all the talking.