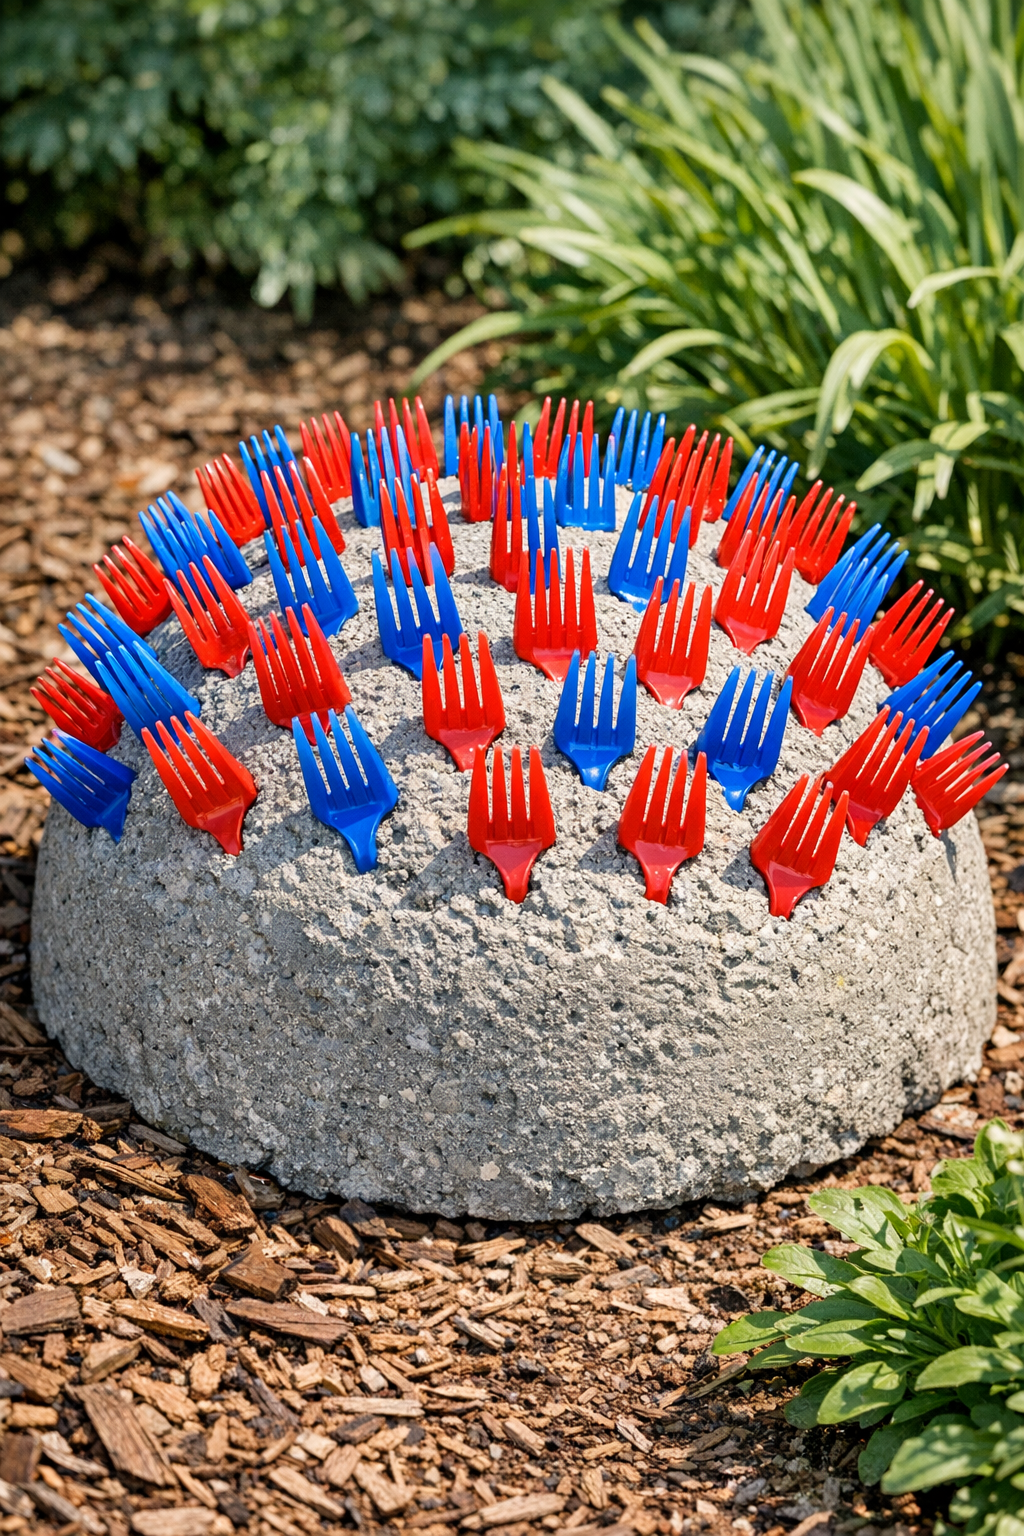
I love a project that looks a little wild and artsy but is secretly very simple to pull off, and this one absolutely fits that category. By pressing red and blue plastic picnic forks into wet cement, you can make heavy spiked outdoor forms that work as sculptural garden accents, quirky patio décor, or even conversation-starting border pieces around a planting bed.
What makes this especially appealing to me is that it uses just a few inexpensive supplies and doesn’t require fancy tools or perfect technique. If you’re busy like I am and still want a weekend project with a big visual payoff, this is the kind of hands-on DIY that feels fun, fast, and surprisingly satisfying.
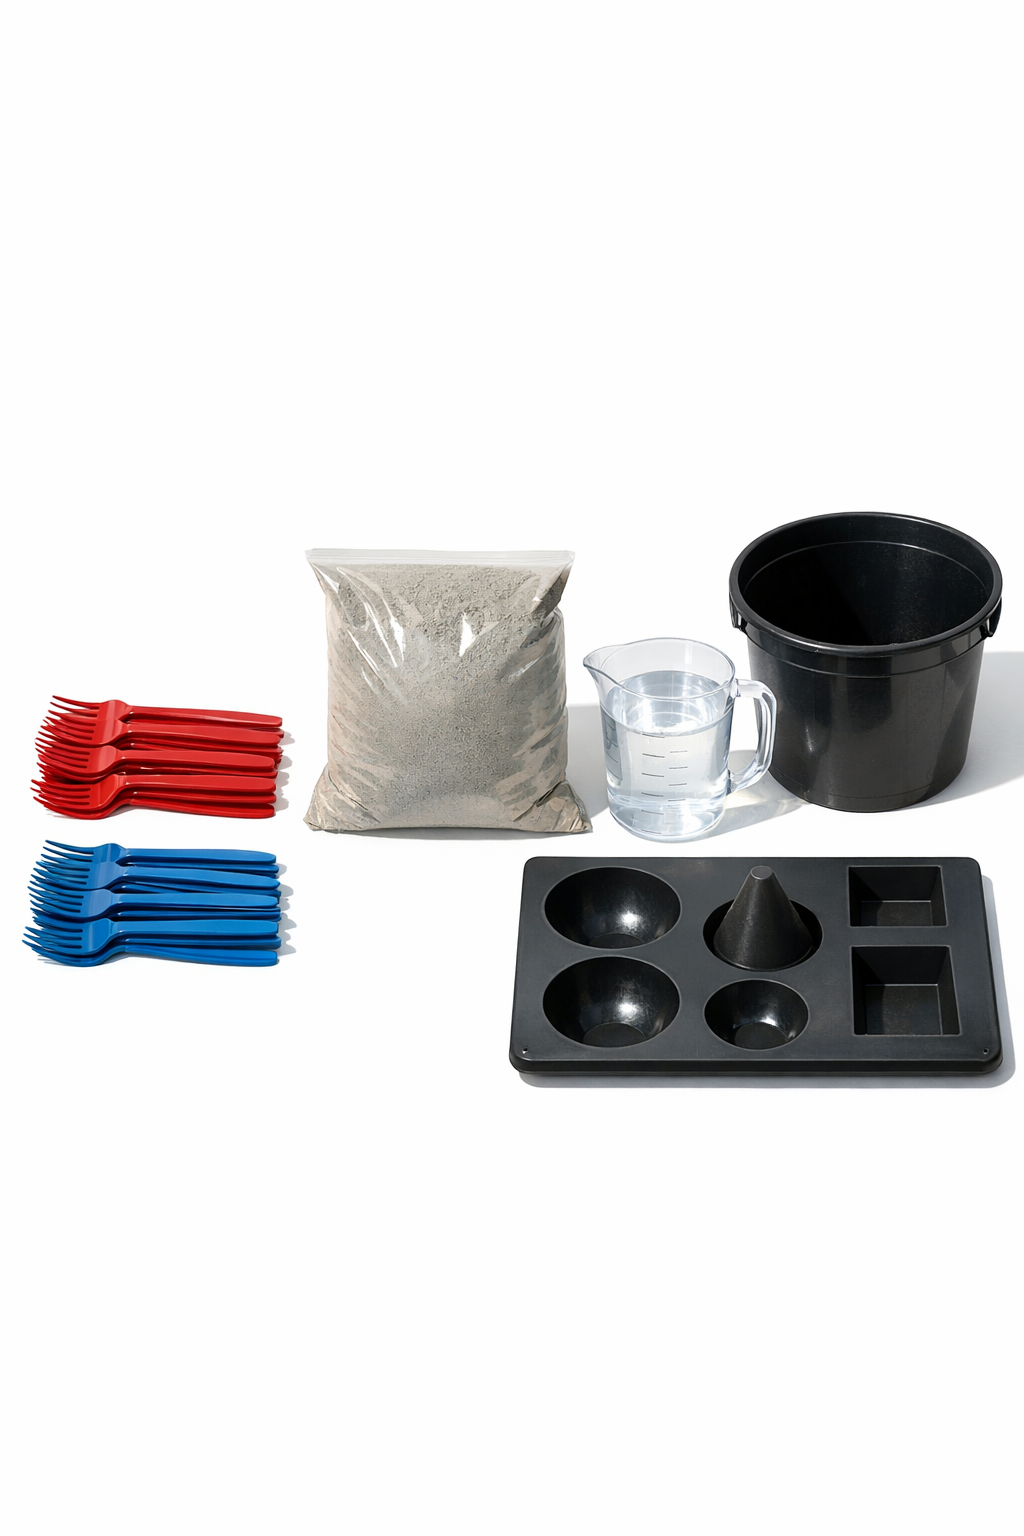
Materials
Instructions
1. Set up your workspace outdoors or in a well-ventilated garage, and cover the surface with a drop cloth or cardboard. Put on gloves before handling the cement.
2. Lightly coat the inside of your mold with cooking oil or mold release so the cement form will come out more easily after curing.
3. Sort the forks by color and decide on a rough pattern before you mix the cement. I like alternating red and blue in rings because it looks intentional without needing to be perfectly precise.
4. Pour the cement mix into the bucket, add 6 cups of water, and stir until it reaches a thick pudding-like consistency. Add up to 1 extra cup of water a little at a time only if the mix feels too dry to spread.
5. Scoop the wet cement into the prepared mold and spread it evenly to a thickness of about 2 1/2 to 3 inches. Tap the mold gently on the work surface several times to release trapped air bubbles.
6. Begin pressing the forks handle-first into the wet cement at a slight outward angle, leaving the tines exposed to create the spiked effect. Space them about 1 to 1 1/2 inches apart so the form looks full without crowding.
7. Continue inserting forks in rows or rings, alternating red and blue as you go. Push each fork deep enough that at least 1 1/2 to 2 inches of the handle is buried in the cement for a secure hold.
8. Fill the entire top surface with forks, adjusting the angle as needed so the spikes radiate evenly from the form. If any fork feels loose, remove it, press the cement back together, and reinsert it deeper.
9. Let the piece cure undisturbed according to the cement package directions, usually 24 to 48 hours. Keep it in a dry spot where it won’t be bumped while the forks are setting in place.
10. Once fully hardened, gently remove the form from the mold and brush off any loose cement dust. Set it in the garden, near a walkway, or on a patio where the heavy spiked shape can really stand out.
Variations & Tips
Color Pattern: Try grouping all red forks on one side and blue on the other for a color-block effect, or alternate every single fork for a more graphic look.
Shape Option: Use an oval mold for a hedgehog-like silhouette or a round mold for something that feels more like a sea urchin or modern garden orb.
Cement Consistency: Don’t make the mix too loose or the forks can drift out of position. I’ve learned the hard way that thicker cement holds the angles much better.
Outdoor Placement: These look best tucked among low plants, gravel beds, or along a border where the colors pop against natural textures.
Safety Tip: The fork tines can be sharp, especially once fixed in place, so display the finished piece away from foot traffic and play areas.
Make-Ahead Tip: If you want a matched set, mix and fill all your molds first, then press in the forks assembly-line style before the cement starts to stiffen.