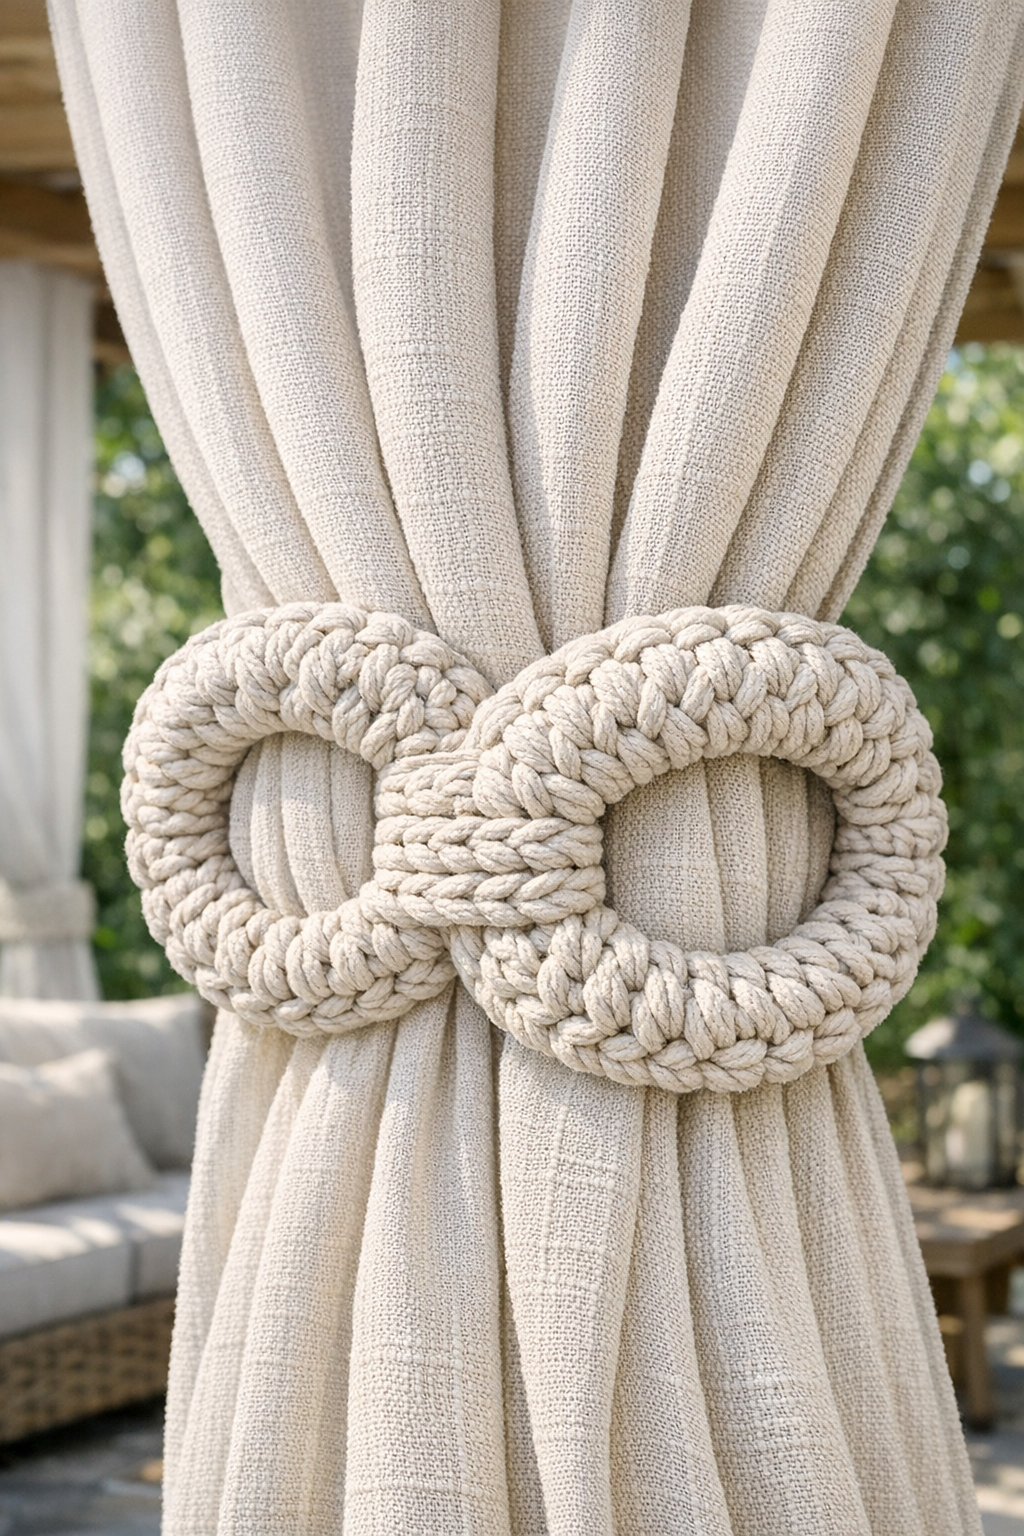
If you’ve ever looked at outdoor curtain tie backs and winced at the price, this is one of those projects that feels almost too clever to work until you see it finished. By slicing a pool noodle into rings and crocheting thick macramé cord around them, you can make soft, chunky canopy tie backs that look polished, modern, and surprisingly high-end.
I love projects like this because they’re inexpensive, easy to customize, and forgiving for beginners. If you can manage a simple crochet stitch and use a pair of scissors, you can make these. They’re especially nice for patios, pergolas, gazebos, or any backyard spot where you want outdoor curtains to look a little more intentional and cozy.
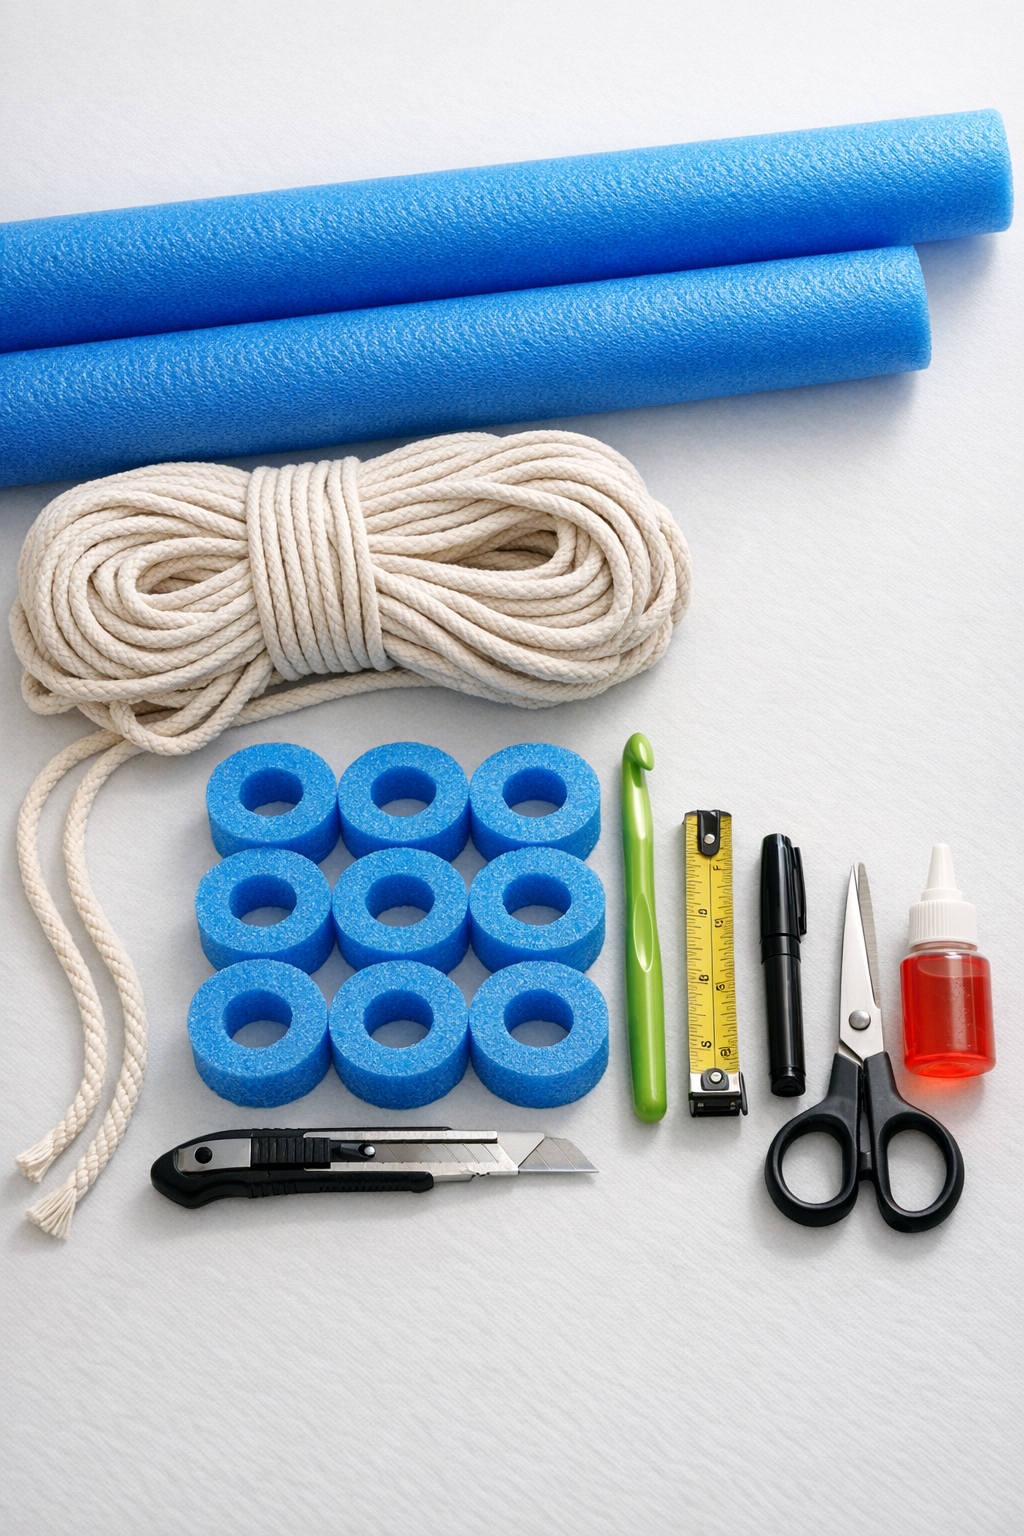
Materials
2 standard pool noodles, 2.5 to 3 inches in diameter and about 52 to 55 inches long each
Instructions
1. Measure and mark the pool noodles into 2-inch-wide sections, then cut out 8 rings total, 4 for each tie back. Try to keep the cuts as straight as possible so the finished pieces stack neatly.
2. Check each ring and trim any jagged edges so they’re smooth and even. Press them lightly to make sure they spring back and hold their round shape.
3. Cut 4 lengths of macramé cord, each 26 to 30 feet long, one length for each crocheted ring stack. It’s always better to have a little extra than come up short near the end.
4. Stack 2 pool noodle rings together for a thicker, more substantial tie back half, then hold them firmly in one hand. You’ll make 2 covered ring bundles per tie back, for a total of 4 bundles.
5. Make a slip knot with the cord and place it on your hook. Insert the hook through the center of the ring stack, yarn over with the cord, and pull up a loop to anchor the cord around the rings.
6. Work single crochet stitches tightly around the stacked rings, covering the foam completely as you go. Push each stitch snugly against the last so no pool noodle shows through.
7. Continue crocheting all the way around until you reach your starting point, then add or reduce a stitch if needed to make the coverage smooth and full. Join the round discreetly and fasten off, leaving a 6-inch tail.
8. Thread the tail under several nearby stitches to hide it, then trim the excess and secure the end with a tiny dot of fabric glue if needed. Repeat the same process until you have 4 fully covered ring bundles.
9. Pair the covered bundles into sets of 2 so each tie back has a matching pair. You can use each covered ring individually, or overlap the pair slightly when styling for a fuller designer look.
10. Gather your outdoor curtain panel at the midpoint and slip one covered ring bundle behind the fabric. Pull the drape through the center slightly, then nest the second ring over it from the front to create a secure, sculptural tie back.
11. Adjust the folds of the curtain until the fabric fans out evenly above and below the tie back. If you want a tighter hold for windy patios, use the rings closer together and gather more fabric through the center.
12. Repeat on the second curtain panel and make any final shape adjustments. Once they’re in place, the tie backs should look soft, chunky, and tailored rather than obviously homemade.
Variations & Tips
For picky color tastes: I like using natural, ivory, taupe, or soft gray cord because it blends with almost any outdoor fabric and gives that expensive resort-style look. If your family likes bolder spaces, black or navy can look very crisp and dramatic.
Make them larger: Use 3 rings per bundle instead of 2 if you have especially full or heavyweight outdoor curtains. The thicker bundle gives you a chunkier tie back and holds bulkier fabric much better.
Try a different stitch: Single crochet gives the neatest, most solid coverage, but half double crochet creates a slightly faster and loftier finish. I still recommend making your stitches tight so the foam never peeks through.
Choose outdoor-friendly cord: Cotton macramé cord is easy to work with and looks beautiful, but for very wet climates you may want a synthetic outdoor cord that dries faster. If you use synthetic cord, seal the cut ends carefully with a lighter.
Keep the cuts clean: A sharp knife makes all the difference here. When I rush foam cuts, I always regret it later because uneven rings show up in the finished shape.
Add a polished finish: If you want these to look even more custom, keep the seam line on the back side of each ring when styling them on the curtains. That tiny detail makes the whole project feel more professional.
Use them indoors too: These work just as well for a sunroom, playroom, or breezy bedroom curtains. I love a project that can stretch from patio season into the house without missing a beat.