There is something deeply satisfying about turning the simplest household odds and ends into something that looks like it belongs in a garden for years and years. This project uses plastic star-shaped ice trays, wet cement, and two other easy items to make heavy, star-studded yard forms that can edge a flower bed, dress up a path, or simply sit among the marigolds like little handmade treasures. I’m fond of projects like this because they feel practical and pretty at the same time, which is how we did things when I was growing up.
If you like garden crafts that are sturdy, inexpensive, and not too fussy, this one is for you. These concrete forms are beginner-friendly, and once you make the first batch, it becomes hard to stop. I’ve always believed the yard ought to have a few personal touches tucked here and there, and these stars have that homemade charm while still holding up to rain, sun, and muddy boots.
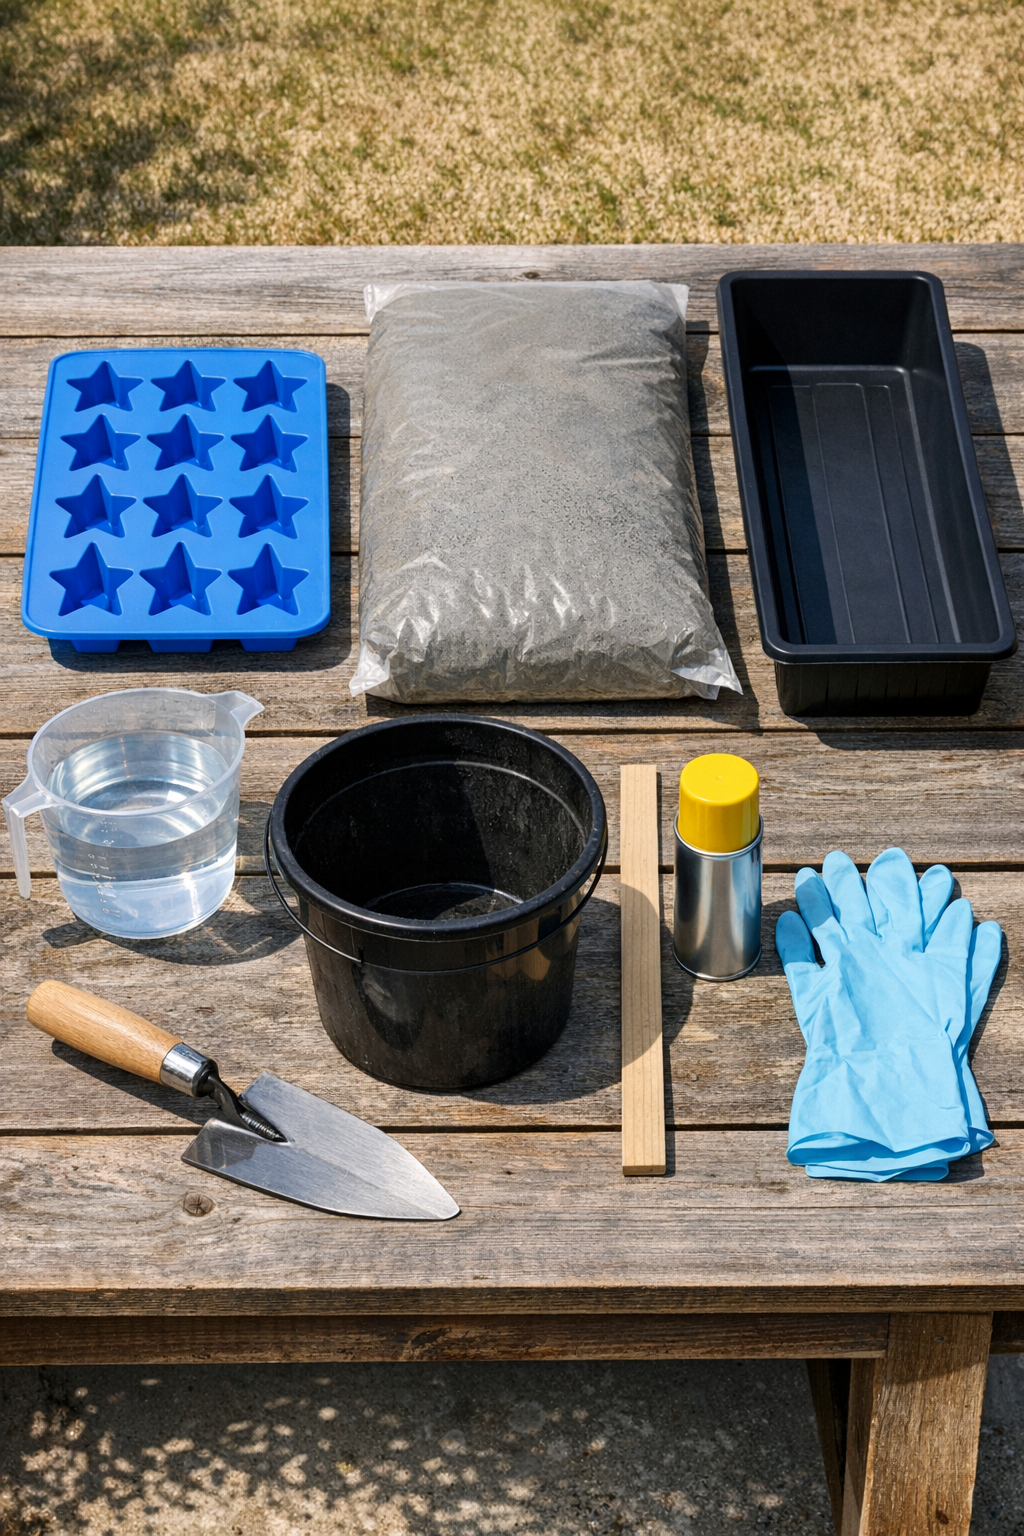
Materials
Instructions
1. Set your plastic drop cloth on a flat outdoor work surface, then place the planter tray and star ice tray on top. Make sure the surface is level so the cement cures evenly and the finished forms sit flat in the yard.
2. Lightly coat the inside of both plastic molds with nonstick spray or a thin wipe of oil. This helps the cured cement release without cracking the points of the stars.
3. Put on your gloves and pour about 6 cups of dry cement mix into the bucket to start. Add water a little at a time and stir until the mixture is thick like peanut butter, wet enough to pack but not runny.
4. Spoon the cement into each star cavity, pressing it firmly into the points to capture the shape. Tap the tray gently on the table several times to bring air bubbles to the surface.
5. Fill the planter tray with the remaining cement to a depth of about 1 1/2 inches, then smooth the top with a trowel or spoon. For a decorative look, keep the surface mostly flat but leave just a little texture.
6. Tap the planter tray against the work surface a few times to settle the cement and reduce voids. If you see low spots, add a little more mix and smooth again.
7. Let both molds rest undisturbed until the cement firms up, usually 24 hours for fast-setting mix or longer in cool weather. If the day is very hot or windy, loosely cover them with plastic so they do not dry too quickly and crack.
8. Flex the plastic star tray gently to pop out the small star pieces one at a time. Turn the planter tray upside down and ease the large form out carefully, supporting it with both hands because it will still be heavy and somewhat tender.
9. Cure the pieces for another 2 to 3 days in a shaded spot before placing them in the yard. Once fully firm, use the large tray form as a garden base or border piece and scatter the star pieces around it for a three-item star-studded display.

Variations & Tips
Make it more decorative: Press a few pebbles, marbles, or bits of broken china into the surface of the larger form before it sets. I’ve seen old-timers use whatever was on hand, and that thriftiness always makes a garden feel more personal.
Change the shape mix: If your ice tray has smaller or larger stars, use them all together for a varied look. Different sizes make the finished arrangement look more natural when tucked among flowers or along a walkway.
Use better release: If your molds are detailed, take extra care to grease the corners and points. A little patience here saves heartbreak later, especially on delicate star tips.
Strengthen larger pieces: For a bigger planter-tray form, press a small square of wire mesh into the center after filling halfway, then cover with more cement. That added support helps if the piece will be moved often.
Soften the edges: If any edges come out sharp, rub them gently with a damp sanding stone or a scrap of coarse sandpaper after the cement has cured. I like a weathered, worn-in look, as though the piece has been in the garden forever.
Placement tip: Set these forms on compacted soil or mulch rather than loose grass. Heavy concrete pieces stay put better and look more intentional when they have a clean little place of their own.